Reports Manager
From the Reports Manager, you can:
- Download a report.
- Copy a report.
- Schedule the creation of a reports.
- View schedules associated with a report.
- View the history of previously generated reports.
- Modify reports and their filters.
Access Reports Manager
To access the Reports Manager:
Log in to Sysdig Secure.
Select Reporting > Reports Manager from the left navigation bar.
The Reports Manager page appears.
Create a Report
You can create reports from report templates, existing reports or from elsewhere in the UI.
From Report Templates
Log in to Sysdig Secure.
Select Reporting > Reports Manager.
Select New Report from the top of the page.
Choose from a template.
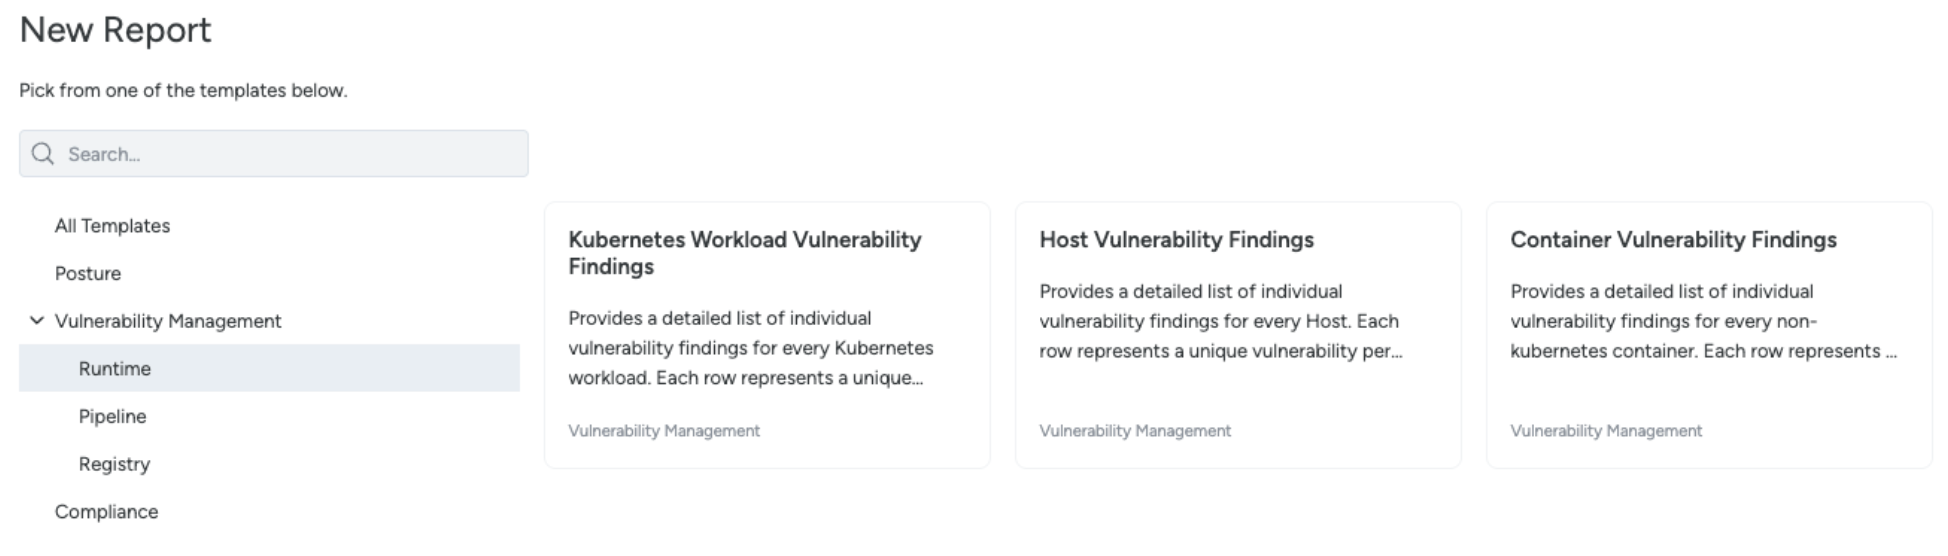
To narrow down the report templates, you can select the category from the left pane.
Save the report, and you can edit the panels within the report.
From Existing Report
From the Reports manager you can either:
- Open the menu for a selected report and select Duplicate.
- Open the report, on the top right menu and select Duplicate.
From Elsewhere in the UI
Depending on where you are in the Sysdig Secure UI, you may find either a reporting column with a report icon:

On the Attack Surface > Compliance Findings page, you can see the select the Report button in the top right corner to download one of the following reports: On the Attack Surface > Compliance Findings page, you can see the select the Report button in the top right corner to download one of the following reports:
- Resource Posture Report
- Policy Compliance Report
- Policy Posture Report
Alternatively, you can click the report icon to on the right side of a Compliance policy listing.
Modify a Report
You can modify reports using either:
- Report Filters
- Panel filters
Report Filters
Currently only zones are supported within report filters, these will affect all panels within the report. When a zone is changed, you can save the filter, which will affect any schedule that uses that report. Optionally, you can save the filter as a new report, which will create a new report, and not affect any schedules.
Panel Filters
On the Report Detail page, you can view panels of the reported data. Each panel contains predefined queries relevant to the data listed, which determine the columns displayed and the conditions available for that query. Editing the panel’s filters will only affect the panel you are editing and will not impact any other panels within the report.
Set a Schedule
Report schedules let you determine when a pre-existing, defined report should be undertaken again.
To set a report schedule:
Log in to Sysdig Secure and select Reporting > Scheduled Reports.
Select a report.
The Report Detail page appears.
Edit the Frequency & Timeframe and click Update Schedule
To create a new scheduled report, click the New Schedule calendar icon.
The New Schedule page opens.
Fill out the schedule details:
Under Report Details, select Existing report or New report
Select All resources or a Specific Zones to choose a scope. If you select Specific Zones, be careful not to share a report of a zone with a team that is not authorized to view that zone.
Name: Choose a descriptive name.
Description: Enter a description of the report. Optionally, specify the password if you choose to set a password for the report.
Set the Frequency & Timeframe. For example, you could cover a whole month by setting the Frequency to Monthly at 03.30 PM local time.
Select a Compression Format (GZIP or ZIP)
Notification Channel: Select where your completed reports should be sent. To set up a Notification Channel, see Set Up Notification Channels. The available channels are:
Format: Select the format in which the report should be sent; CSV, JSON, or PDF. PDF is limited to 7 columns and 250 rows. Therefore, use CSV or JSON for larger reports.
Password Protection: Enable this option to secure the report with a password. Make sure to remember your password or save it in a password manager, as it cannot be recovered if forgotten.
Navigate the Report Detail Page
Access The Report Detail page by selecting a report from the Reports Manager page.
Sysdig reevaluates reports multiple times per day, as well as when you update a workload’s image.
Filter by Zone (Scope)
Use the Zones field to include specific Zones in the report you have open. By default, all zones are selected.
Enter a zone or zones to affect all the panels inside the report.
The zone selection is not permanent and will not affect any scheduled reports. The zone is stored in the URL, so you can save the URL to go back to it later.
Export Reports and Tables
In Reporting, you can download entire reports, or download individual tables from a report as in CSV or JSON format. You can also view when reports were previously downloaded.
You can also use the three-dot menu to quickly access the following:
- Download a report in PDF
- View download history
- View existing schedules
Download a Report
To download a report:
Log in to Sysdig Secure and select Reporting > Reports Manager.
Select a report.
The Report Detail page appears.
Click Download.
Choose the File Name and Format.
CSV and JSON formats are only available when the report only has one table or panel. Otherwise, reports are available to download in PDF.
Click Download to download the report.
Reports can be downloaded as a
.zipor.gzfile.
Download a Table
To download a single table:
Log in to Sysdig Secure and select Reporting > Reports Manager.
Select a report.
The Report Detail page will open.
Hover over the top right corner of the desired table to reveal the scheduled, download and settings icons.
Select the download icon.
The Download window appears.
Select the desired File Name and Format.
The available formats are CSV, JSON and PDF.
View Downloads
To view previous downloads of Reports:
Log in to Sysdig Secure and select Reporting > Reports Manager.
Select a report.
The Report Detail page will open.
Click the three-dot menu in the top right corner and select Download History.