Jira Ticketing
This integration works for both Jira Cloud (SaaS) and Jira Data Center (On-Prem).
Configure Jira Ticketing Integration
Prerequisites
Admin access to Sysdig Secure.
A Jira Cloud or Data Center account with the appropriate permissions.
- The latest Jira Data Center supported version is
10.
- The latest Jira Data Center supported version is
A Jira API Token.
Log in to your Jira account and generate the API token from Atlassian.
- The API token must be created by the same User you input when creating a new Jira Ticketing Integration.
- The best practice is to set up the integration with a service account email rather than an individual’s email.
Required Permissions
The Administrator with the Jira API token who is setting up the integration must have the following:
- Permission to access Jira.
- Administrator Jira global permissions, or at least:
- Permissions to create issues in the Jira project associated with Sysdig.
- Permissions to create attachments in the Jira project associated with issues coming from Sysdig.
If a Jira administrator sets ups the integration, the Sysdig Secure UI will reflect Jira status updates in real time.
If a non-administrator Jira user sets up the integration, changes in Jira may take up to an hour to be reflected in the Secure UI.
The Sysdig user who will create tickets in the UI must have one of the following:
- Administer Jira global permission
- Browse Projects permission for the Jira project associated with Sysdig
- Administer Projects permission for the Jira project associated with Sysdig
Set Up Jira Integration
To set up a ticketing integration with Jira:
Log in to Sysdig Secure as an administrator.
Navigate to Integrations > Ticketing.
Select New Integration.
The Connect Jira Account window appears.
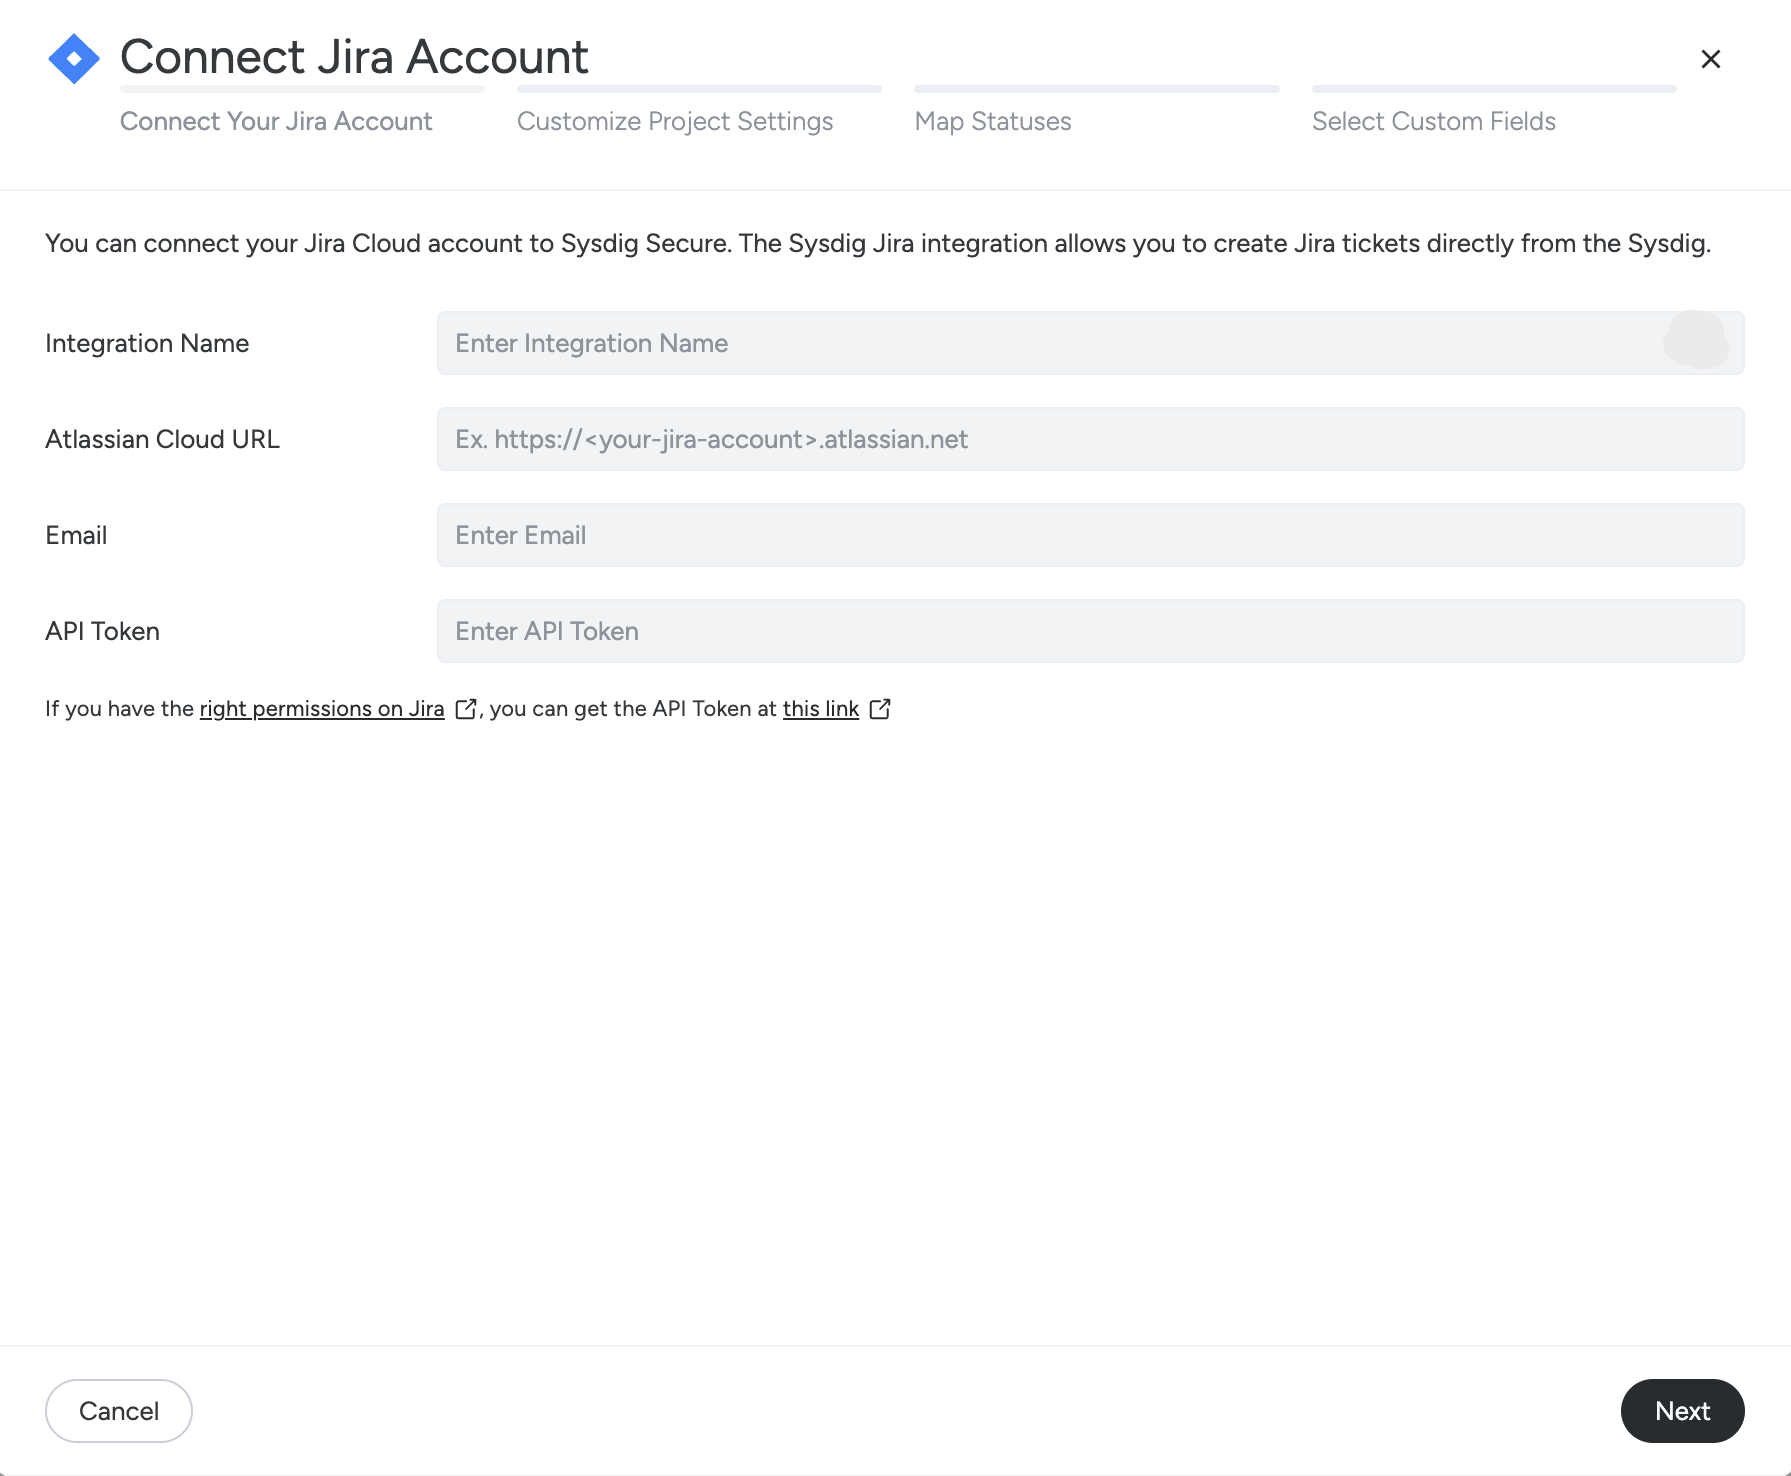
Specify the following:
- Integration Name: Choose any name for the integration.
- Atlassian URL: Your Jira account URL, in the format
https://myaccount.atlassian.net. For example,https://sysdig.atlassian.net. - Email: The email address of the API token holder, which matches the email used in the Jira Cloud or Data Center account.
- API Token: The Jira token you have generated. Follow the links in the wizard if you do not have a token.
- Certificate: Optionally, select a client certificate to enable mTLS between Sysdig and your Jira Data Center instance. Not applicable to Jira Cloud.
Click Next and in Customize Project Settings tab specify the following:
- Project: Select your project from the dropdown.
- Issue Types: Select at least one issue type to use for this integration.
- Teams: Choose between two options.
- Select Teams: Apply this integration to particular teams, chosen from the drop-down.
- All Teams: Apply this integration to all teams on your account.
- Jira Assignee: Optionally, select the default assignee(s).
- Labels: Optionally, select labels for the tickets.
Click Next.
Optionally, assign custom field to the appropriate issue type in the Select Custom Fields tab.
Click Next to save your configuration.
The Jira integration will be listed on the Ticketing Integration page with an Active status.
If you completed setup as a Jira administrator, a webhook named sysdig-jira-integration-webhook is created in your Jira server. This webhook updates Sysdig whenever a change is made to a ticket in the project you integrated.
Do not delete this webhook, as this may lead to slower refresh rates.
Test the Integration
To use the integration, open the Sysdig Secure Home page and check the Vulnerability Management (VM) Remediation recommendations, as described in Remediate with Jira.
Jira Platform Ticketing
Ticket Types and Templates
The type of ticket created depends on where in the application you trigger the action and the filters or groupings you have selected.
In the Vulnerability Program Owner Flows view:
- with no grouping selected, each row represents a single finding. Creating a ticket from this view generates an individual finding ticket, which also includes details about the affected resource.
- with Runtime Resource grouping selected, each row represents a resource with all of its findings (based on the applied filters). Creating a ticket from this view generates a resource ticket that aggregates all findings for that resource.
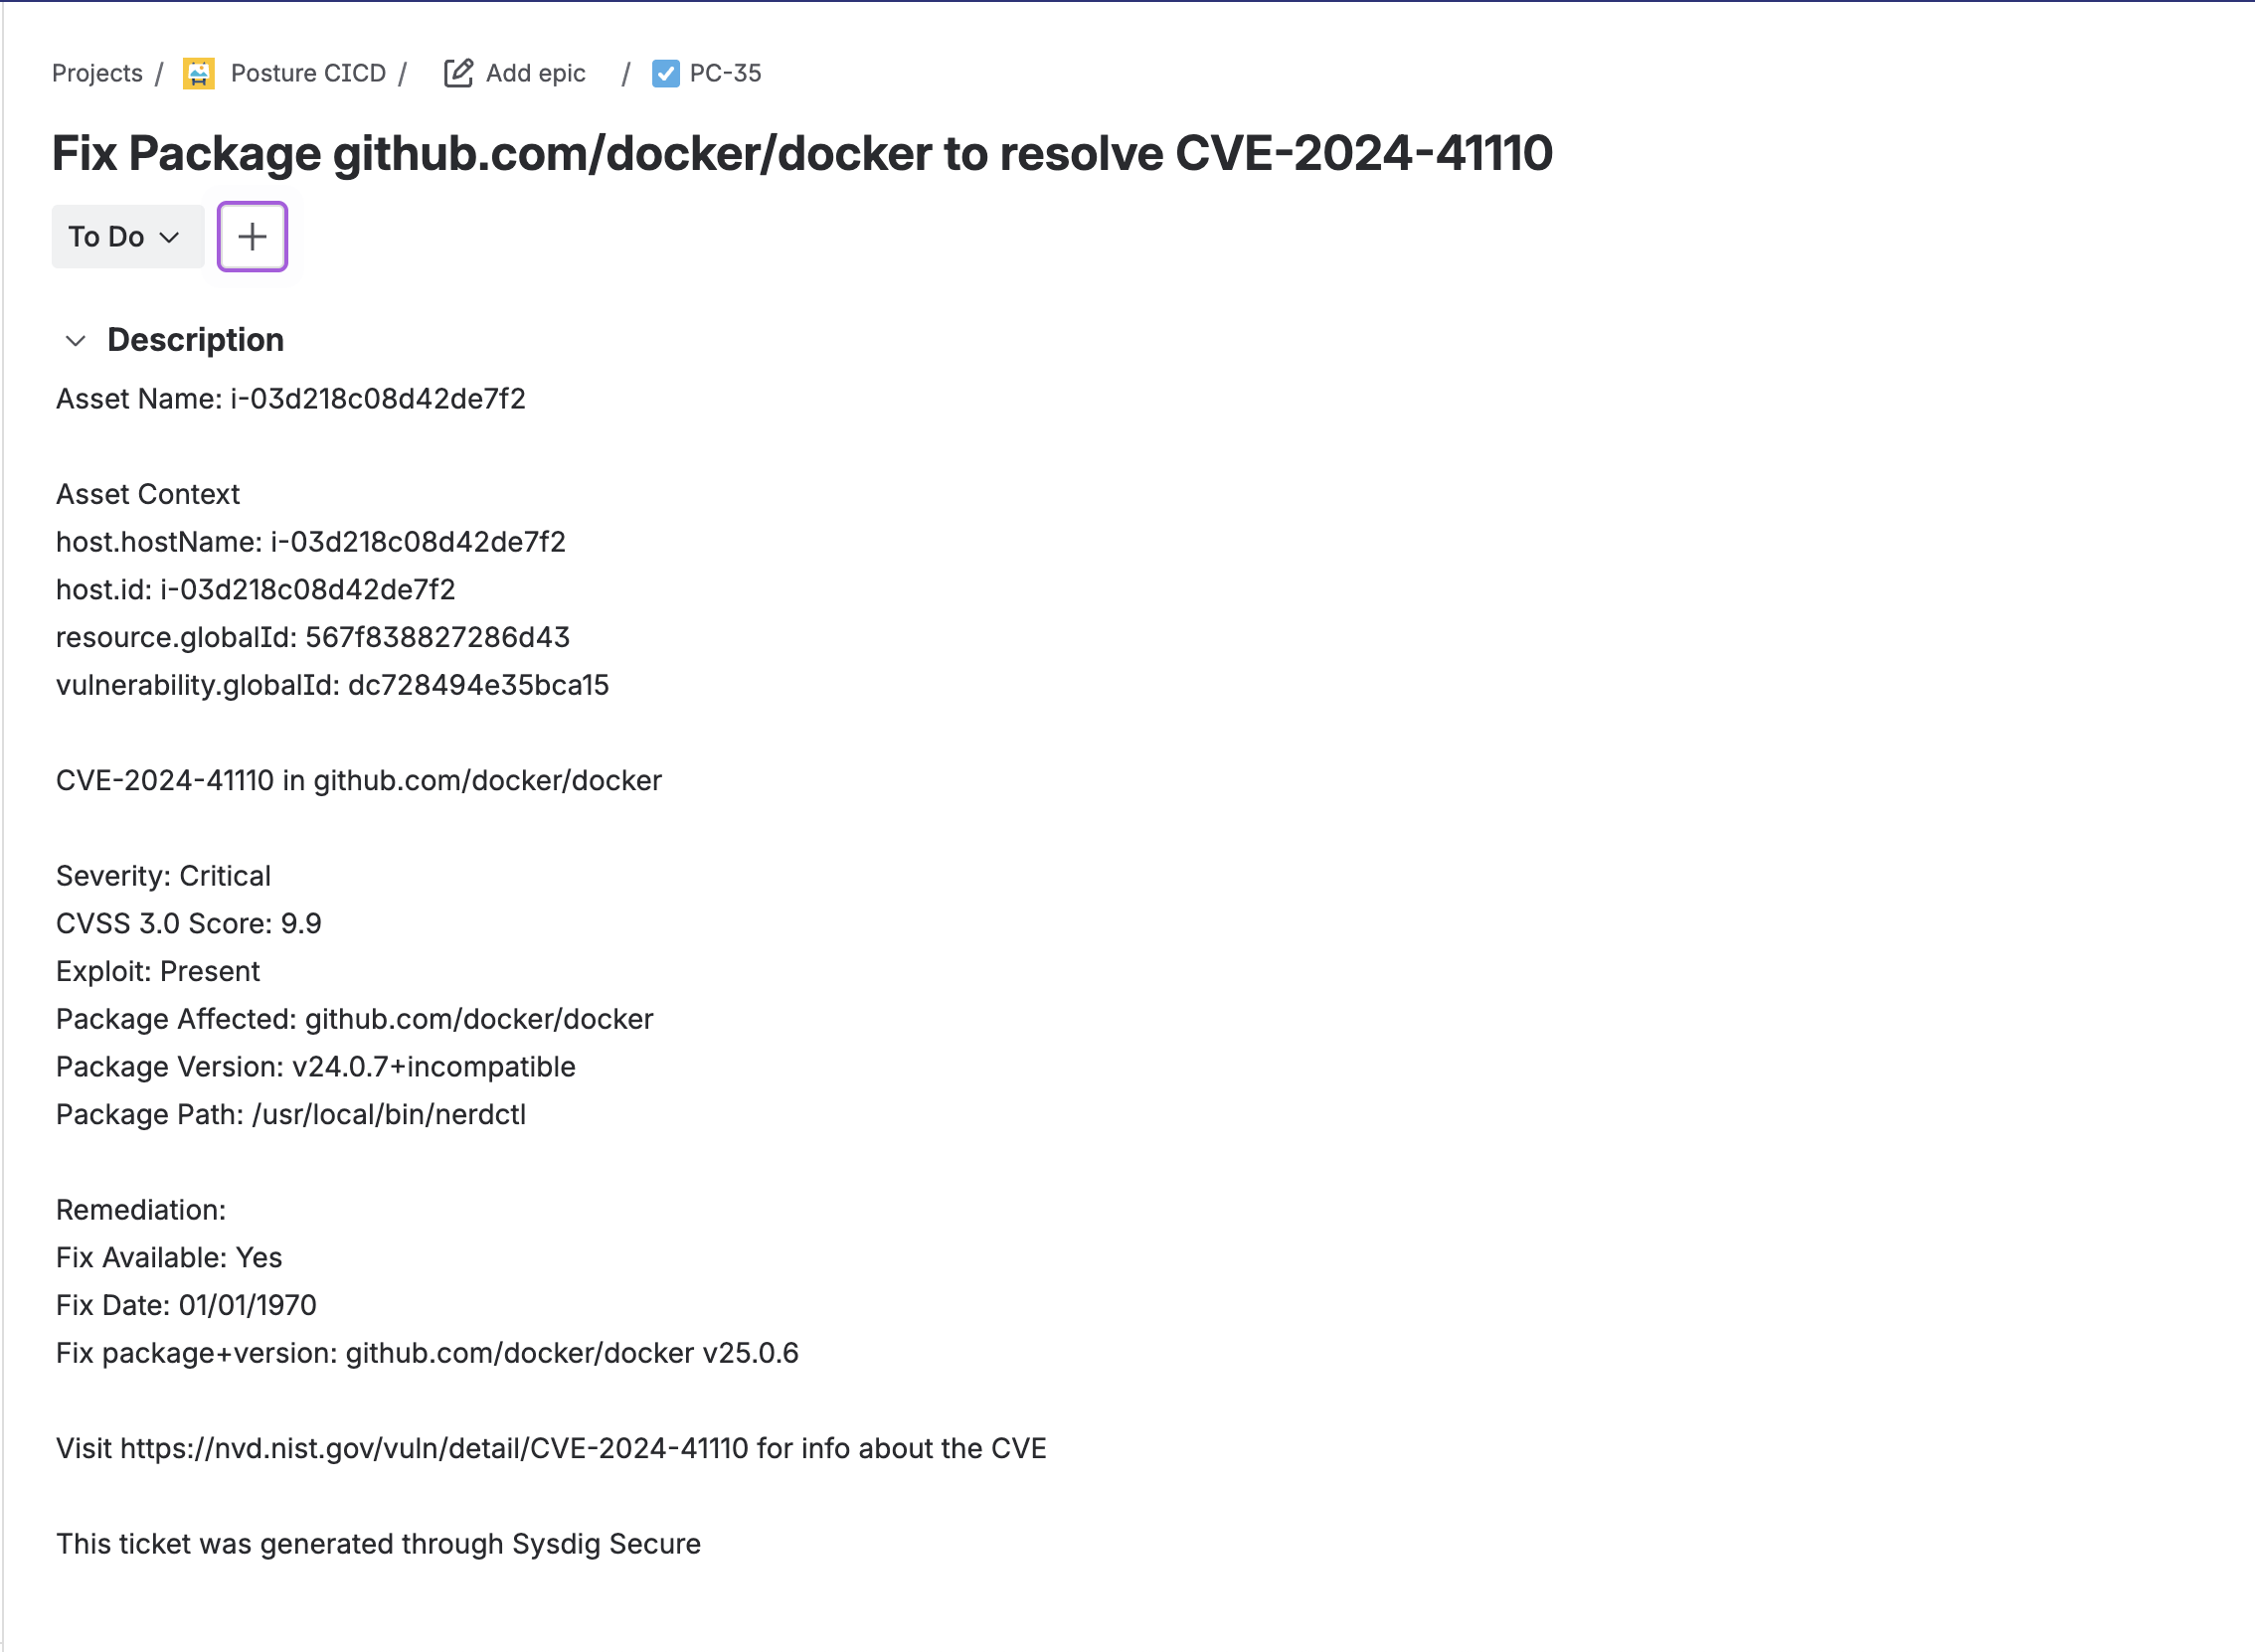
Finding Tickets
A finding is a single issue (for example, a vulnerability or control failure) on a single resource. When you create a finding ticket, additional information is added in the Jira issue, including:
- CVE description
- Links to related resources
- Remediation guidance
Example of a finding ticket in Jira:
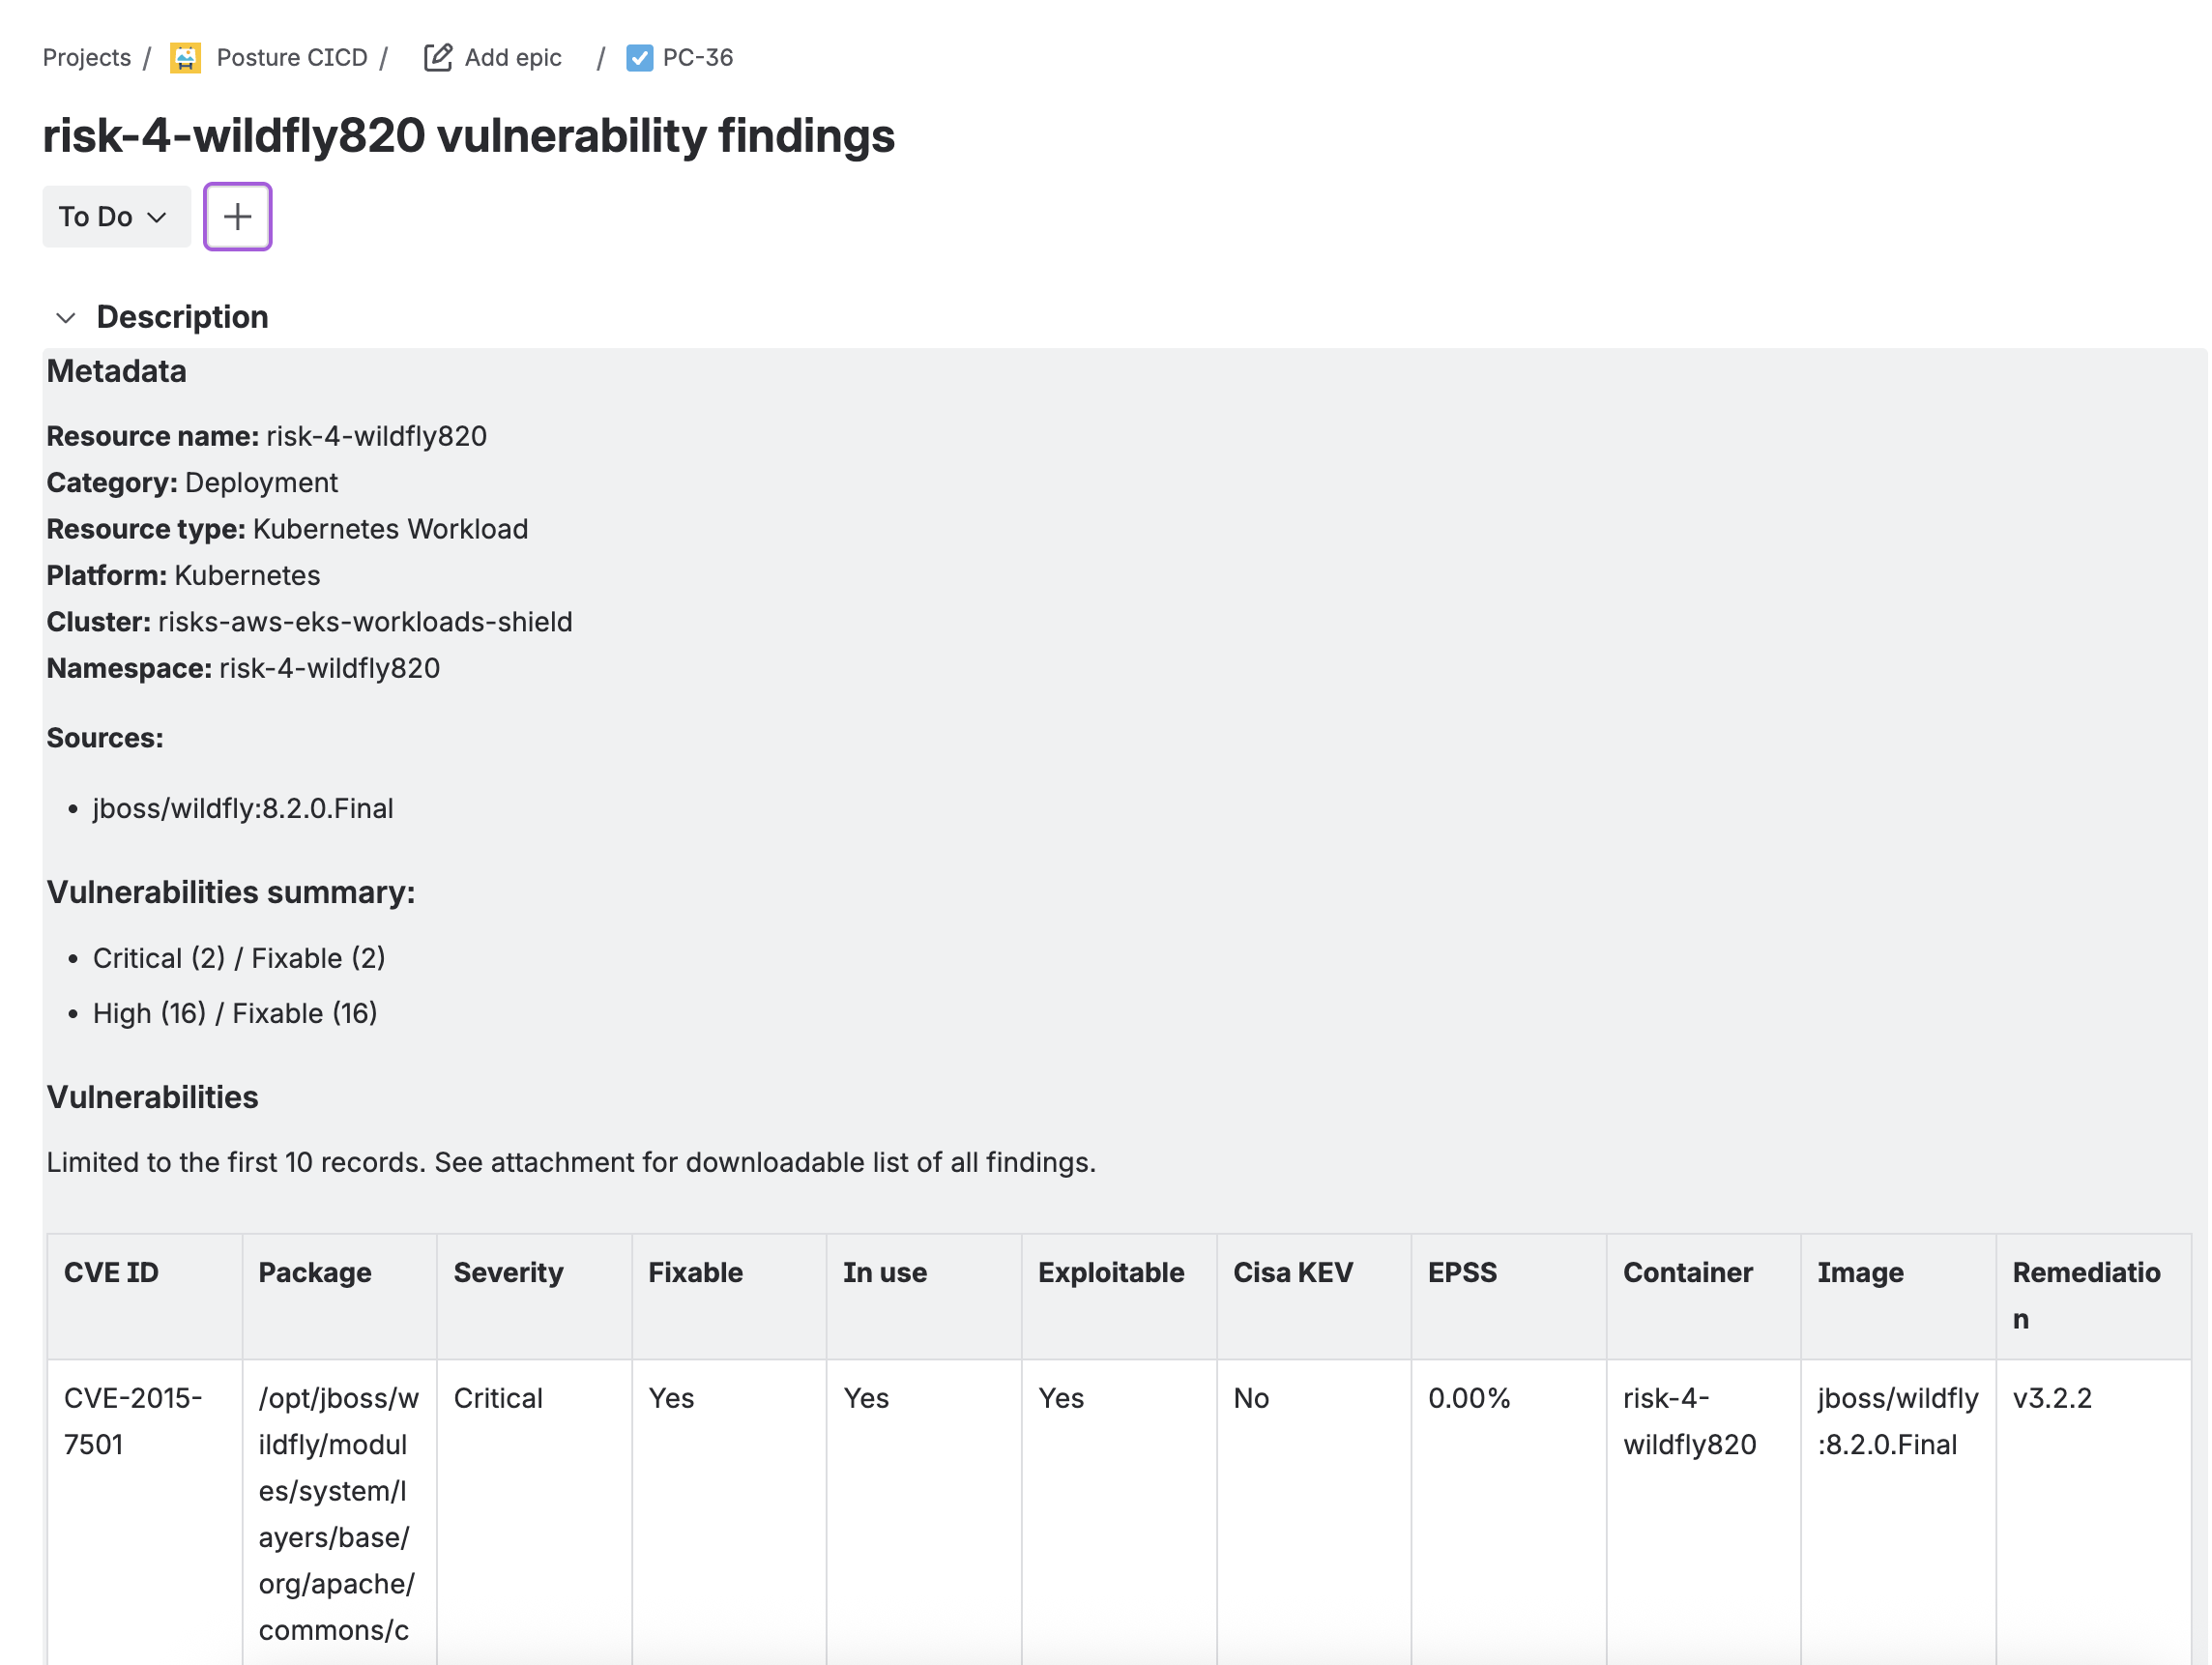
Resource Tickets
A resource is a unique running asset that may have one or more findings. When you create a resource ticket, additional details about the resource are included, such as:
- Resource type and name
- Labels
- Associated findings
Sysdig also attaches a CSV and/or PDF to the Jira issue with a full findings report.
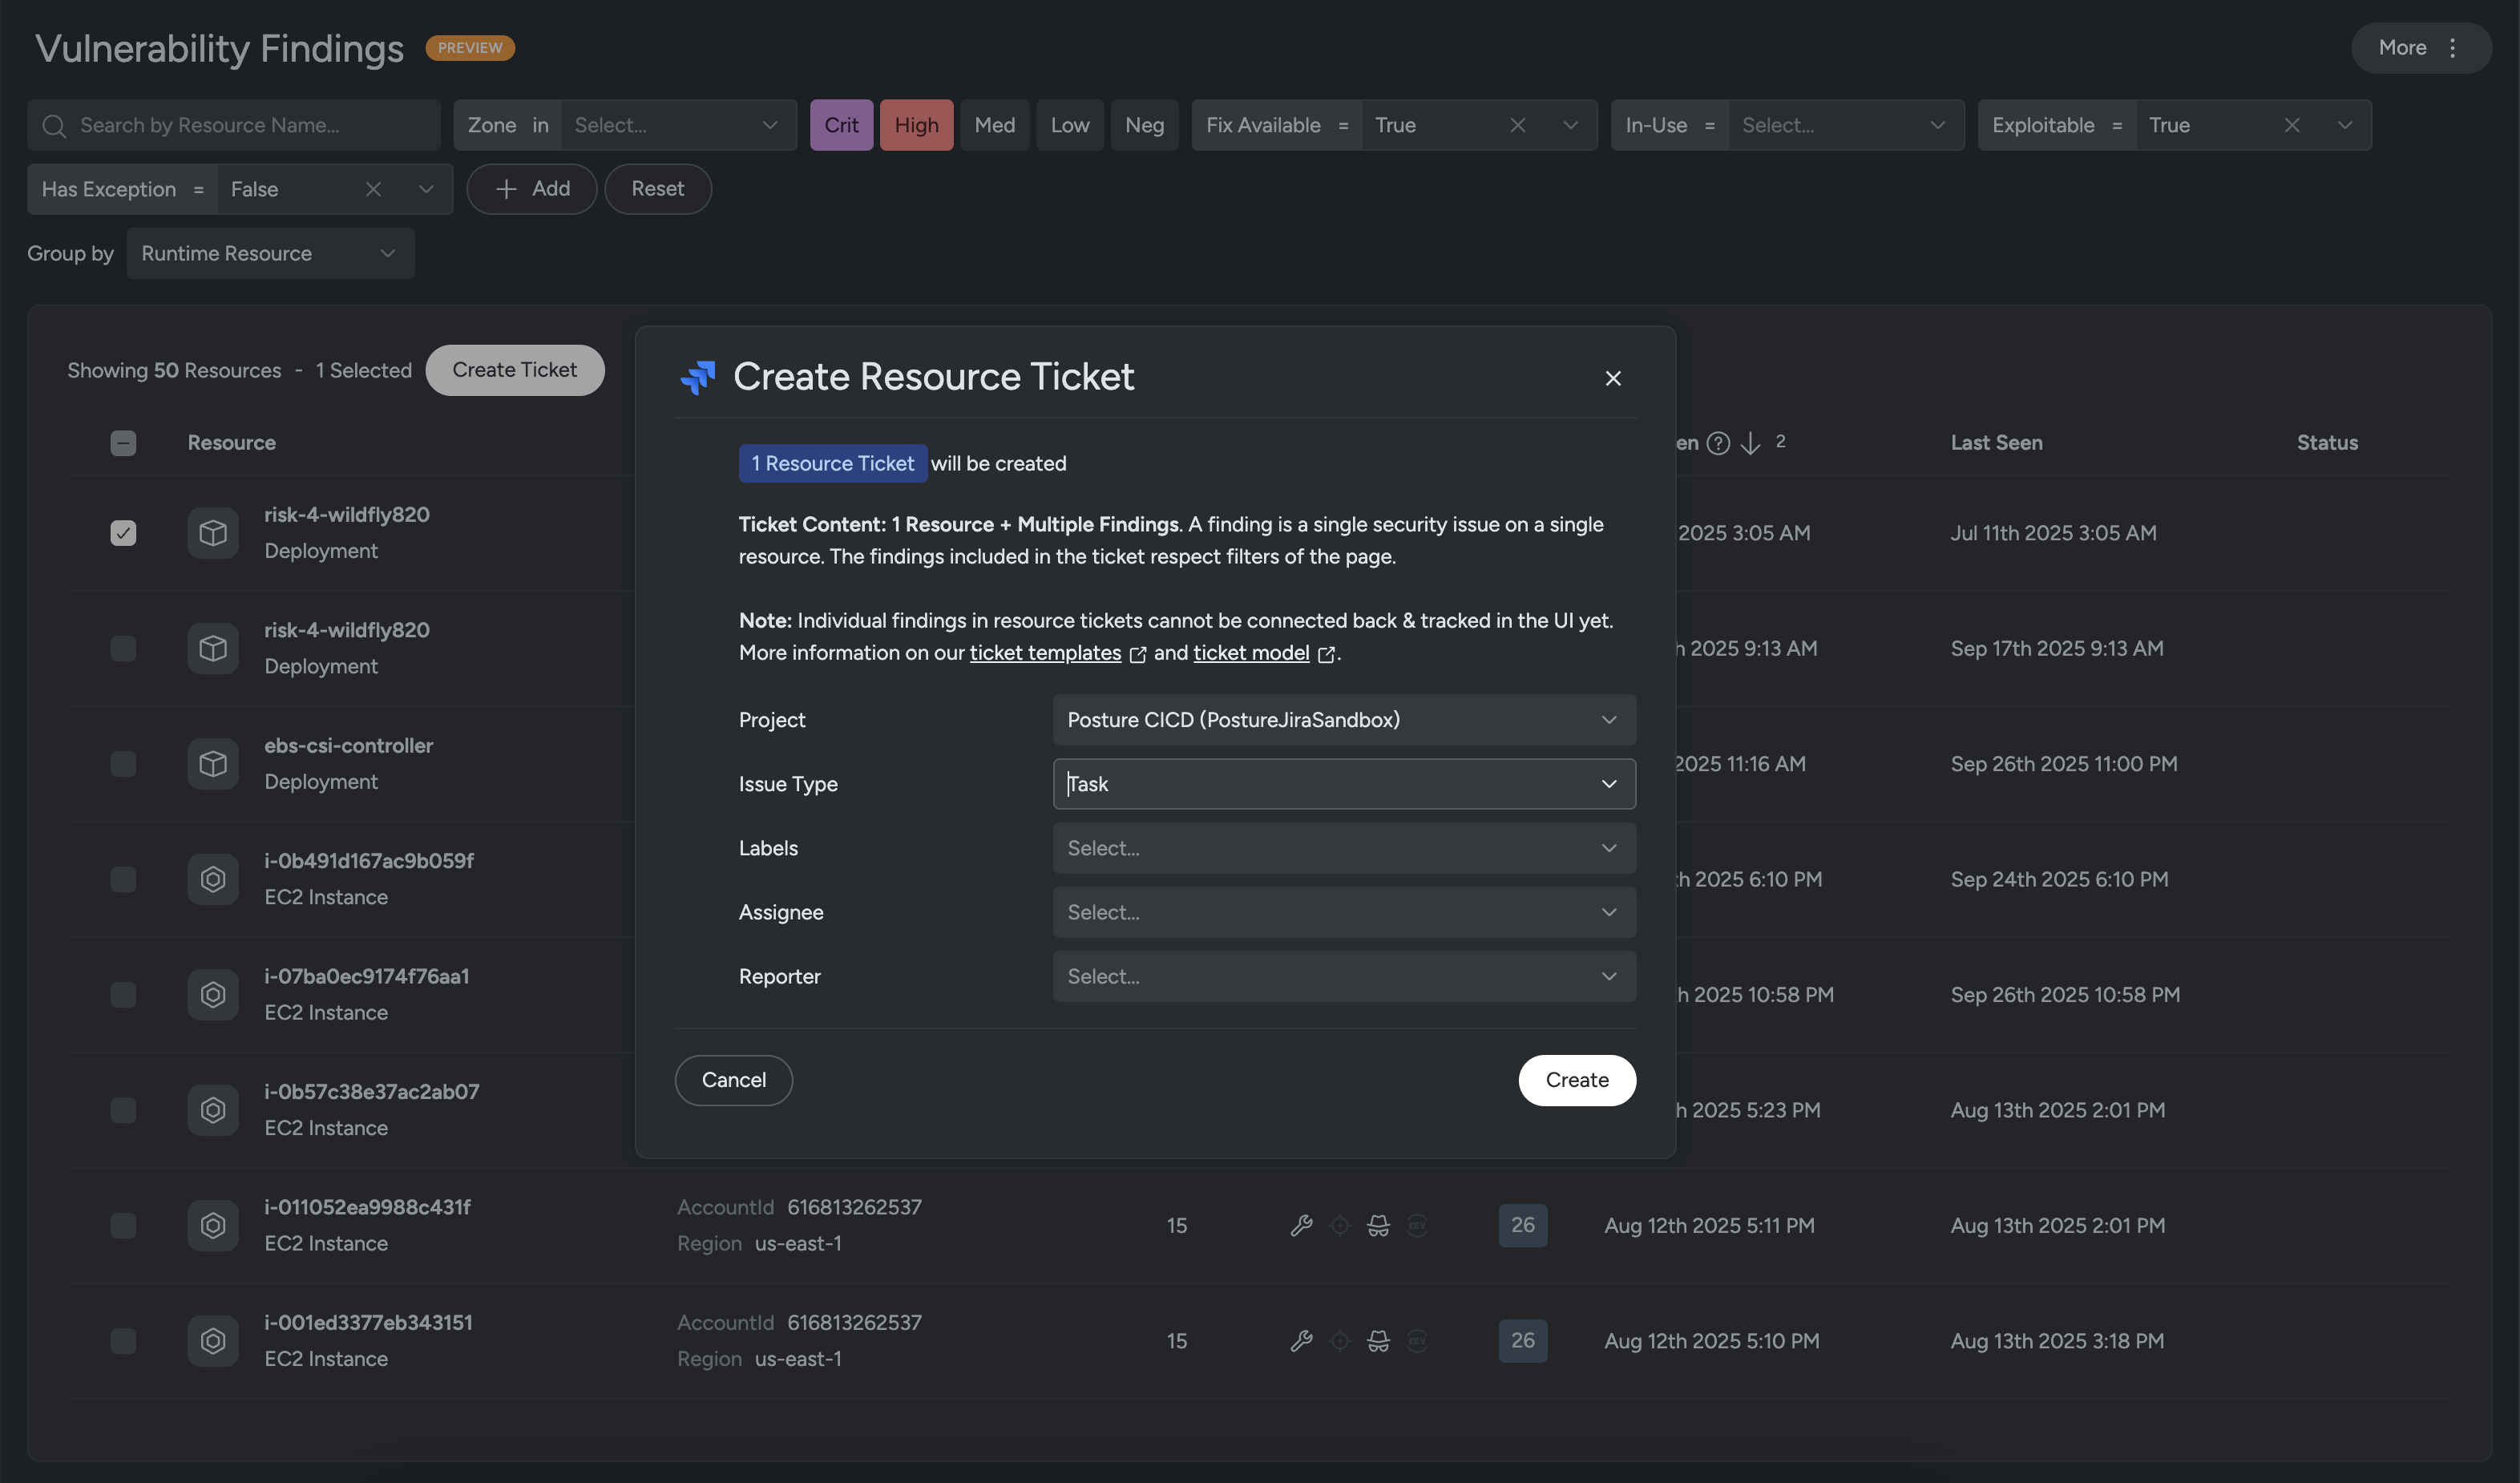
Example of a resource ticket in Jira:
Ticket Workflow
Ticket Creation
Tickets are created with the information available at the time of creation. Updates to resources (such as new labels, new findings, or resolved findings) are not automatically synced.
From Program Finding Pages
- Select one or more rows to create tickets.
- With no grouping selected, each ticket is a finding ticket.
- With grouping selected, each ticket is a resource ticket, with findings included based on the current filters.
From a Resource or Finding Drawer
- From the Resource drawer, you can create a ticket with all findings for that resource.
- From the Findings drawer, you can create a ticket scoped to that finding.
From a Risk View
Create a Finding Ticket from a Risk
When you create a ticket from a Risk view, Sysdig creates a Finding Ticket.
A finding ticket represents one security finding on one resource and can be tracked individually across the UI.
Access and scope
- Navigate to Risk.
- Select a Risk Definition, then select a Risk Finding.
- For each unique combination of a finding and its anchor resource, Sysdig creates one ticket.
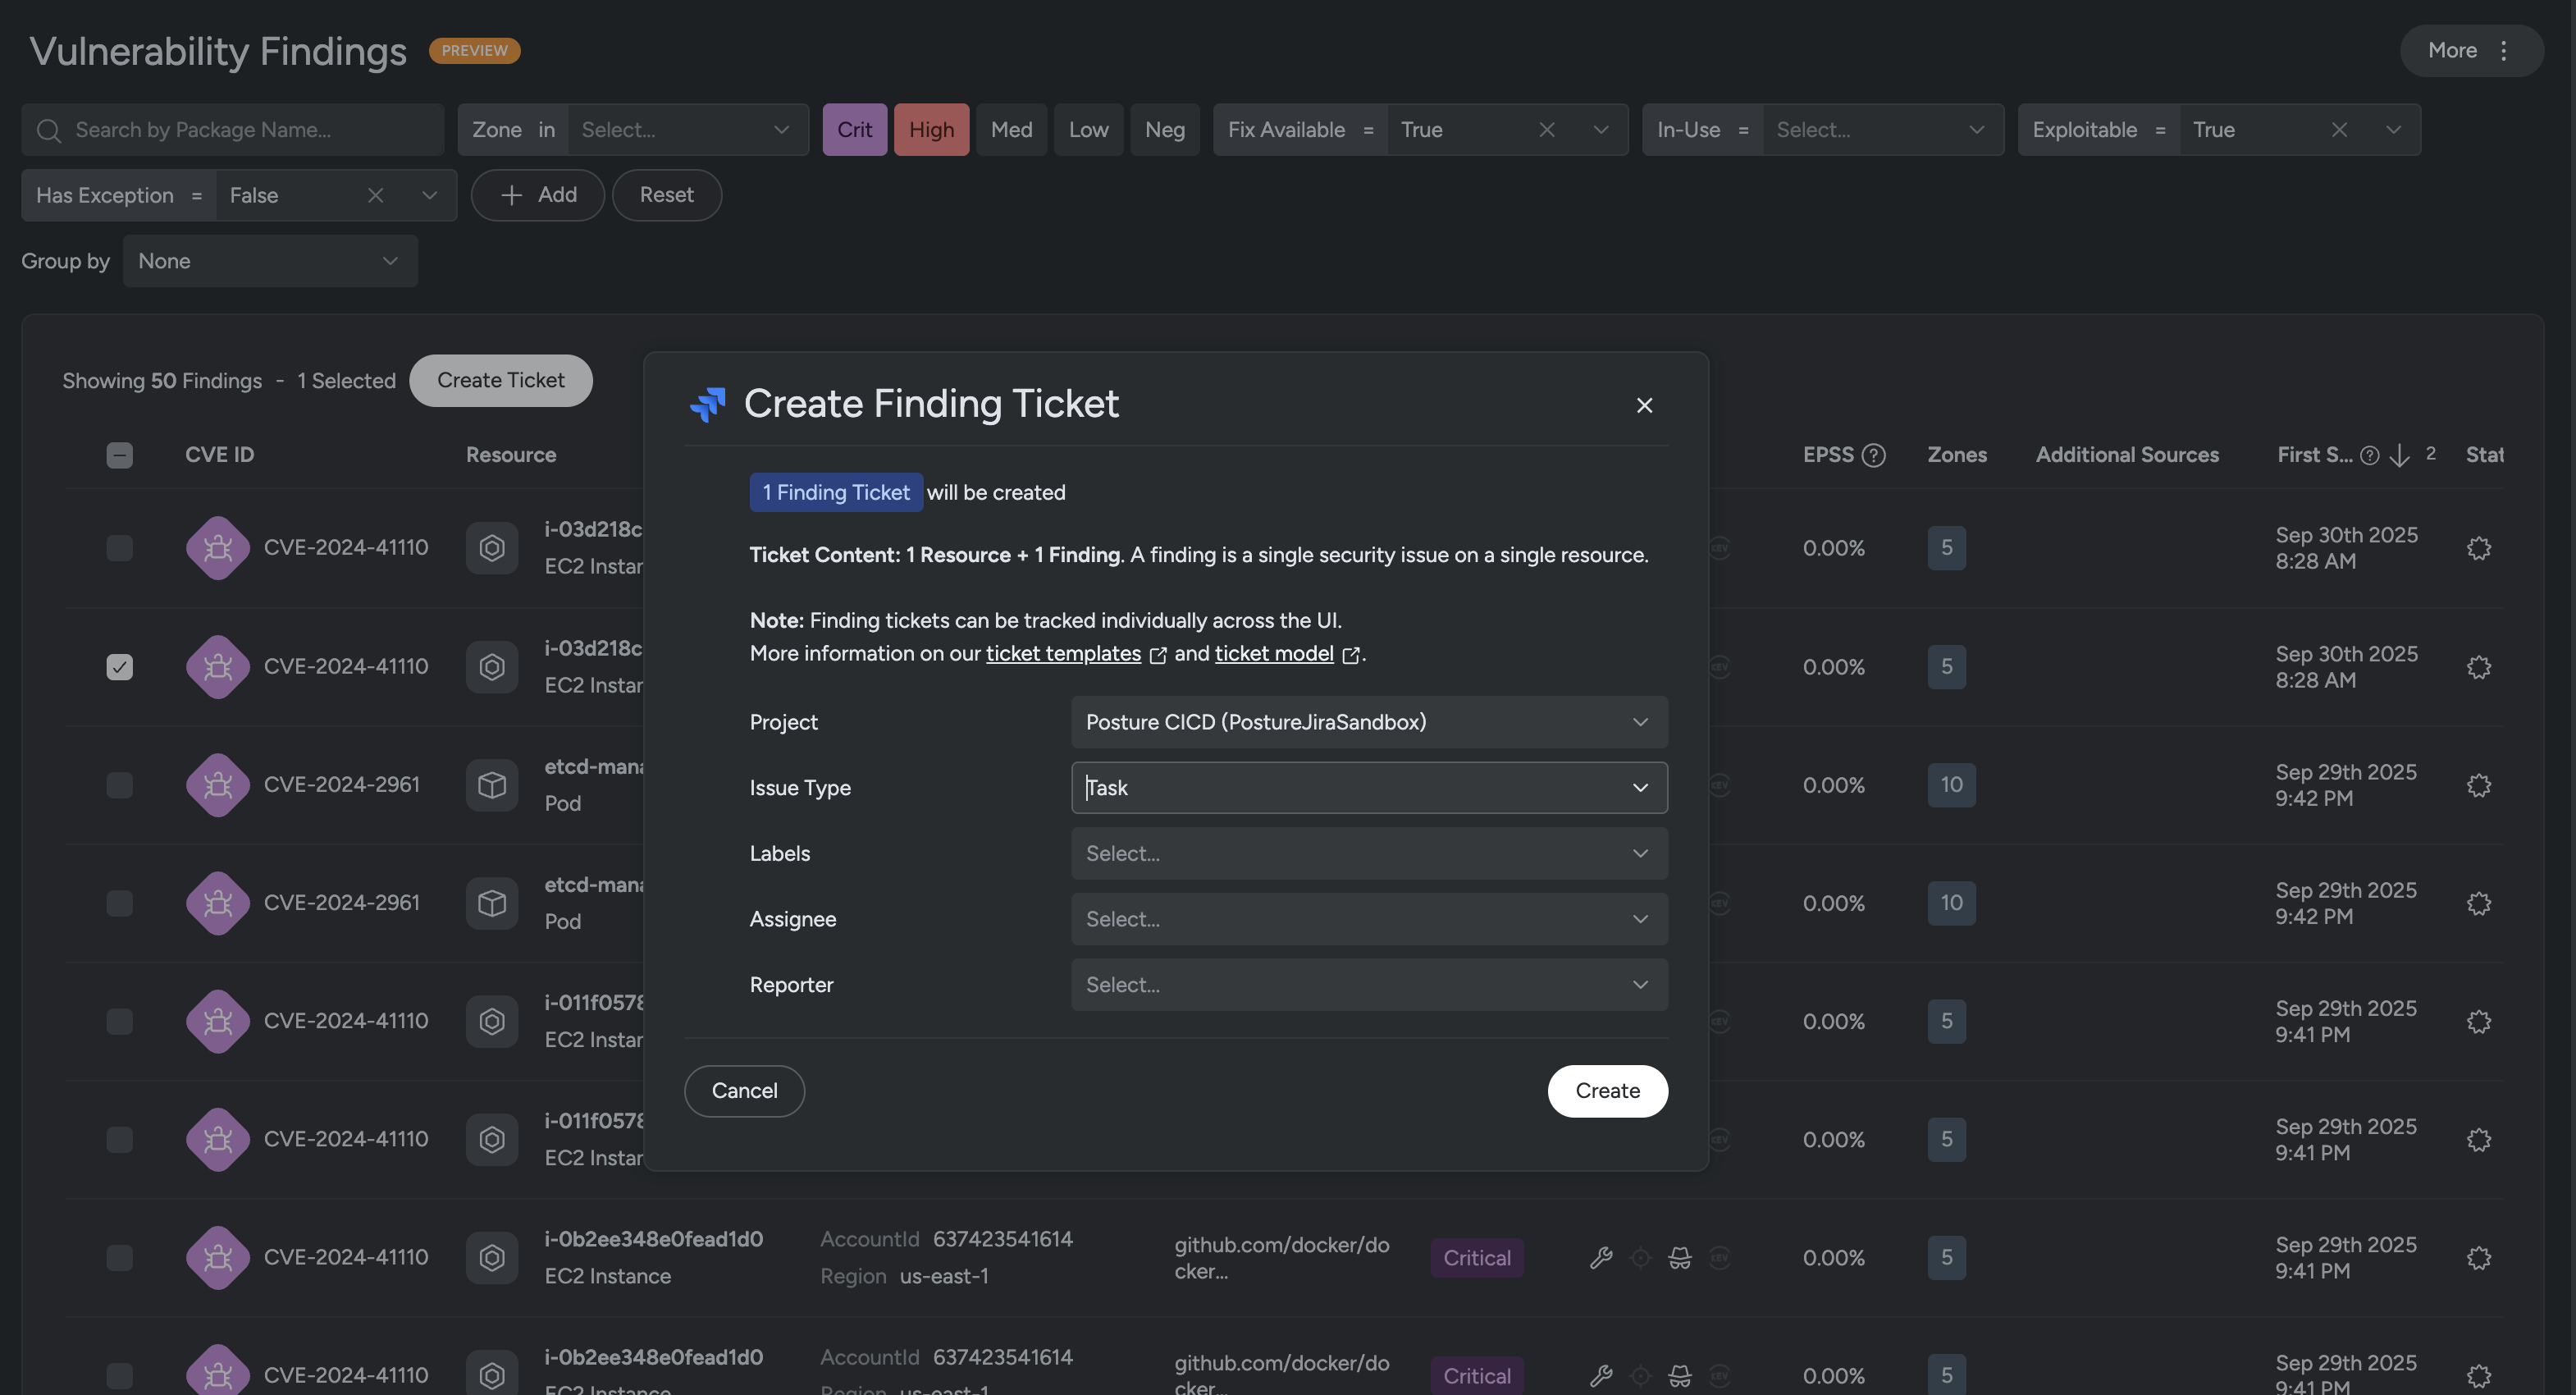
Create a finding ticket
- From the selected Risk Finding, click Create Ticket. The Create Finding Ticket window appears.
- Review the ticket summary:
- 1 Finding Ticket will be created.
- Ticket Content includes 1 resource and 1 risk finding.
- Complete the required fields:
- Project: Select the destination project.
- Issue Type: Select the issue type (for example, Task, Epic, or Subtask).
- Labels: Select one or more labels.
- Assignee: Assign the ticket to a user.
- Reporter: Select the reporter.
- Due Date: Select the target completion date.
- Click Create.
The ticket is created in the selected project and linked to the corresponding risk finding.
Ticket Updates
Sysdig does not update tickets automatically. However, if a ticket is closed in Jira, the updated status is reflected in Sysdig.
Ticket Indicators
Ticket indicators help you track issues directly in Sysdig:
- Finding indicator → shown on the finding if a ticket exists.
- Resource indicator → shown on the resource and all findings included in the ticket.
Hover over the ticket icon to view the Jira issue and its current status.