GCP
Cloud Security Posture Management (CSPM)
Connecting your GCP environment will set up a Service Account between you and Sysdig, enabling Cloud Security Posture Management (CSPM) which:
- Monitors and detects misconfigurations in your cloud resources.
- Ensures your cloud environment complies with industry standards and regulations.
- Provides a comprehensive inventory of all cloud assets, helping you maintain visibility and control over your environment.
Basic CIEM (Cloud Infrastructure Entitlement Management) analysis is included as a standard functionality within CSPM, without requiring log ingestion. To avail yourself of advanced CIEM, install log ingestion.
Review GCP Roles and Permissions
Service Accounts
There are two security principals in the onboarding process:
- Installer: The primary security principal, either a User or a Service Account. This security principal will be used to perform the onboarding. Sysdig does not have access to this security principal.
- Sysdig: A Service Account (robot user) created during onboarding with specific, less permissive roles. Sysdig will be given access to this service account.
GCP Roles
GCP IAM has a single control plane that applies to either at the organization or project level:
- GCP Roles: Applied to the entire organization or project.
Prerequisites
- Sysdig Secure SaaS with Admin permissions
- Terraform version 1.5.0 and later
- GCP CLI installed. See How to install the GCP CLI.
- Access to a User with the permissions required to install.
- For Permissions Required to Install, see Base GCP Integration - Cloud Security Posture Management (CSPM).
Supported GCP Regions
Sysdig supports agentless scanning in the many GCP regions.
Click to see all GCP regions:
| Region | Display Name |
|---|---|
| asia-east1 | Taiwan |
| asia-east2 | Hong Kong |
| asia-northeast1 | Tokyo |
| asia-northeast2 | Osaka |
| asia-northeast3 | Seoul |
| asia-south1 | Mumbai |
| asia-south2 | Delhi |
| asia-southeast1 | Singapore |
| asia-southeast2 | Jakarta |
| australia-southeast1 | Sydney |
| australia-southeast2 | Melbourne |
| europe-central2 | Warsaw |
| europe-north1 | Finland |
| europe-southwest1 | Madrid |
| europe-west1 | Belgium |
| europe-west2 | London |
| europe-west3 | Frankfurt |
| europe-west4 | Netherlands |
| europe-west6 | Zurich |
| europe-west8 | Milan |
| europe-west9 | Paris |
| europe-west10 | Berlin |
| europe-west12 | Turin |
| me-central1 | Doha |
| me-central2 | Dammam |
| me-west1 | Tel Aviv |
| northamerica-northeast1 | Montreal |
| northamerica-northeast2 | Toronto |
| southamerica-east1 | São Paulo |
| southamerica-west1 | Santiago |
| us-central1 | Iowa |
| us-east1 | South Carolina |
| us-east4 | Northern Virginia |
| us-east5 | Columbus |
| us-south1 | Dallas |
| us-west1 | Oregon |
| us-west2 | Los Angeles |
| us-west3 | Salt Lake City |
| us-west4 | Las Vegas |
Need support for a region not listed? Contact your Sysdig representative to request additional region coverage.
Prepare Your Environment
1. Configure Installation Permissions
If you install manually or on your local machine, install as a user. If you are automating the installation, such as using Terraform Cloud, install as a service account.
You can:
- Use an existing user or service account that meets the permissions requirements
- Create a new user or service account and set up permissions
- Add permissions to an existing user or service account
Provide User with Appropriate Roles
Ensure your user has the correct roles and permissions in GCP to perform the onboarding.
Single Project
To check or assign roles:
- Log in to the Google Cloud Console as either a user or a service account, ensuring you have the correct project active.
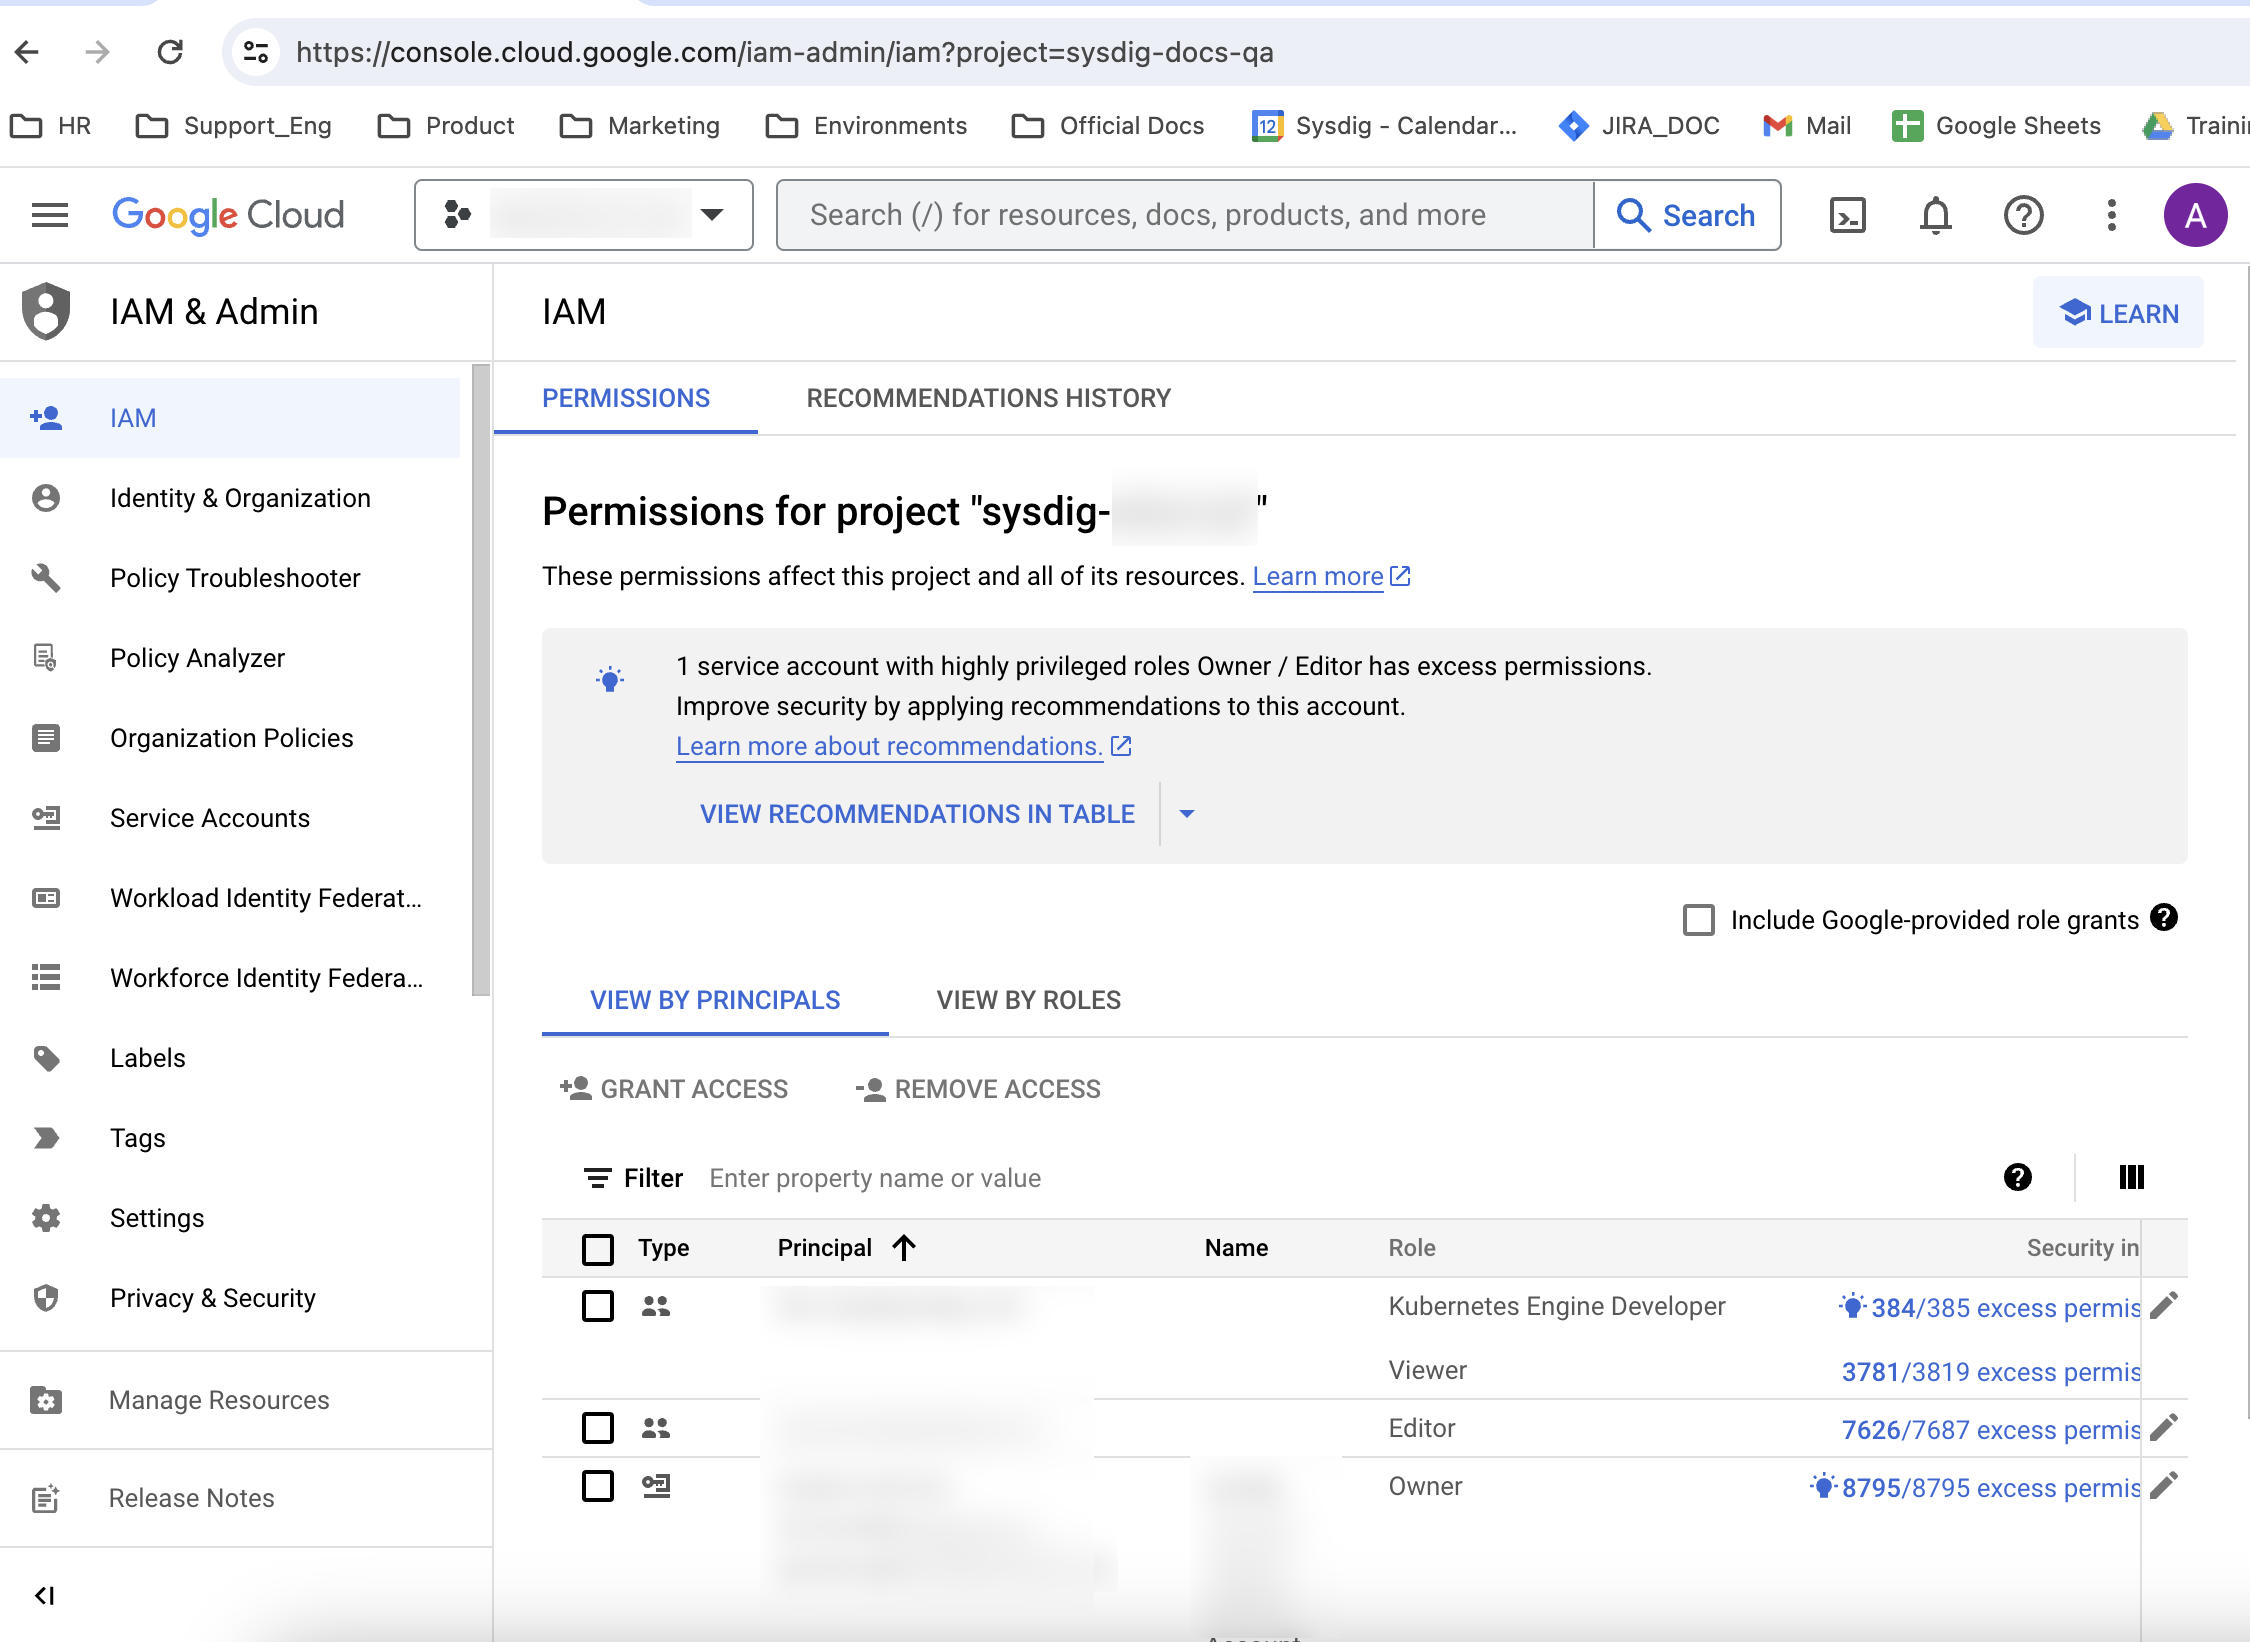
- Navigate to IAM & Admin > IAM.
- In VIEW BY PRINCIPALS, find your User/service account.
- Ensure that all the roles listed in Permissions Required to Install are present.
- If any roles are missing, select your user/service account, and grant the roles using the Grant Access button. You may need to work with your administrator to be granted the correct roles.
Organization
Certain roles are required at the organization level. Certain roles are required on a single project in which you will deploy shared resources. Ensure you have the correct roles assigned at the correct scope.
For roles required on a single project, follow the instructions for a single project above.
For roles that are required at the organization level:
- Log in to the Google Cloud Console as either a user or a service account.
- Ensure the organization is selected in the project selector in the top bar. If you do not see your organization there, you may need to work with your administrator.
- In VIEW BY PRINCIPALS, find your User/Super Administrator.
- Ensure that all the roles listed in Permissions Required to Install are present.
- If any roles are missing, select your user/service account, and grant the roles using the Grant Access button. You may need to work with your administrator to be granted the correct roles.
Enable Required APIs
Enable the APIs at the project level. For organization onboarding, this refers to the project you selected during the onboarding process.
To do so manually:
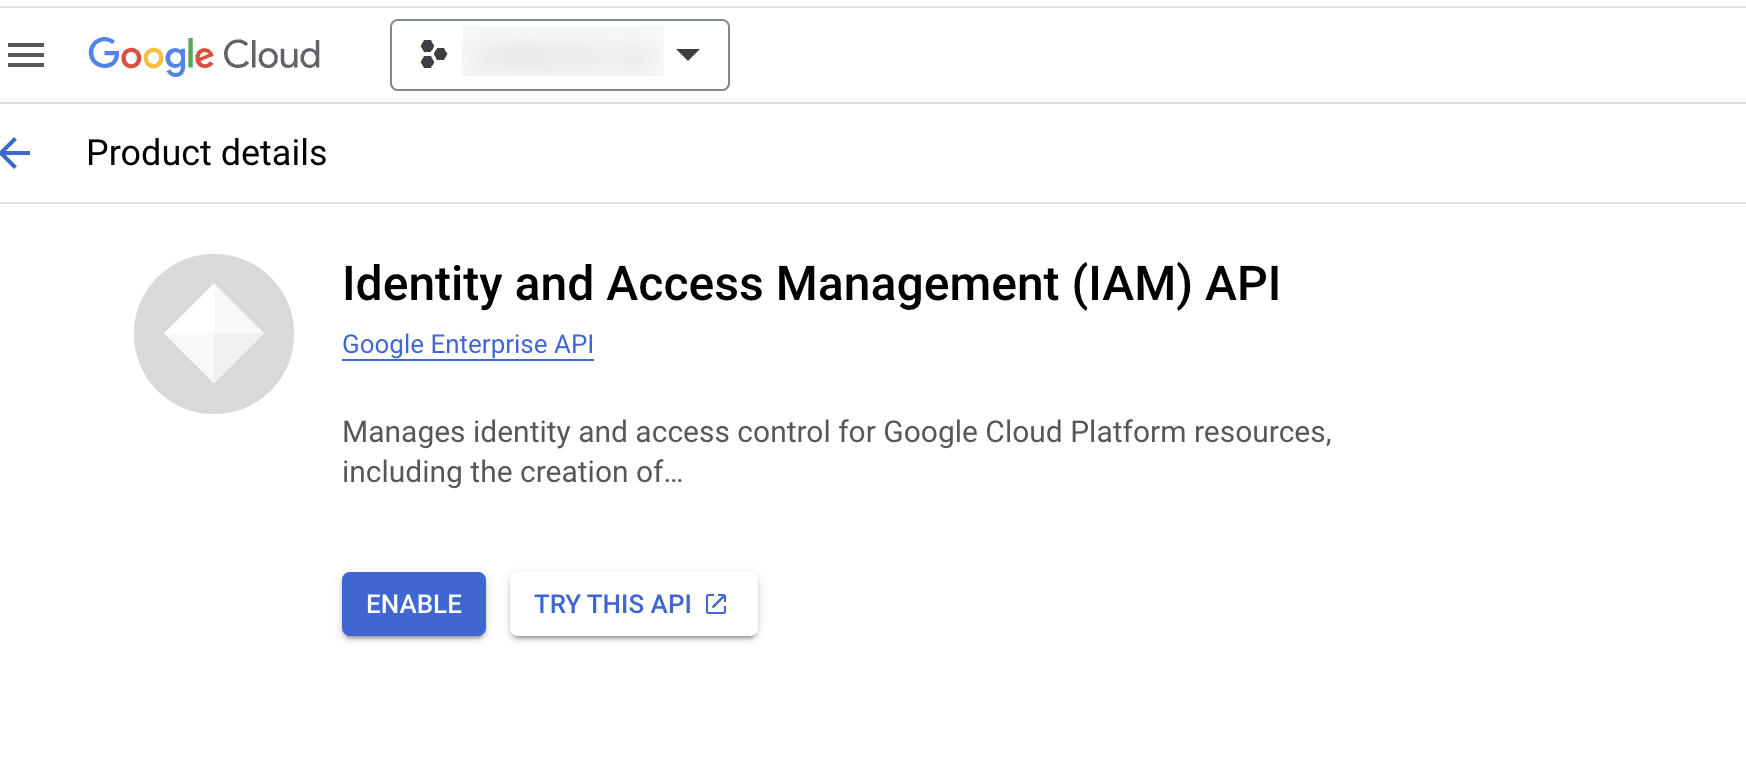
Click each of the API links in the table below.
Select the appropriate project and click Enable.
| API Name | API ID | Features | Usage | |
|---|---|---|---|---|
| Identity and Access Management (IAM) API | iam.googleapis.com | All Features | Used to access and collect IAM resources for CSPM and CIEM evaluations. | |
| IAM Service Account Credentials API | iamcredentials.googleapis.com | All Features | Used to generate OAuth 2.0 access tokens. | |
| Security Token Service API | sts.googleapis.com | All Features | Used to exchange short-lived access tokens when interacting with Google Cloud resources. | |
| Cloud Resource Manager API | cloudresourcemanager.googleapis.com | CSPM/CIEM | Used to gather resources such as organizations, projects, and IAM access control policy bindings for CSPM and CIEM evaluations. | |
| Cloud Identity API | cloudidentity.googleapis.com | CSPM/CIEM | Used to look up Google Group resource details. | |
| Admin SDK API | admin.googleapis.com | CSPM/CIEM | Used to list users and their details, including information about the users who belong to Google Groups. | |
| Cloud Asset API | cloudasset.googleapis.com | CSPM/CIEM | Used to obtain a comprehensive inventory of Google Cloud resources for CSPM and CIEM evaluations | |
| Compute Engine API | compute.googleapis.com | Vulnerability Management/CSPM | Used by Vulnerability Management and CSPM to gather firewalls for network exposure analysis | |
| Pub Sub API | pubsub.googleapis.com | CDR | Used by CDR to receive all events w.r.t organization / project | |
| Cloud Monitoring API | monitoring.googleapis.com | CDR/CIEM | Used to collect metrics for CDR and CIEM evaluations. |
Check API Enablement
To confirm that the required APIs were enabled:
Enable the
serviceusage.googleapis.comService API.This is required to execute the following command.
Execute:
gcloud services list --enabled
Include all the services listed above.
2. Authenticate and Configure Terraform
A common way to do this is:
Ensure you are logged in to the correct Project.
Log in using the GCP CLI:
gcloud auth application-default loginA web page to select your user account appears. Log in as the user you configured in Step 1.
Confirm you are logged in as the correct user, by running:
gcloud auth listFor alternative ways to authenticate Terraform, see the Terraform documentation: Google Provider Configuration Reference.
3. Collect your GCP Organization Domain name and Project ID
Organization Domain Name
- Sign in to the GCP portal.
- Browse to Select a Resource > All.
- Search for your Organization name in the overlay.
- Copy the Organization Domain Name. You can paste this value into a text document or other location.
Project ID
- Sign in to the GCP portal.
- Browse to Select a Resource > All.
- Search the project in the list, and note the Project ID shown in the second column. If no projects appear, or you don’t see the right one, you may need to switch organizations to show the projects.
- To easily copy the Project ID, select the project name to display more details. Select the Copy to clipboard icon shown next to the Project ID. You can paste this value into a text document or another location.
Install GCP Using the Sysdig Secure Wizard
- Log in to Sysdig Secure.
- Select Integrations > Environments > GCP and click Add GCP Account on the top right corner.
- Workload Scanning and Host Scanning will also be configured, but you can toggle them off. (Enabling these options can activate more of the platform’s core security capabilities in a single session.)
- Connect your GCP Organization or Project.
- This enables CSPM and lets you onboard Vulnerability Management and CDR after completing.
Organization Multi-Project
- Enter your:
- Project ID: The ID of the project where the Sysdig resources will be created.
- Specify Management Groups:
- For onboarding the entire Organization: Enter Organization Domain Name.
- Generate and apply the Terraform code:
- Create a
main.tffile. - Copy the snippet provided into the file.
- Run the command:
terraform init && terraform apply.
Within an hour after deployment, your accounts will appear on the Cloud Accounts page.
Single Project
- Enter your:
- Project ID: The ID of the project you want to onboard.
- Generate and apply the Terraform code:
- Create a
main.tffile. - Copy the snippet provided into the file.
- Run the command:
terraform init && terraform apply.
Within an hour after deployment, your accounts will appear on the Cloud Accounts page.
Configure Domain-Wide Delegation
What is Domain-Wide-Delegation?
In GCP, domain-wide delegation (DWD) refers to a feature in Google Workspace (formerly G Suite). It allows a Google Workspace super admin to delegate authority to a service account to access user data on behalf of users within the domain. Once set up, Sysdig uses a service account that can impersonate users by specifying the subject parameter in its authentication request, setting it to the email address of the Google Workspace user it wishes to impersonate.
Review domain-wide delegation permissions before you configure DWD.
Domain-wide delegation entails:
- Service Account Access: It allows a service account to impersonate a Google Workspace user and gain access to the Google data the user has access to, assuming they have provisioned the necessary Authorization scopes to the Service Account.
- No User Consent Required: With DWD, individual user consent is not required. Once the super admin sets up the delegation, the service account can access the specified data of any user in the domain without additional authorization prompts.
- OAuth 2.0 Scopes: When setting up DWD, the super admin specifies which OAuth 2.0 scopes the service account is granted. For instance, they might grant access to the Directory API to allow the service account to read group member data.
- Security: Because DWD grants broad access, it’s essential to handle it with care. Ensure that you keep the service account’s private key (used for authentication) secure.
Where is Domain-Wide Delegation Used?
Sysdig’s CIEM analysis requires DWD to provide:
- User and Group Insights derived from Google Workspace and Cloud Identity If DWD is enabled, then Unused Permission Criticality, Excessive Permissions, and Members are displayed on the Identity and Access Groups page.
- Enhanced Monitoring and Reporting for MFA usage, user logins, admin console changes, and third-party application access
- Asset management to gain insights into Roles, Service Accounts, and their associated keys
The onboarding wizard prompts you to perform domain-wide delegation. If you skip this step, you will be prompted again from the Identity and Access (CIEM) page of the Sysdig Secure UI.
Enable Domain-Wide Delegation in GCP
Authorize Service Account Scopes
Log in to the Google Admin Console with Super Administrator privileges and select Security > Access and data control > API controls.
Click Manage Domain Wide Delegation.
Click Add New.
Switch to the Google Cloud Console to collect your service account’s OAuth 2 Client ID:
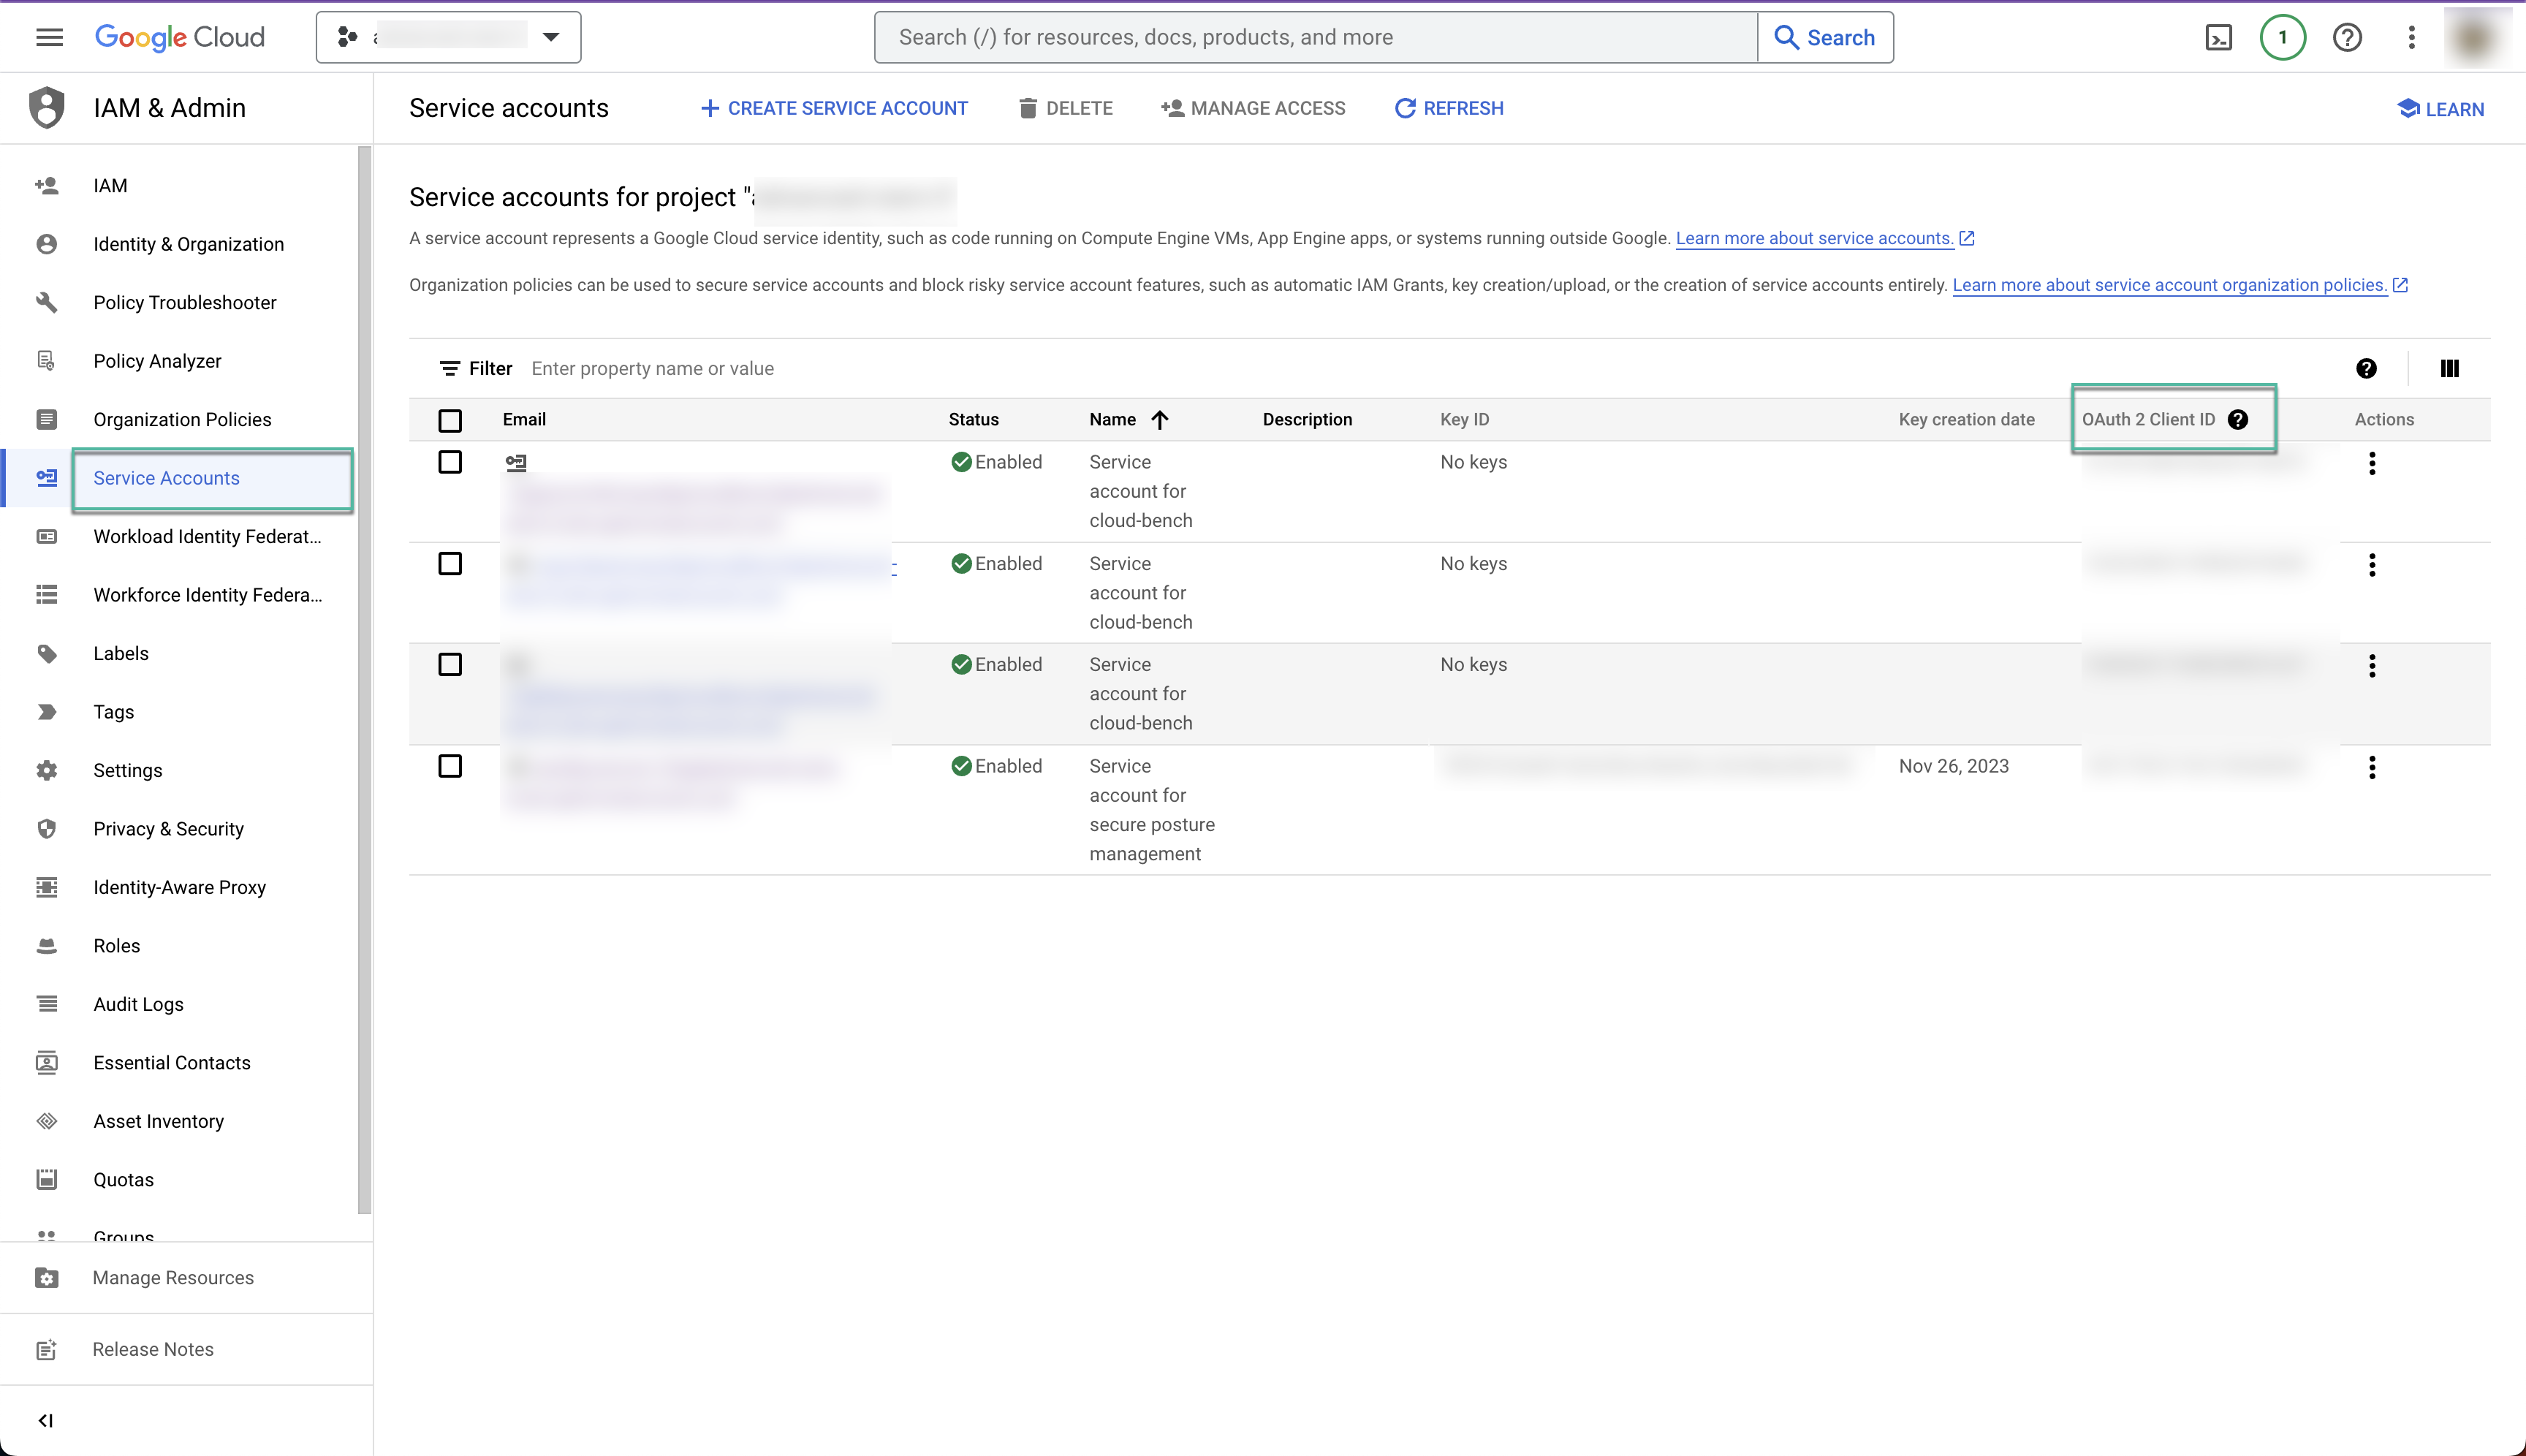
Navigate to the Project specified during the initial onboarding step.
Select Service Account and search for the newly created Sysdig service account with the format:
sysdig-posture-xxxxxx@<project_id>.iam.gserviceaccount.com.Click the Service Account link to display the OAuth 2 Client ID and copy it.
Return to the Google Admin Console from Step 3. (Security > Access and data control > API controls > Manage Domain Wide Delegation > Add New ).
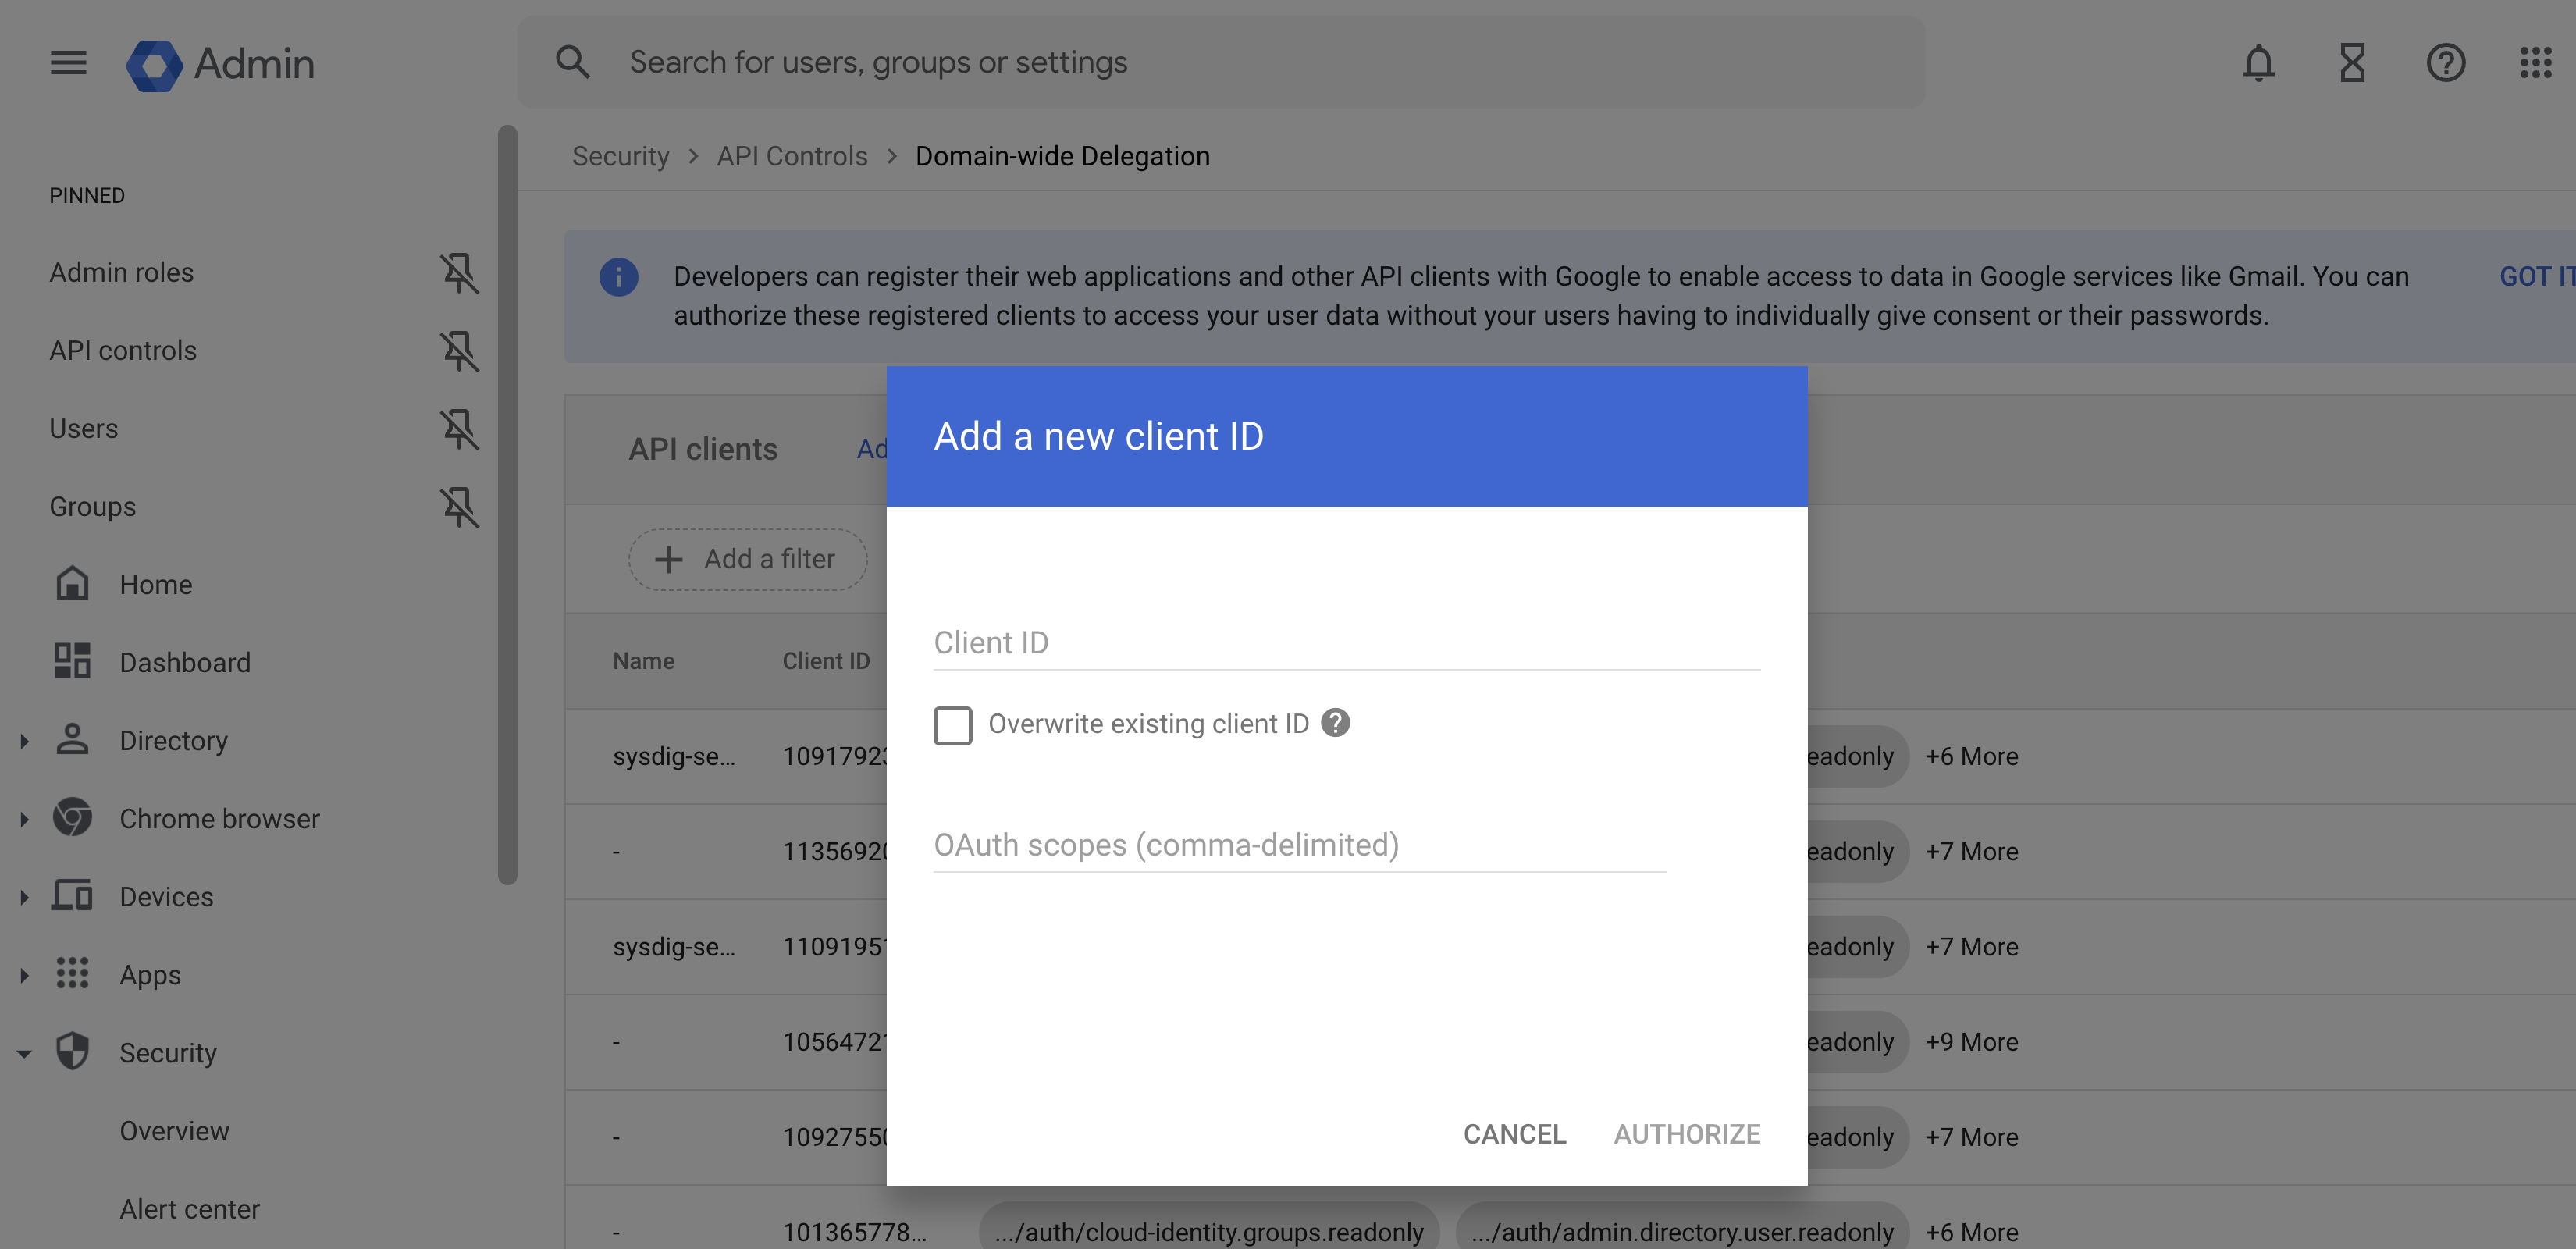
In the panel, enter:
Client ID: Paste the OAuth 2 Client ID you copied.
OAuth Scopes: Add the OAuth scopes below in a comma-delimited list.
https://www.googleapis.com/auth/cloud-identity.groups.readonly,
https://www.googleapis.com/auth/admin.directory.user.readonly,
https://www.googleapis.com/auth/admin.directory.group.readonly,
https://www.googleapis.com/auth/admin.directory.group.member.readonly,
https://www.googleapis.com/auth/cloud-platform.read-only,
https://www.googleapis.com/auth/logging.read,
https://www.googleapis.com/auth/admin.reports.audit.readonly,
https://www.googleapis.com/auth/admin.reports.usage.readonly,
- Click Authorize.
Create a Custom Admin Role and Grant Privileges
While still in the Google Admin Console, go to Account > Admin Roles.
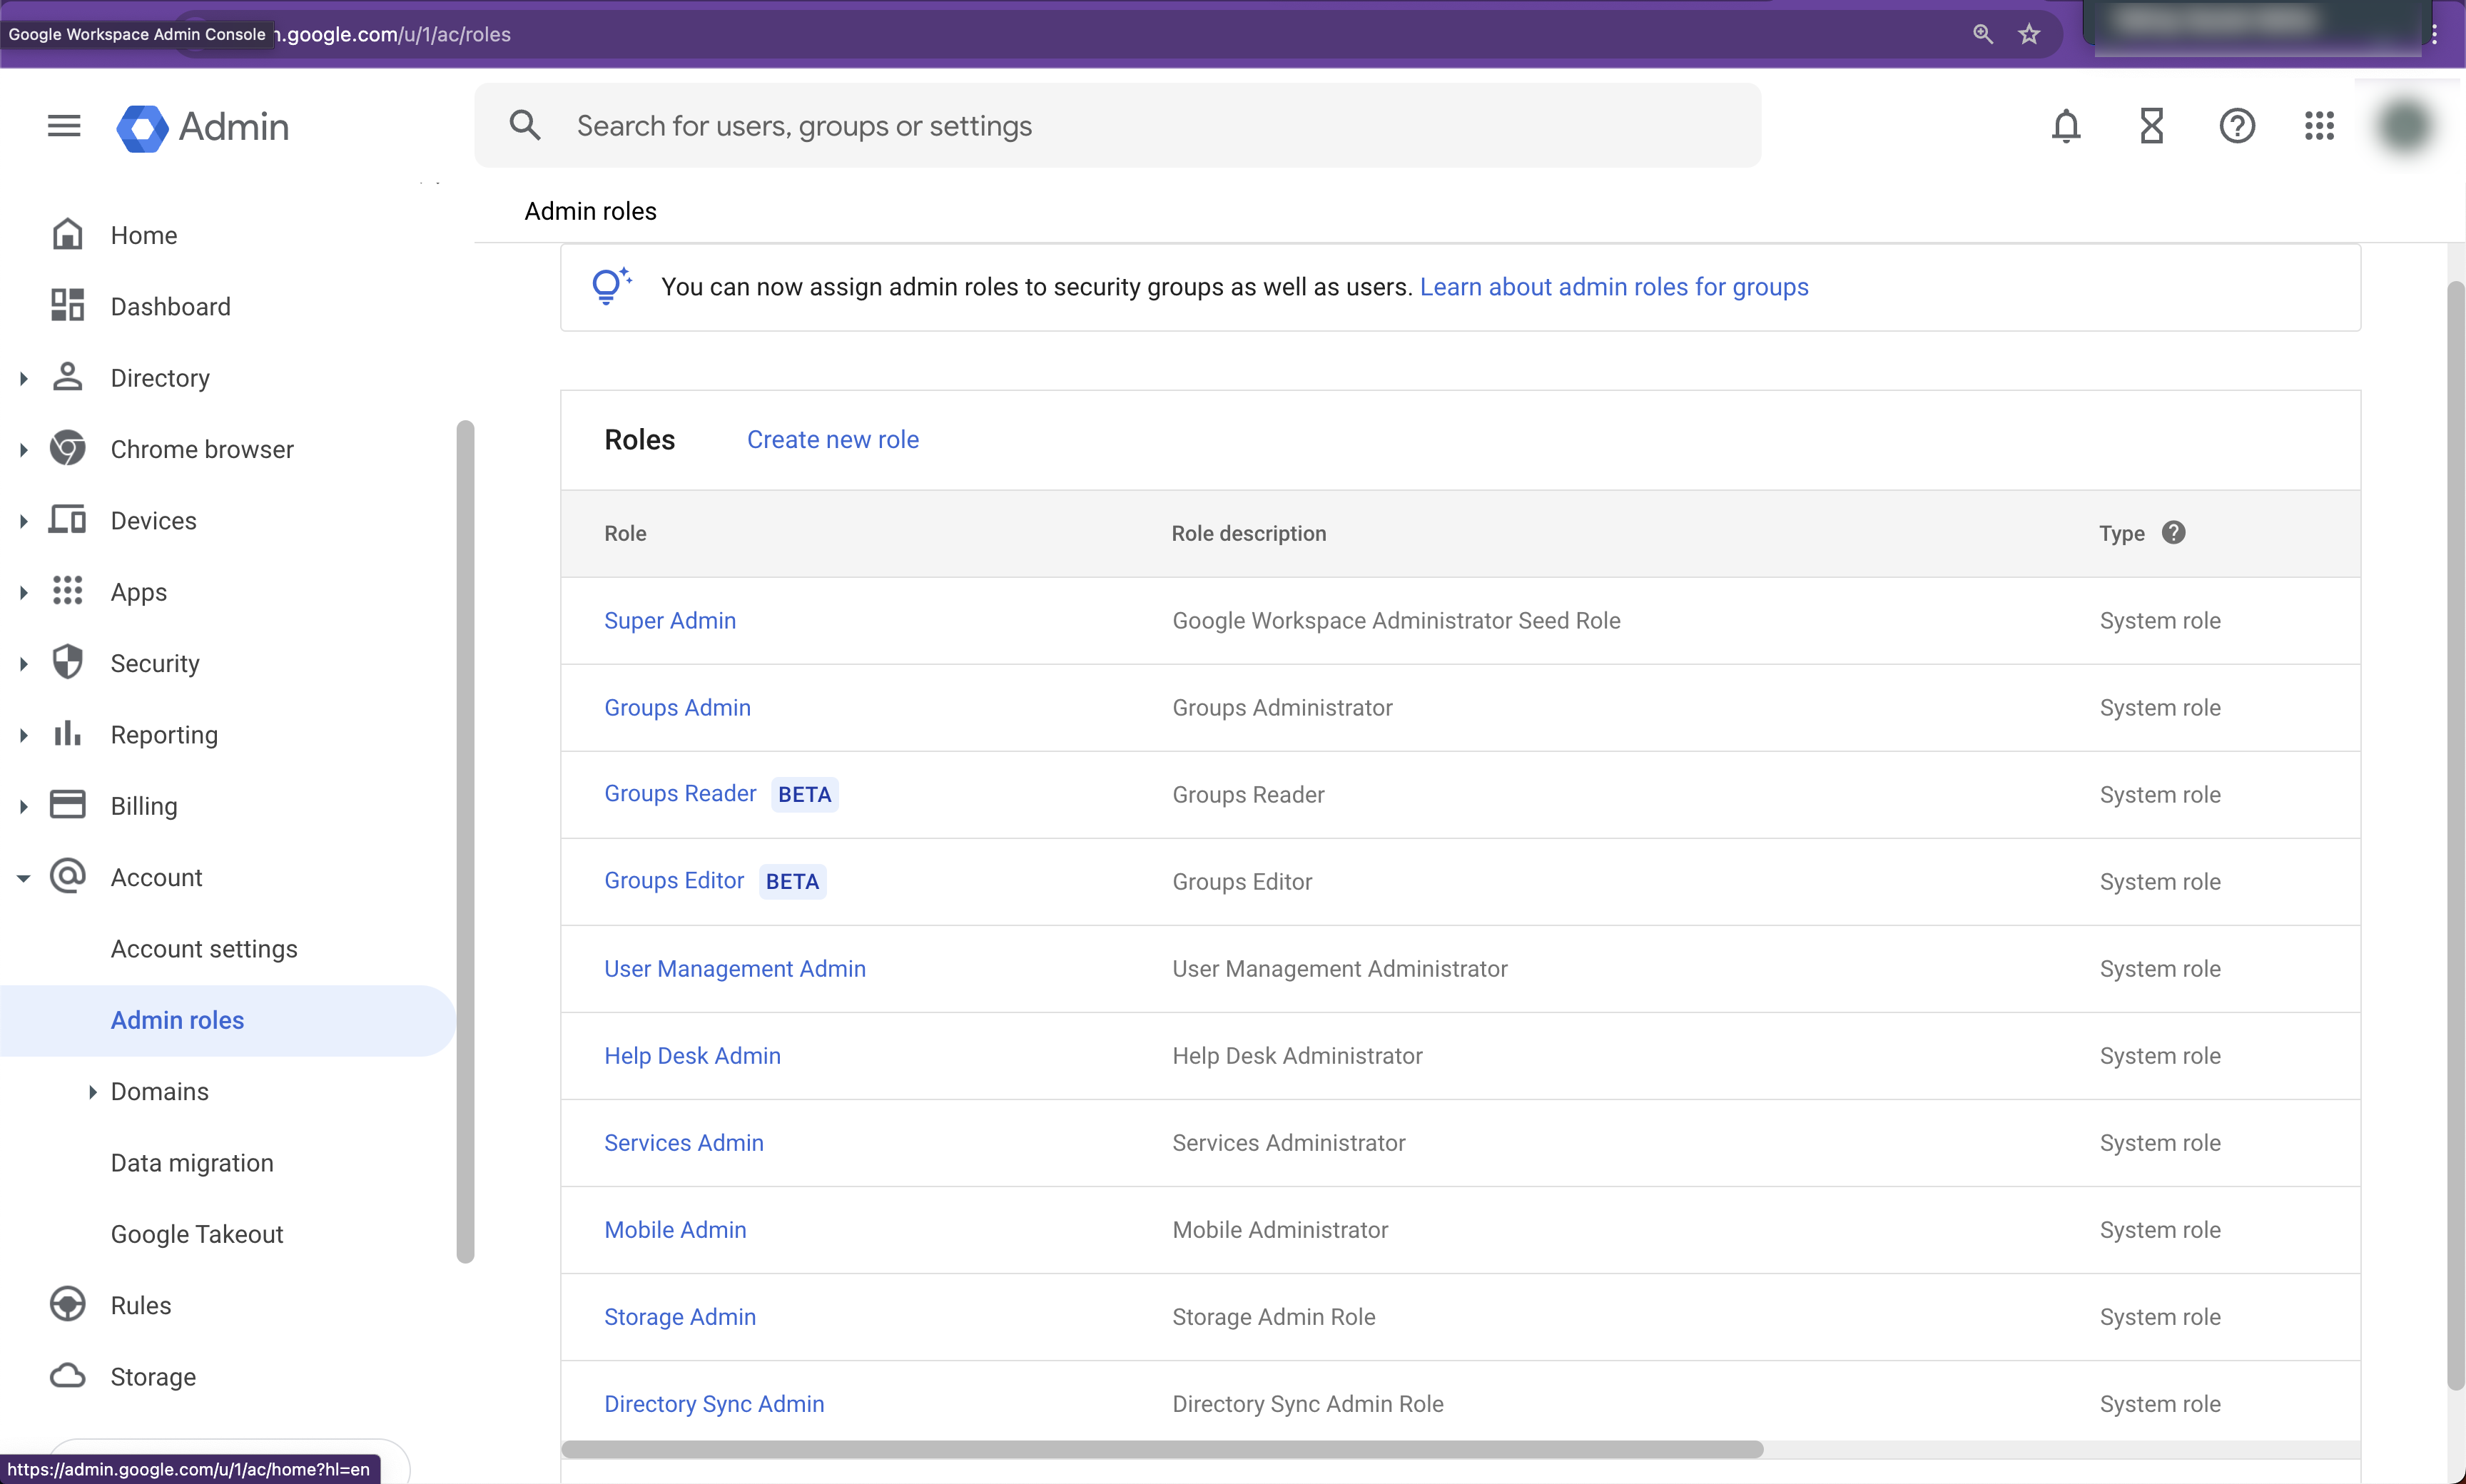
Click Create new role.
Enter the following values:
Name: Enter an appropriate name, such as
Secure Posture Management Read-Only Admin Role.Description: Optional
Click Continue. The Select Privileges page appears.
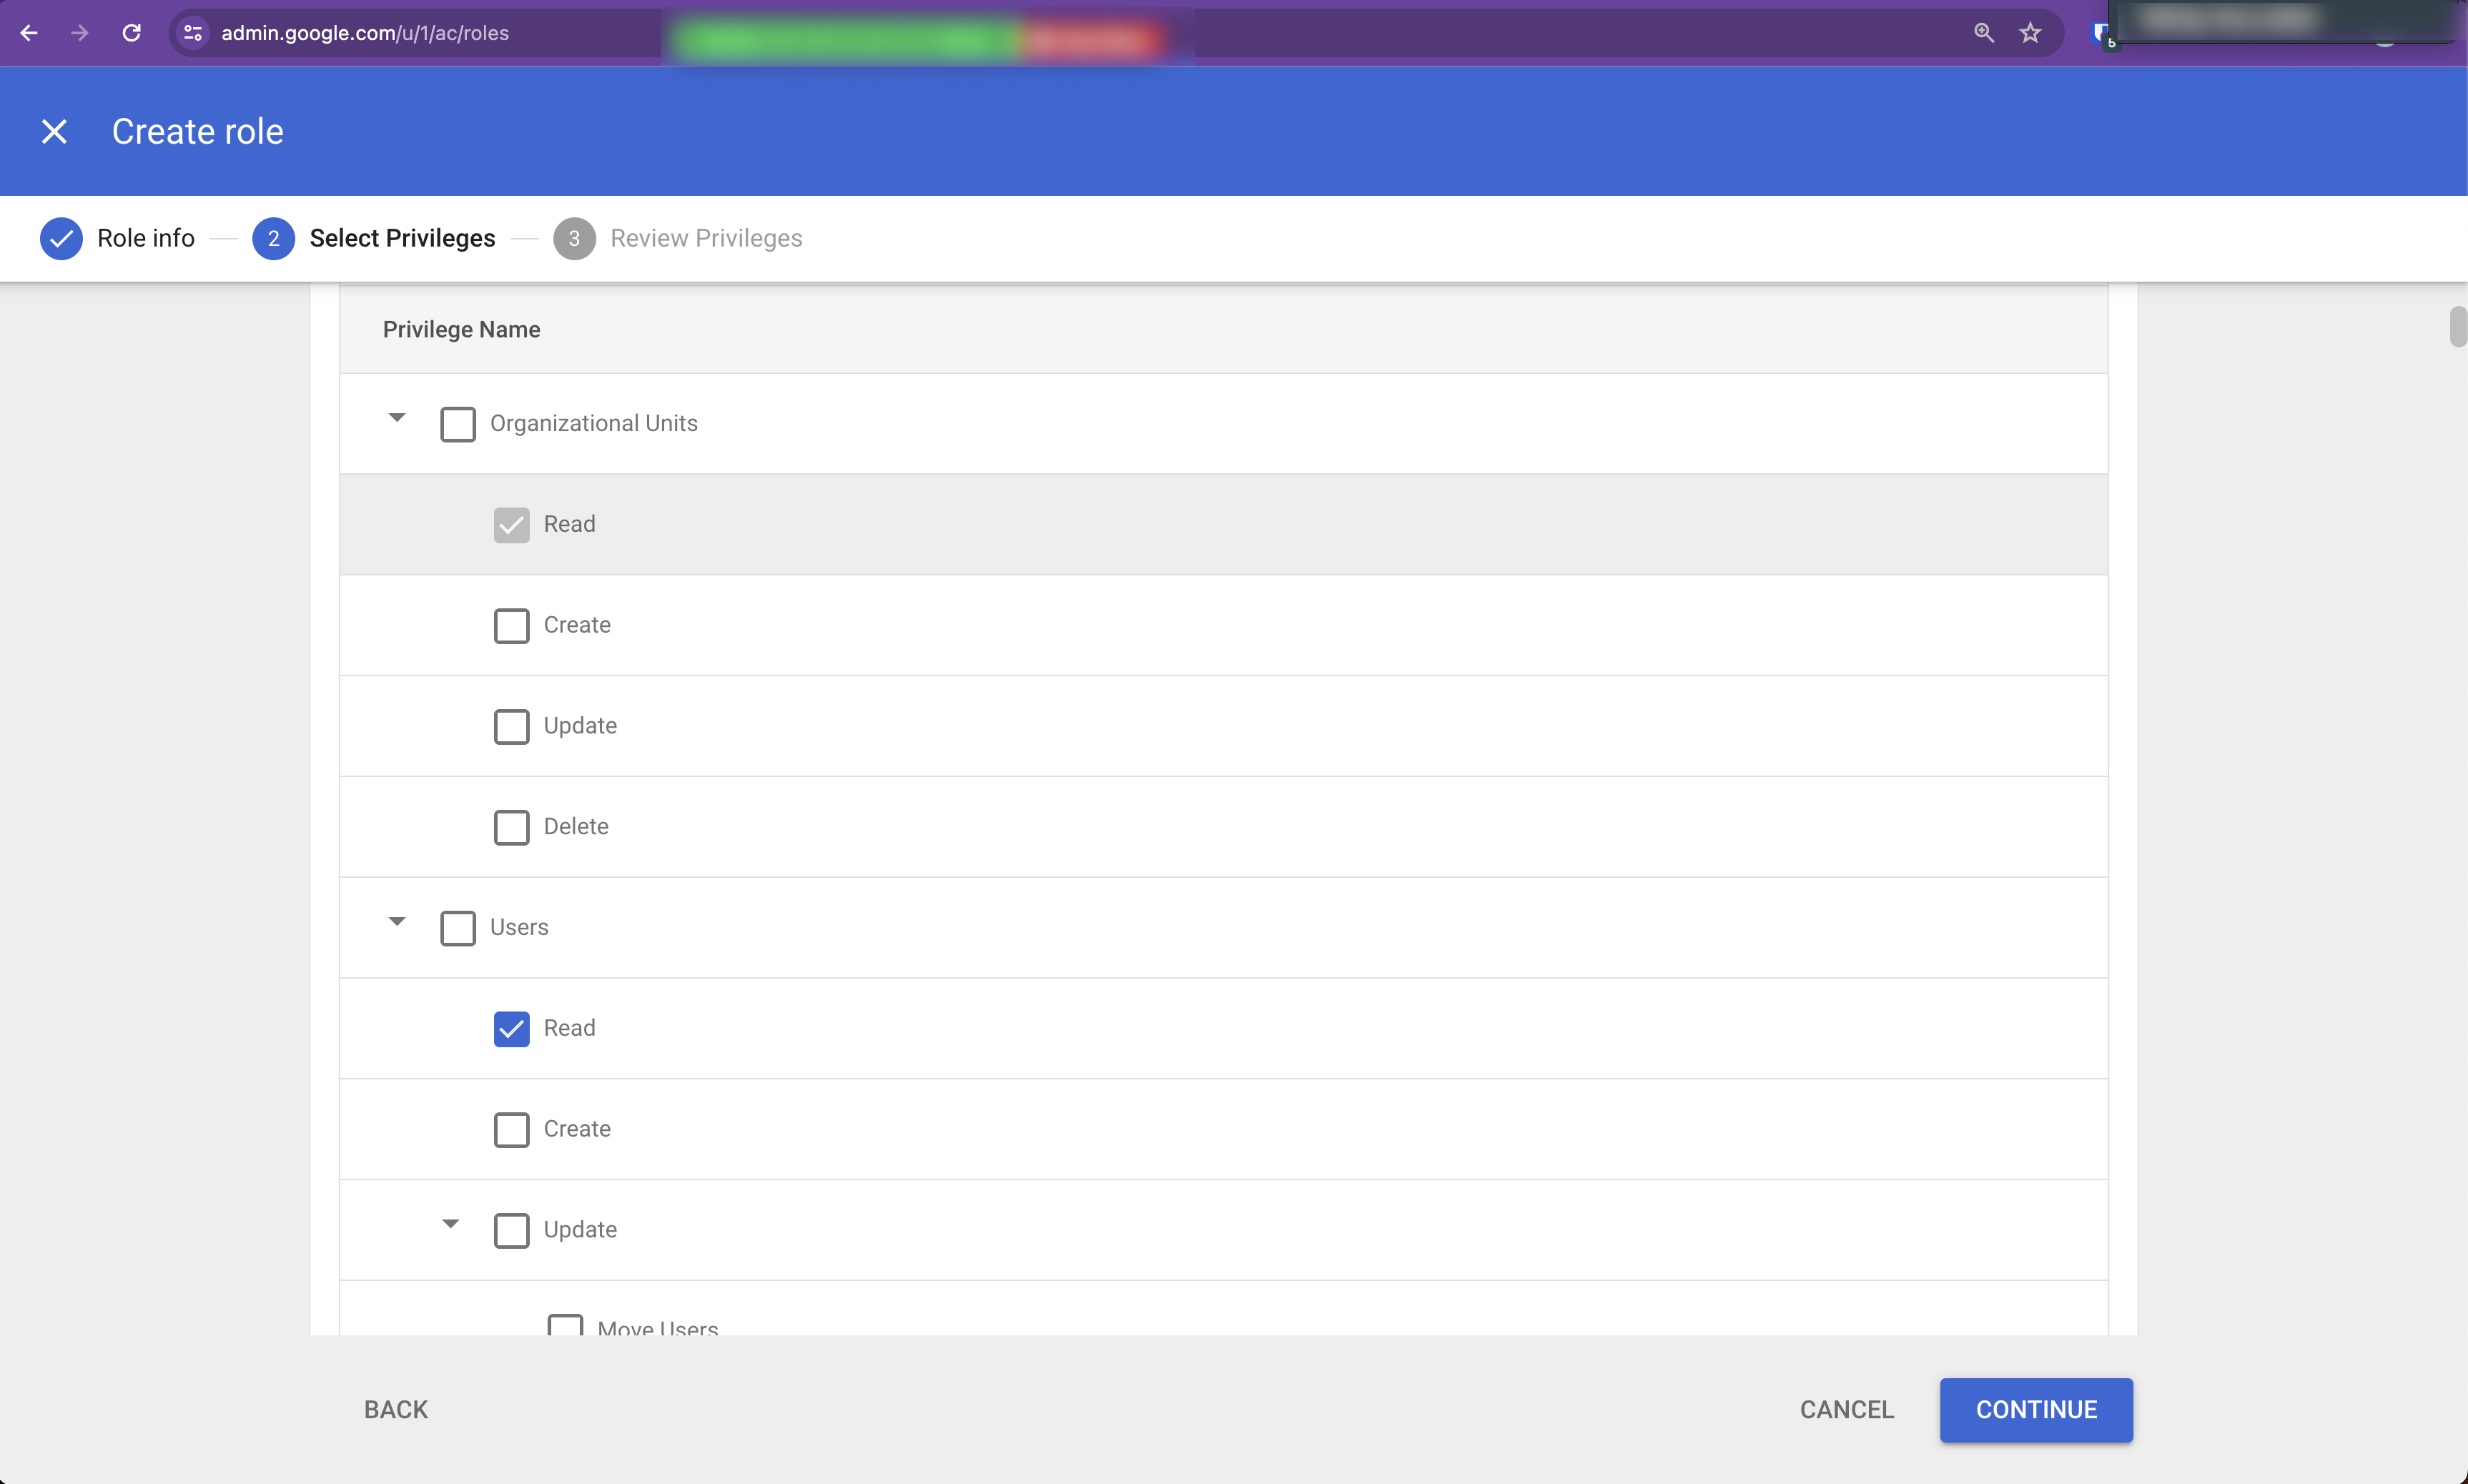
Configure the Select Privileges as follows:
In Admin Console Privileges, at the top of the page, enable:
Organization Units - ReadUsers - Read
Scroll down to Admin API Privileges and enable:
Groups - Read
Click Continue. Confirm the 5 privileges.
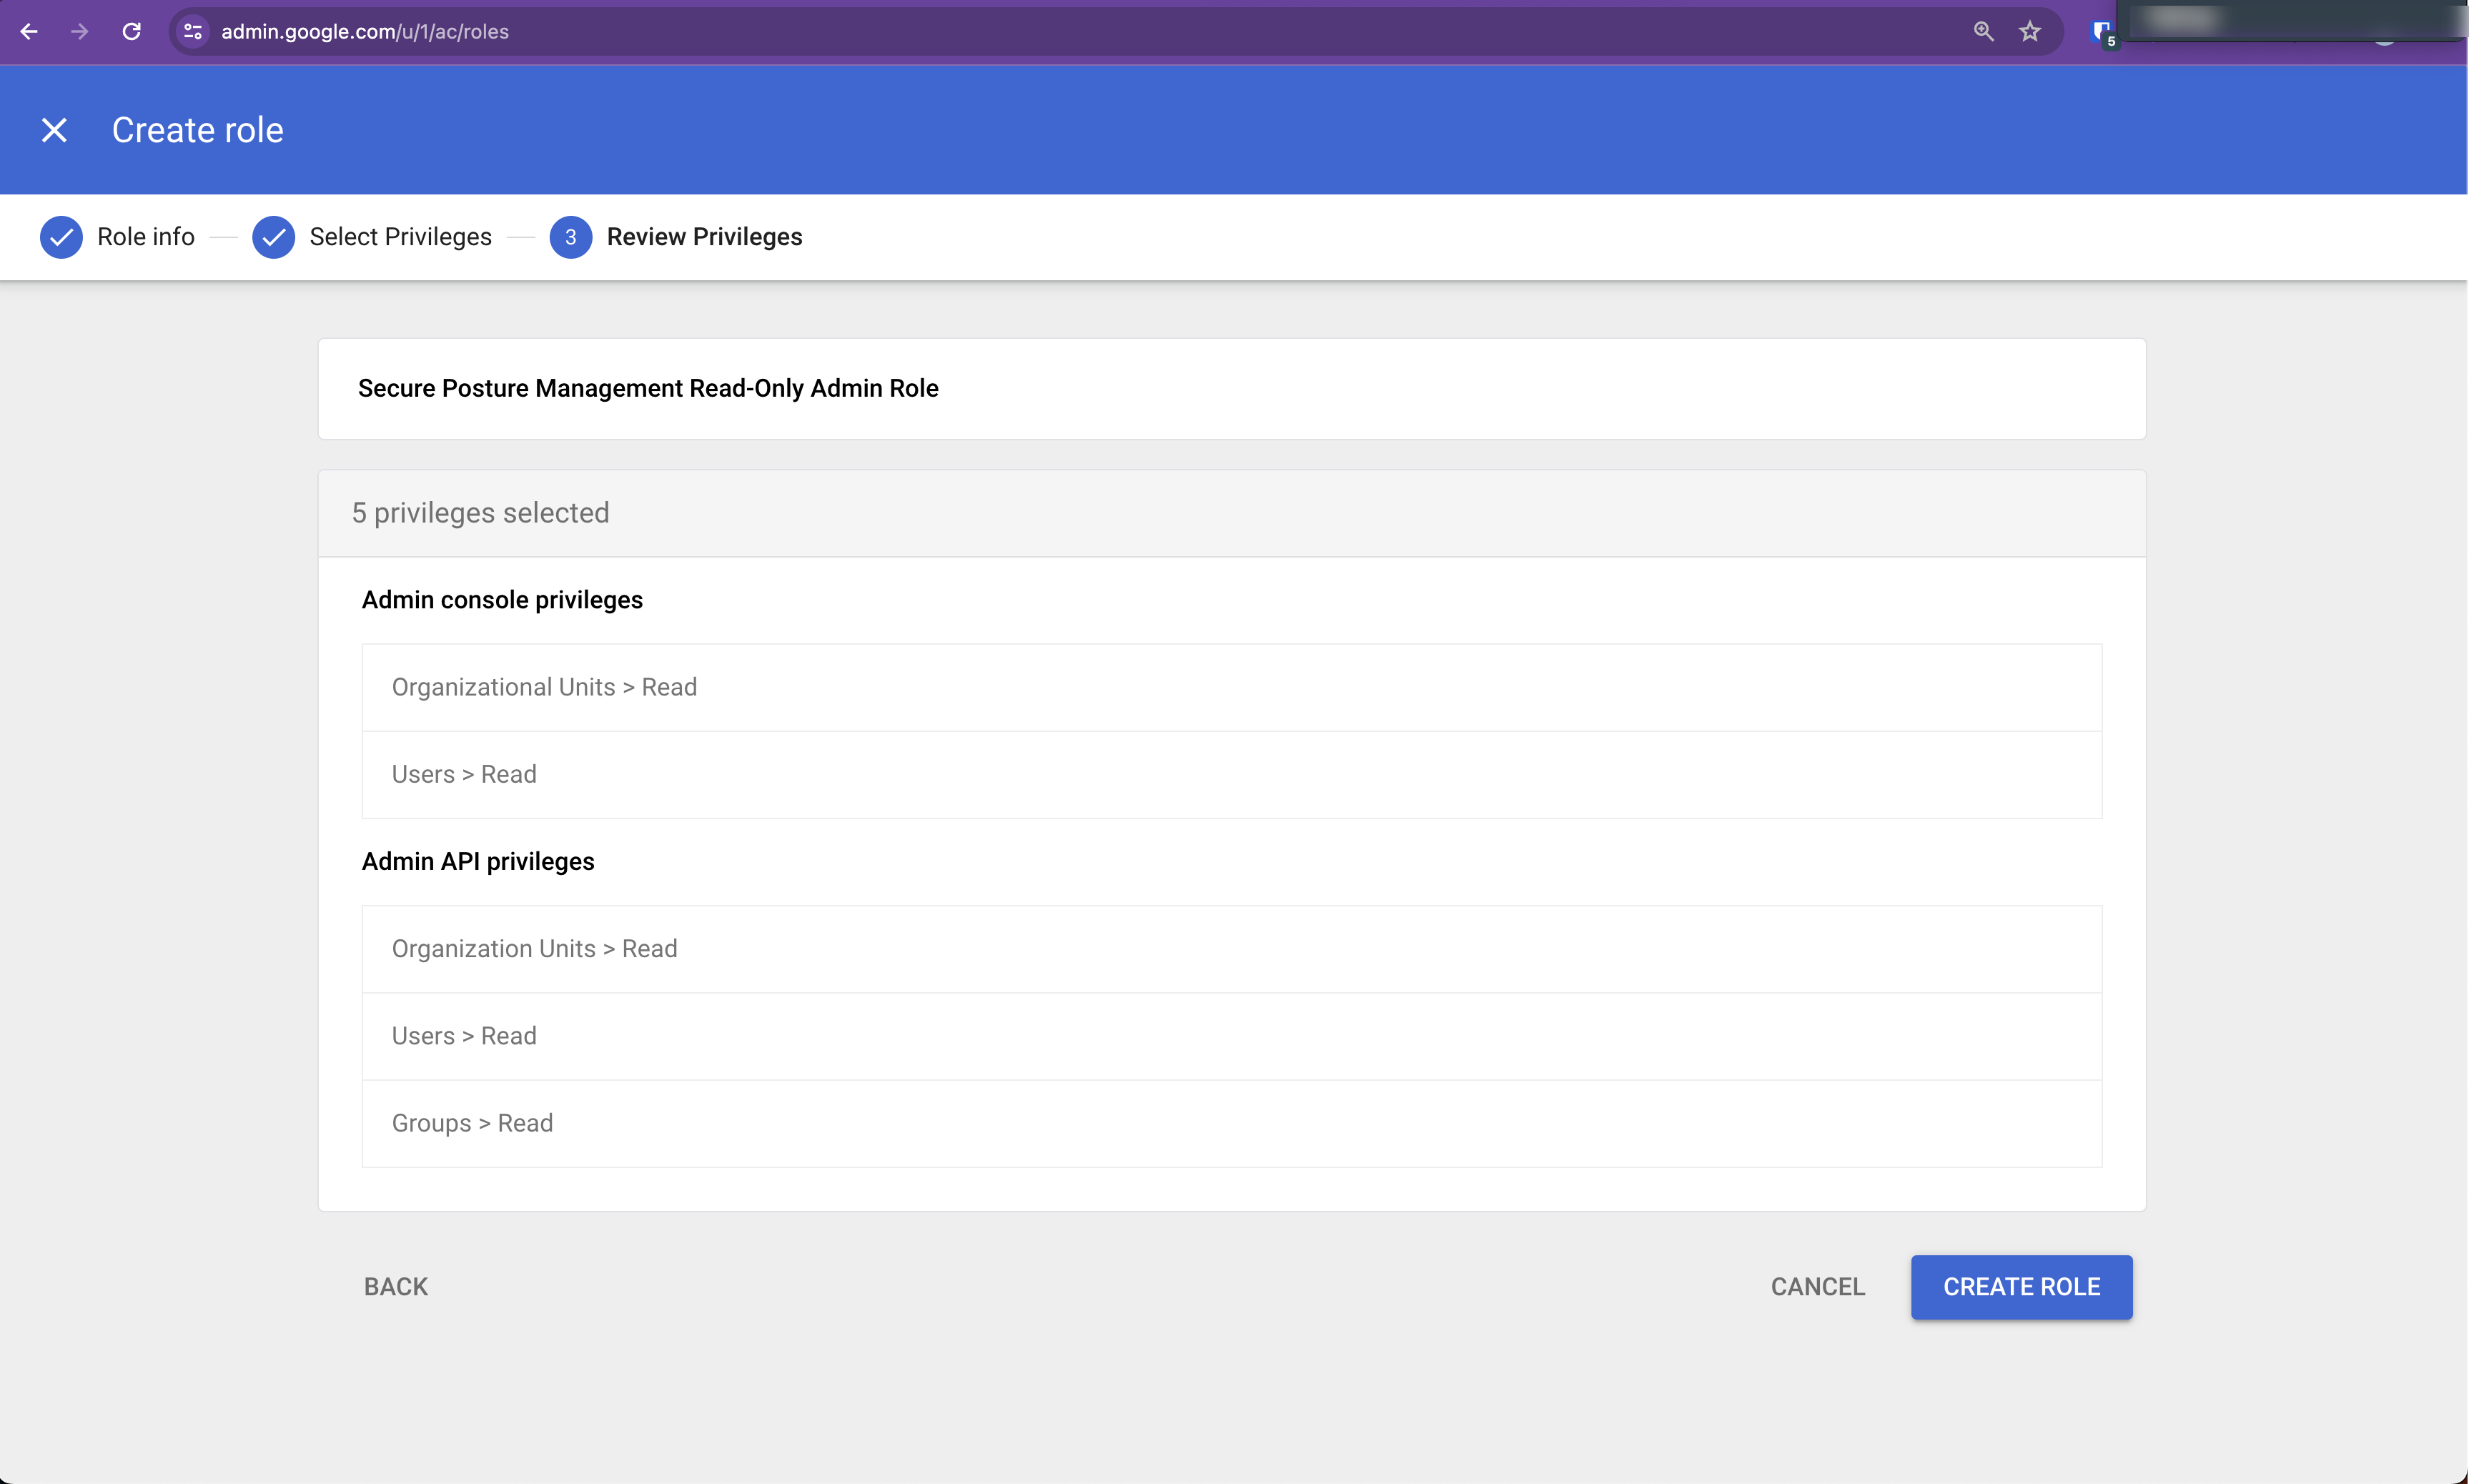
Click Create Role. The Admin Roles screen appears.
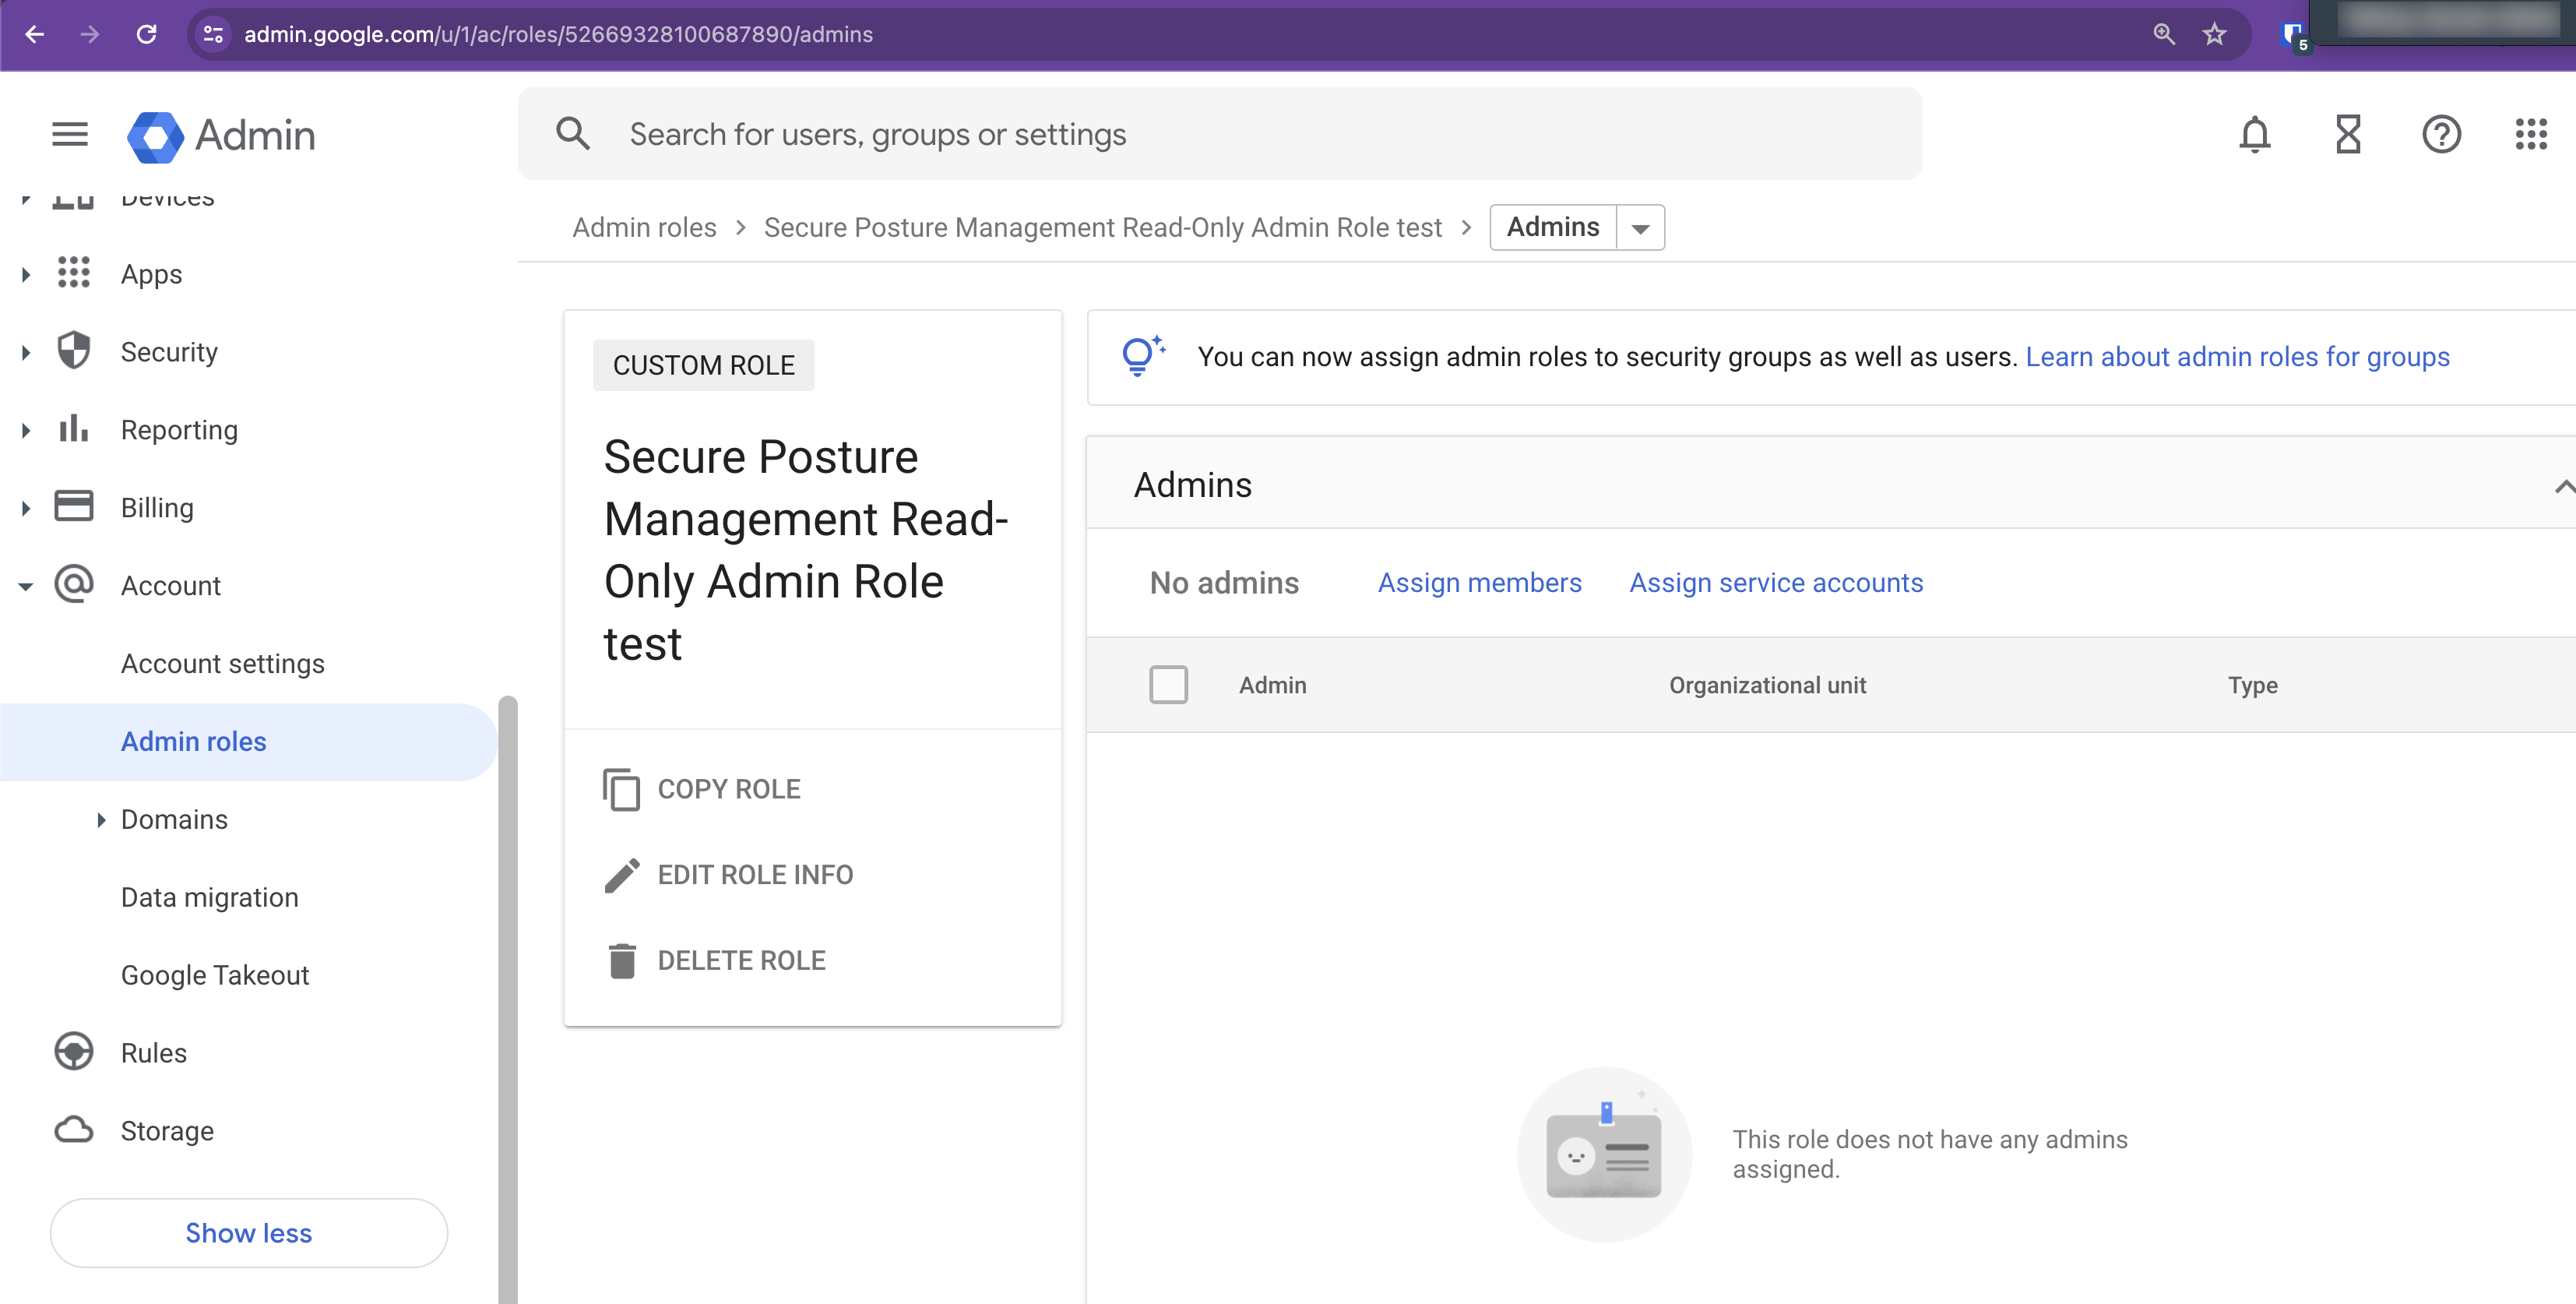
Click Assign Service Accounts.
Enter the Sysdig service account name from step 4 and click Add.
(Format:
sysdig-secure-a1b2@your-project-id.iam.gserviceaccount.com)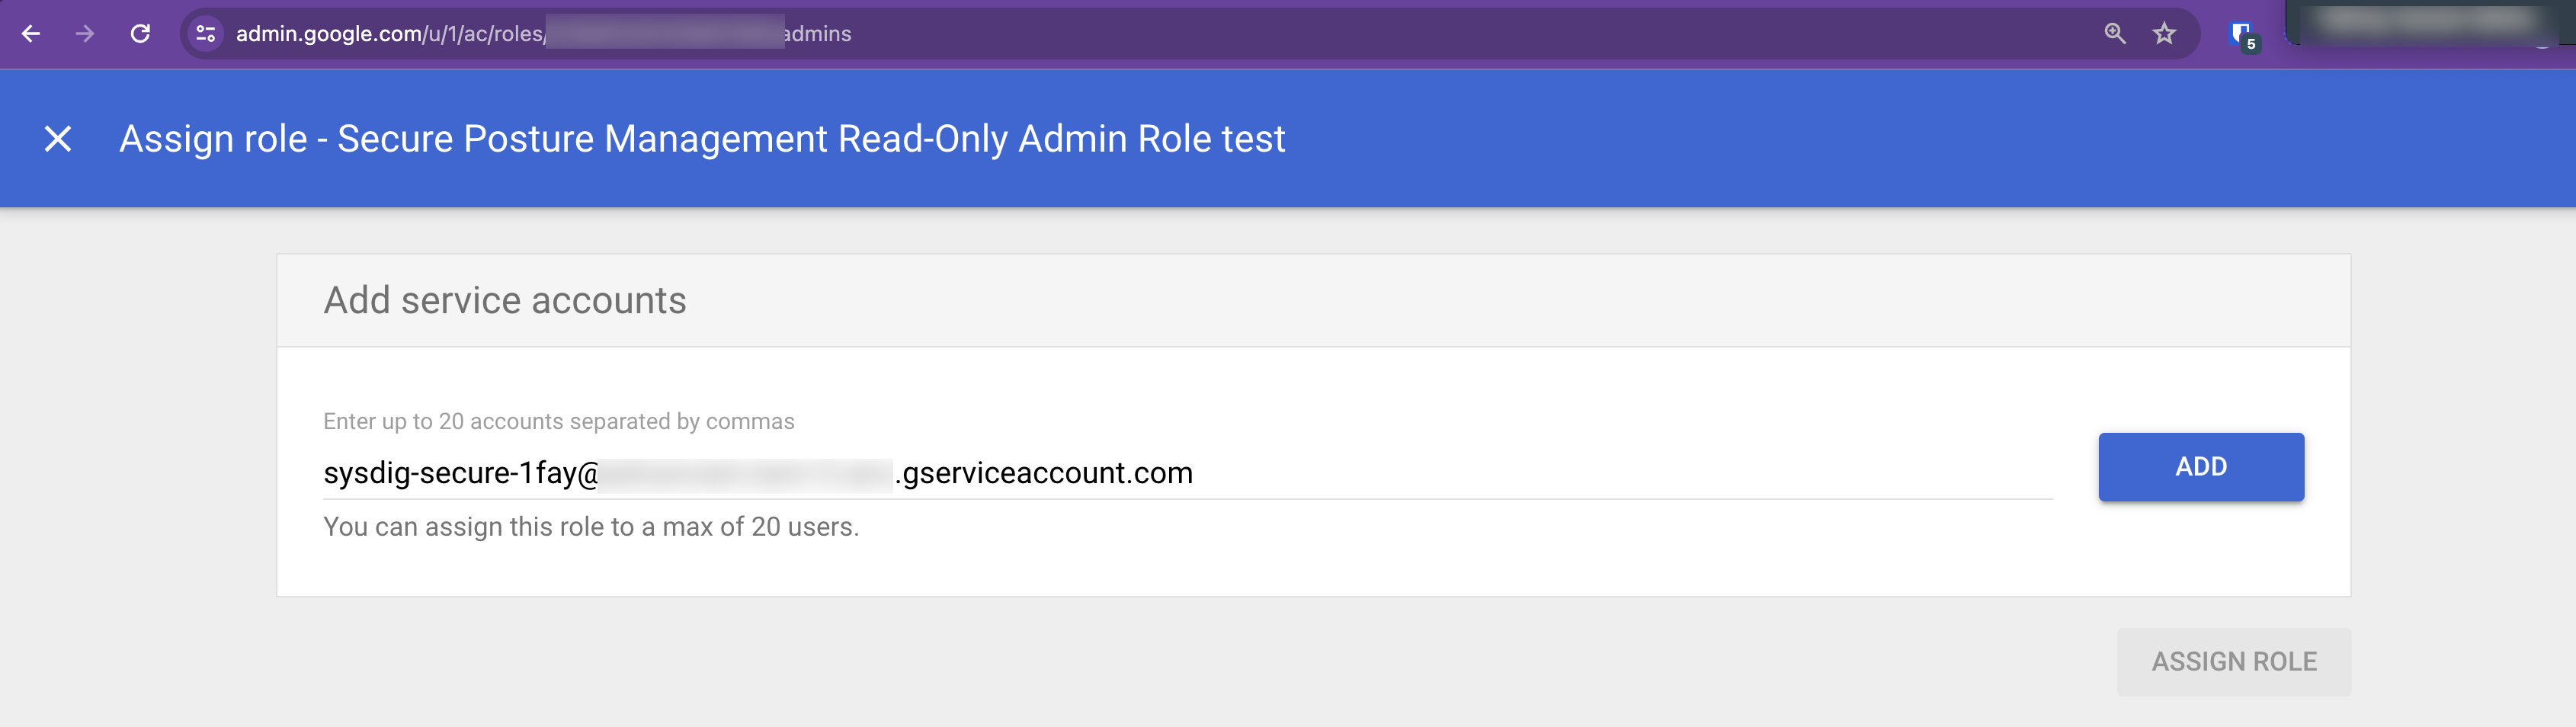
A confirmation screen appears; click Assign Role.
Check the Connection Status
Within 10 minutes, after you apply Terraform, your accounts will appear on the Sysdig Cloud Accounts page. You can add more features after this initial connection by following instructions to Add New Features.
You can verify your CSPM configuration by checking the connection status.
In Sysdig Secure, select Integrations > Environments > GCP.
The Status column shows the overall connection status:
- Connected
- Error
- Unknown
Select the desired account to review the individual services in the detail drawer.
The health status for CSPM configuration is given below:
CSPM Status Description Healthy ✅ The account has been successfully connected, and all the resources have been scanned. Error ❌ - Authentication errors. For example:
- Invalid account ID
- Invalid client secret
- Invalid access credentials
- Access token errors
- Deny policy created by the user is preventing Sysdig from collecting resources
- The scan takes too long and eventually times out.
- Unknown error
- Authentication errors. For example: