Automations
An example work flow:
- Set up a filter to detect a new risk of critical severity in your team zone.
- If the resource type is in an S3 bucket, you can notify a certain team via Slack.
- Alternatively, if the resource type is an IAM Role or IAM User, you can notify another team via Email.
Prerequisites
- Managing Automations is only available to Admin users by default.
- You can also grant permission to a custom role by adding the Automations: Edit permission. See Manage Custom Roles.
Guidelines
Understand the terminology:
Automation: A workflow that automatically triggers when an event matches user-defined criteria.
Event: An atomic entity generated by the platform, such as the discovery or update of a risk.
Actions: Generic procedures performed within an automation. Each action leads to one or more outcomes: true, false, successful, or error. Note that not all actions support all outcome types.
Condition Action: An action to filter or branch attributes based on specific criteria, resulting in either a true or false outcome.
Notification Actions: The actions to send alerts to supported notification channels. You can append additional actions to these notifications. Subsequent actions are executed only after the notification action runs successfully.
Trigger: An event listener that activates when all criteria of a filter are met. Once triggered, the automation executes the subsequent set of actions. You can define optional filters to reduce unnecessary automation runs. Each automation listens for only one event at a time; however, a single event can trigger multiple automations. For optimal performance, triggers should use the broadest filters necessary to complete the task efficiently.
For example:
Send a Slack message for all critical risks by:
- Set the trigger filter to severity = critical.
- Add a single action to send the notification to Slack.
Send a Slack message for all critical risks by:
- Leave the trigger filters empty.
- Add a condition action with severity = critical.
- Add a true action to send the notification to Slack.
If there are 100 risk events, but only one is critical:
- The first automation runs once and sends one Slack message.
- The second automation runs 100 times but still sends only one Slack message.
Risk Automations
Create a Risk Automation
To create an alert based on a risk or risk update:
Log in to Sysdig Secure as an Admin.
Select Automations from the left navigation bar.
The Automations page appears.
Select New Automation > Risks.
Select a Trigger:
Risks: Create an automation based on Risk events, such as elevated privileges or exposed containers. See Risk.
Risks Updates: Create an automation when a new resource is added to a risk.
The Automations configuration page will open. Proceed to Configure an Automation.
Configure a Risk Automation
You can build automations visually through logic chains of conditions and actions.
Set the first automation condition to Trigger on:
New Risks: A new risk that is reported.
Risk Updates: A risk you’ve seen before, but has updated.
For more information, see Example Automation Flow.
Choose one or more of the available Filters:
Severity: A severity, such as Critical, High, Medium or Low.
Zones: A default Zone, such as Entire Infrastructure or Entire Git, or a custom Zone. For more details, see Zones.
Platform: Cloud platforms, such as GCP and Azure, or platforms such as Linux or containers.
Resource Type: Workload resource, such as Kubernetes Deployment, Kubernetes DaemonSet, Compute Instance, AWS IAM Role, or AWS S3 Bucket.
Select the plus icon under a condition box to select an action.
Actions include:
An additional Condition.
A notification via Slack, MS Teams, Webhook, Email or PagerDuty.
You can link several actions to a single condition. Actions such as sending a notification will only occur if the “If” condition is met successfully.
Add additional conditions and actions until you have built a desired flow.
To create the new automation, select Save.
Example: Notify Risk Updates to AWS Resources
Consider you have set up the following automation flow:
- Trigger on: Risks Updates
- Filters: Resource Type in S3 Bucket, EC2 Instance, IAM User, IAM Role
At 12:00 AM, the user environment has no reported Risks.
At 12:01 AM, a new risk is detected:
Risk: Workload with critical vulnerabilities exposed to the internet
Affected Resources:
- S3 Bucket
- EC2 Instance
The user receives one alert for this new risk, listing all affected resources.
At 12:02 AM, the same risk persists, but two additional resources are affected:
- S3 Bucket
- EC2 Instance
- IAM User
- IAM Role
The user receives two separate alerts for the risk updates:
- One alert for IAM User
- One alert for IAM Role
Since S3 Bucket and EC2 Instance were already included in the initial alert, they do not trigger new alerts.
Vulnerability Findings Automations
Create a Vulnerability Findings Automation
To create an alert to notify you of a vulnerability issue:
Log in to Sysdig Secure as an Admin.
Select Automations.
The Automations page appears.
Select New Automation > Vulnerabilities.
The New Vulnerability Findings configuration panel appears. Proceed to Configure an Automation.
Configure a Vulnerability Findings Automation
You can build automations visually through logic chains of conditions and actions.
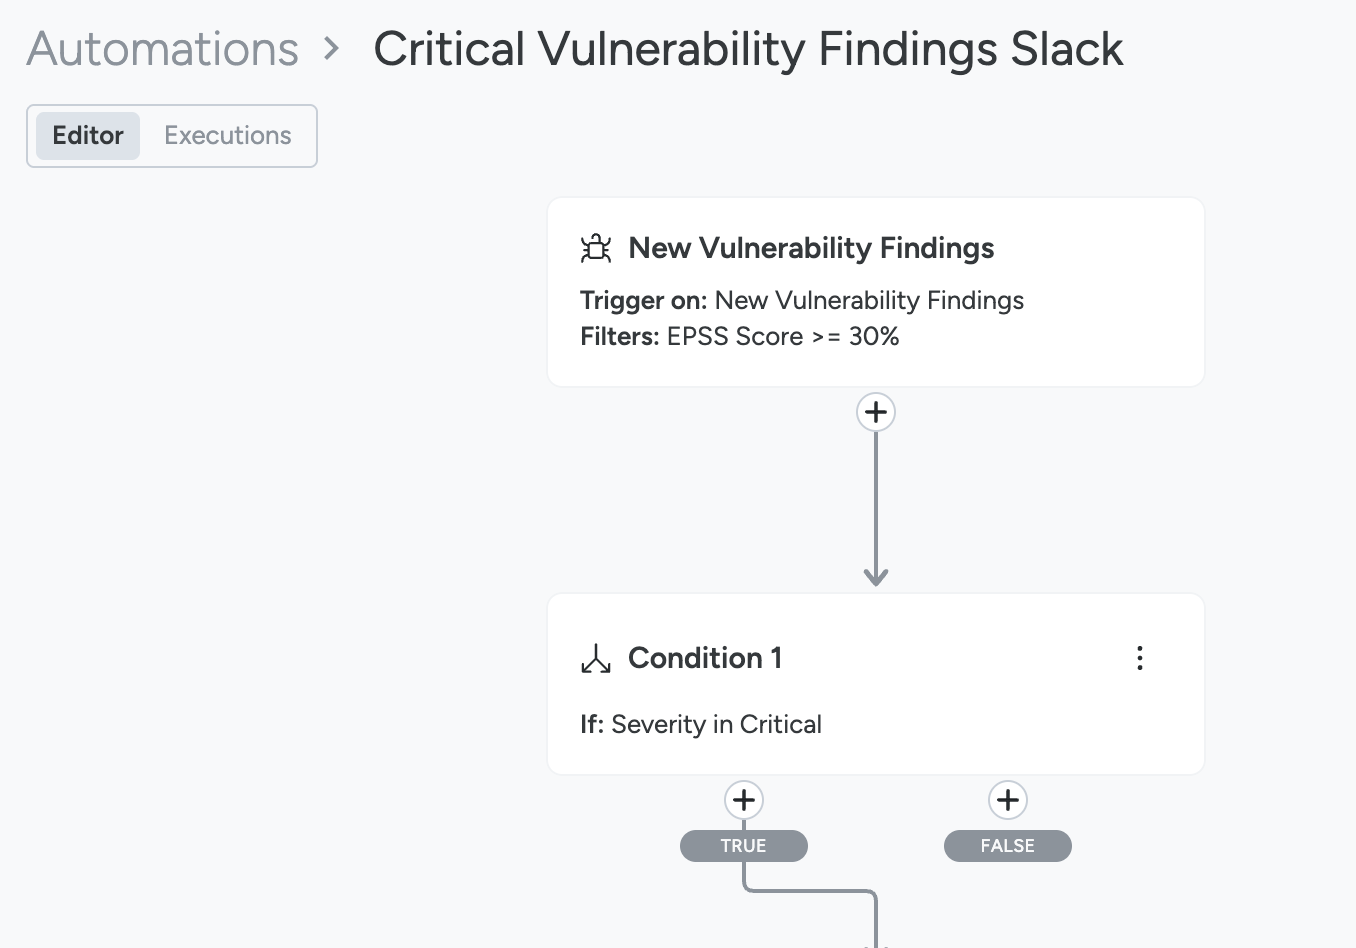
On the New Vulnerability Findings panel, select one or more of the available Filters:
Severity: A severity, such as Critical, High, Medium or Low.
EPSS Score: Choose between a score of 10% and 100%.
CISA KEV: Select Yes or No.
Has Exploit: Select Yes or No.
Has Fix: Select Yes or No.
Source: Select one of the following:
- Kubernetes Runtime
- Host Runtime
Zones: A default Zone, such as Entire Infrastructure or Entire Git, or a custom Zone.
See Zones.
Select Done.
Select the plus icon under a condition box to select an action.
Actions include:
- An additional Condition.
- A notification via Slack, MS Teams, Webhook, Email or PagerDuty.
- A Tickets integration you have set up, such as Jira. To set up a Jira integration, see Jira Ticketing. When you select a Jira action, you must select the integration and the issue type.
- Optionally, you can select the assignee, along with a number of additional fields, allowing assignment and organization based on your existing workflows. You can also customize the ticket with variables.
- You can link several actions to a single condition. Actions such as sending a notification will only occur if the “If” condition is met successfully.
Add additional conditions and actions until you have built a desired flow.
To complete creating the new automation, click Save.
Example: Notify Critical Vulnerabilities with Exploits in a Zone
Consider you want to be alerted on critical vulnerabilities with exploits.
Click New Automations and Select a Trigger for Vulnerabilities.
From Filters select:
Severity in Critical
Has Exploit = Yes
Specify the condition:
- Select the Zone and click Done.
- Click TRUE.
Select the Notification channel you prefer.
When a critical vulnerability with exploits occur in the selected zone, you will be notified on the selected channel.
Customize Outputs with Variables
When creating a Vulnerability Findings automation, you can use variables to customize the output.
Variables are placeholders that will be replaced with the real value of the variable at the time the automation is executed.
For example, if you use the variable {labels.agent.tag.region}, when the ticket is created it will show us1.
You can use the variable automation.id to label a Jira ticket with the ID of the automation that created it. When the automation executes, automation.id is replaced with the actual automation ID, which is a simple UUID. That means that in your Jira ticket you will have a label with a value like eb1ebe2b-e12b-1234-bfd1-1234dbfdbc12.
Global Variables
Global variables are available across all applicable automation triggers and actions:
automation.id: The automation ID, which is a simple UUID. For example,eb1ebe2b-e12b-1234-bfd1-1234dbfdbc12.automation.name: The name of the automation.execution.id: The unique ID for each time an automation is executed.execution.startedAt: The date and time the automation was triggered.
Asset and Dynamic Variables
The asset variable trigger.asset.assetName will always be present on Vulnerability Findings automations, as all such automations are based on an asset.
trigger.asset.assetName: A string that depends on the resource type. For example, it could bequay.io/sysdig/vuln-host-scanner:0.13.4for Kubernetes workloads, ori-0d1d23457b6b789e0for a host.
Some asset variables are dynamic; they may or may not be applicable to the automation resource and resource type:
trigger.asset.hostNametrigger.asset.clustertrigger.asset.hostIdtrigger.asset.hostNametrigger.asset.imageIdtrigger.asset.namespacetrigger.asset.pullstringtrigger.asset.workload
If you select a variable which is not applicable, the output will be N/A.
Finding Variables
Finding variable can be dynamic; they may or may not be applicable based on the type of trigger, resource or finding type.
Examples of variables that are only available for vulnerability triggers include:
trigger.finding.cveNametrigger.finding.cvssScoretrigger.finding.severity
Vulnerabilities Accepted Risk Automations
You can create an automation to trigger when Accepted Risks for vulnerabilities are created, updated, or deleted.
Create Vulnerabilities Accepted Risk Automation
To create a Vulnerabilities Accepted Risks automation:
Log in to Sysdig Secure as an Admin.
Navigate to Automations.
The Automations page appears.
Select New Automation > Vulnerabilities Accepted Risk.
The configuration panel appears.
Proceed to Configure a Vulnerabilities Accepted Risk Automation.
Configure a Vulnerabilities Accepted Risk Automation
You can build automations visually through logic chains of conditions and actions from the configuration panel:
- Set the first automation condition to Trigger on:
Event based triggers such Risk Acceptance Created, Updated, Deleted or Expired, which happen when a risk acceptance change occurs. Such changes are typically user-driven.
Risk Acceptance Expiring: Calculates the number of days until a risk expires. Use this be alerted 7, 30, 60, or 90 days before a risk expires.
- Choose one or more of the available Filters:
Expires in: How many days the user has defined that the risk accepted will be expiring
Days before expiration: Relative number of days before the risk acceptance will expire. Only available for the Risk Acceptance Expiring trigger.
Created By: The user who created the risk accepted.
Updated By: The user updating the risk accepted. Only available for the Risk Acceptance Updated trigger.
Reason: The reason selected by the user for performing the risk action. This includes custom reasons.
Select Done.
Select the
+icon under a condition box to Select an Action. Actions include:
Condition: An additional condition.
Notifications via Slack, MS Teams, Webhook, Email or PagerDuty to notification channels you have created.
You can link several actions to a single condition. Actions, such as sending a notification, only occur when the If condition is met.
Add additional conditions and actions until you have built a desired flow.
Select whether to Enable the automation or not, and select Save.
You cannot save an automation if the configuration is incomplete. For example, if a Send Slack Message action has not been linked to a notification channel.
Example: Alert Before a Risk Expires
As an example, imagine you want to be alerted on whenever a risk is set to expire in 7 days. To set this up from the Automations page:
Click New Automation > Vulnerabilities Accepted Risks.
For Trigger on, select Risk Acceptance Expiring from the drop-down.
From Filters select:
Days before expiration =
5.You can input the number as free text.
Select Done.
Select the
+icon under the condition box.The Select an Action modal appears.
Select the Notification channel you prefer.
Ensure the automation is Enabled, and click Save.
Five days before the accepted risk expires, the notification channel you selected will get an alert.
Runtime Events Automation
You can create an automation to trigger when a runtime policy generates an event.
Create a Runtime Event Automation
To create a Runtime Event Automation:
Log in to Sysdig Secure as an Admin.
Select Automations.
The Automations page appears.
Select New Automation > Runtime Events.
The configuration panel appears.
Proceed to Configure a Runtime Events Automation.
Configure a Runtime Events Automation
You can build automations visually through logic chains of conditions and actions. To configure a Runtime Events Automation:
From the configuration panel, select at least a Severity of Policy filter.
Optionally, you can add other filters, such as:
- Event Source, such as Syscall, K8s Audit and more
- Rule Name
- Zones
- Labels available from agent tags, Kubernetes labels and more
Select Done.
Select the
+icon under the condition box to Select an Action, such as:
An additional Condition.
Notifications via Slack, MS Teams, Webhook, Email or PagerDuty to notification channels you have created.
Response Actions - see the Response Actions section.
You can link several actions to a single condition. Actions such as sending a notification will only occur when the If condition is met.
Add additional Conditions and Actions until you have built a desired flow.
Ensure the automation is Enabled and select Save.
Response Actions
Response Actions are a type of action allowing you to contain a threat, after it has been detected, or to collect additional data as a forensic proof or to support the investigation phase.
For Response Actions to work, they need to be set up in the environment where the trigger event takes place, in regard to the selected action. For instance:
- Trigger event on cluster
foo, Container kill action, the host response actions need to be deployed and enabled on clusterfoo - Trigger event on host
bar, Fetch Cloud logs action, the AWS account wherebaris in needs to have Cloud Response actions deployed for the region wherebaris.
You can read more about Response Actions in the Response Actions page.
Acquire File
This action allows you to acquire different files that the Trigger Event refers to, if any:
- Process binary
- Parent process binary
- File argument, for actions on a single file (i.e. create/open/write). For actions on multiple files, the target file if available in the event, the source file otherwise.
- Target file
- Source file
The captures storage must be set up for this to be working, as a prerequisite.
See the Response Action documentation for additional information.
Kill Container
Kills the container that the event refers to, if any.
See the Response Action documentation for additional information.
Kill Process
Kills the process the event refers to or its parent, depending on your choice, if the event contains such data.
See the Response Action documentation for additional information.
Pause Container
Pauses the container the event refers to, if any.
See the Response Action documentation for additional information.
Quarantine File
This action allows you to quarantine different files that the Trigger Event refers to, if any:
- Process binary
- Parent process binary
- File argument, for actions on a single file (i.e. create/open/write). For actions on multiple files, the target file if available in the event, the source file otherwise.
- Target file
- Source file
See the Response Action documentation for additional information.
Stop Container
Stops the container the event refers to, if any.
See the Response Action documentation for additional information.
Delete Pod
For events referring to a Pod, this action proceeds to kill it.
See the Response Action documentation for additional information.
Get Logs
If the event refers to a Workload, this action fetches its logs. You can select if you want the logs from all containers of all pods, or just the log from the single container the event refers to, if any.
It’s possible to get the logs from the latest execution or the previous instance. Like kubectl logs, the latest instance is the running one, if any, or the last one if none.
The captures storage must be set up for this to be working, as a prerequisite.
See the Response Action documentation for additional information.
Isolate Network
For events about network traffic, this creates a Kubernetes Network Policy to deny it, based on the inputs and its configuration.
- Direction: you can select the direction of the connections that will be blocked. This will be used, regardless of the event. If you want to target connection events only, or a direction only, use a Condition box.
- Port: you can specify to use the port from the event or all of them. In the former case, the event will need to contain such information.
- IP: you can specify to use the IP from the event or all of them. In the former case, the event will need to contain such information.
- Protocol: you can specify to use the protocol (TCP/UDP) from the event or all of them. In the former case, the event will need to contain such information.
See the Response Action documentation for additional information.
Rollout Restart
This action restarts the Kubernetes workload, if specified in the trigger event.
See the Response Action documentation for additional information.
Volume Snapshot
For events about a Kubernetes workload with an attached volume, this creates a snapshot of such a volume.
Currently, only workloads with one volume are supported.
See the Response Action documentation for additional information.
EBS Volume Snapshot
This action takes a Volume Snapshot on all EBS volumes attaches to the EC2 instance pertaining to the event.
The triggering event must refer to an EC2 instance for this action to take place.
See the Response Action documentation for additional information.
Fetch Cloud Logs
For events happening on AWS, you can fetch the CloudTrail logs to support further investigations. You can customize some options for this action:
- Time before the Event: Define when the query interval starts, based on the event. The interval ends on the event timestamp.
- User: Get only the actions from the user that generated the event or all. If you select “From the event”, the cloud user (or role) must be included in the trigger event for the action to take place.
- Event Source: Get only the action regarding the resource type that the event happened on or all. If you select “From the event”, the resource type must be included in the trigger event for the action to take place.
- Event Name: Fetch only the logs pertaining to the same action performed in the event, if any, or all. If you select “From the event”, the action name must be included in the trigger event for the action to take place.
Your captures storage must be set up for this to be working, as a prerequisite.
See the Response Action documentation for additional information.
Remove Public Access
For events pertaining to an S3 bucket and/or an RDS instance, this removes the public access option, if set.
For this response action to be defined, the S3 bucket or RDS instance must be included in the trigger event.
You can select this action to be performed on either or both the resource types.
See the Response Action documentation for additional information.
IAM Quarantine
Through this action you can quarantine an IAM User or Role, if included in the triggering event.
If selecting “Event Subject”, the actor that performed the original event, tracked on CloudTrail, will be quarantined (if any).
By selecting “Event Object”, you can instead quarantine a IAM object of an event, i.e. on which an operation is performed, like a permission grant.
See the Response Action documentation for additional information.
Example: Alert for all High Severity Events in a Zone. Alert by Slack if there are Specific Labels.
As an example of a Runtime Event Automation, you can be alerted via email about all high-severity events in your Prod Zone. Additionally, if the agent tag critical = true is detected in that zone, you can receive a Slack notification. To set up this automation:
Log in to Sysdig Secure as an Admin.
Select Automations.
The Automations page appears.
Select New Automation > Runtime Events.
The configuration panel appears.
- From Filters select:
Severity
inHigh.Zones
inProd.
Select Done.
Select the
+icon under the condition box.The Select an Action modal appears.
Under Notifications, select Email.
From the Notification channel, select the email notification channel of your security team.
Select Done.
Under the original condition box, select the
+icon.Select Condition.
The If panel appears.
- From the Select Filter drop-down, add:
agent.tag.criticalintrue
Select Done.
Under the
agent.tag.criticalintruecondition box, select the TRUE+icon.
The Select an Action modal appears.
Select Slack, and choose your Slack notification channel from the drop-down.
Click Done.
Ensure the automation is Enabled and select Save.
This automation would result in two alerts for the label agent.tag.critical; one to Slack and one to an email.
Threats Automation
You can create an automation that triggers when new threats are detected. For more details, see Threat Management.
Create a Threat Automation
To create an automation for Threats:
Log in to Sysdig Secure as an Admin.
Select Automations.
The Automations page appears.
Select New Automation > Threats.
The configuration panel appears.
- From Filters select from:
- Rule Name
- High Severity Only: Select Yes or No.
- Source: Select Workload, Host, Container or Cloud.
- Cluster
- Workload
- Cloud User: Select one or more cloud users.
- Cloud Provider
When you’re finished choosing filters, select Done.
Select the
+icon under the condition box.The Select an Action modal appears. You can add another Condition or configure notifications with notification channels, such as Slack, MS Teams, and Email.
When you are finished configuring actions and conditions, click Save.
Executions
You can view Executions to see the history of your Automations and debug any problems they may have.
Each time an automation is triggered, Sysdig logs the full path of the workflow to determine the state of each node (condition, action), and whether it was successful.
You can review the success of failure of Executions in the UI through a color-coded list:
- Green: A successful action was taken, for actions like Email, Slack, or Jira.
- Red: The condition or action failed in some way. This may be due to incorrect use or invalid key or value, or incorrect action configuration, or because the notification channel failed to receive the response.
Review Executions
To review executions:
Log in to Sysdig Secure.
Select Automations.
Select an existing Automation or create a new Automation.
The Editor | Executions tabs appear.
Select the Executions tab.
The executions provide the log history for each triggered automation. An execution only happens if all conditions in the trigger match as true.
Click an execution to see a history of all executions that have succeeded.
Select an execution to view the path the execution took.
You can select each node to view the state of the node. This includes all the values that were checked against that condition node, as well as the configurations for that node at that time of the execution.
If one or more nodes have a failed state, it is logged as a failed execution
Delete an Automation
To delete an automation:
Log in to Sysdig Secure as an Admin.
Select Automations from the left navigation bar.
The Automations page appears.
On the right side of an automation listing, select the three-dot menu icon.
Select Delete, and confirm Yes, delete.