Integrate Sysdig with Snyk
Supported Snyk Integrations
- Risk Spotlight (In Use vulnerabilities)
- Snyk AppSec Pro
Risk Spotlight Integration
Snyk ingests and correlates Sysdig In-Use package context, enhancing prioritization.
Note: This integration currently supports only on Kubernetes clusters.
Prerequisites
Ensure you have an active account and valid license for:
Verify that In-Use results appear in your Sysdig screen:
See Vulnerabilities > Findings > Runtime. If no in-use results are visible, nothing will be forwarded to Snyk.
Installation Instructions
Both the Sysdig Agent and the Snyk Controller must be installed and interconnected in the same clusters. You must configure specific secrets in the Snyk Controller to interconnect them.
If the Sysdig Agent is not installed, install it by using the Sysdig Agent Install Guide or the Cluster Shield Installation Docs.
If the Snyk Controller is not installed, install it by following the Snyk Installation instructions.
Install the Snyk Controller
Here is a sample command:
 kubectl create secret generic snyk-monitor -n snyk-monitor \
   --from-literal=dockercfg.json={} \
   --from-literal=integrationId=abcd1234-abcd-1234-abcd-1234abcd1234 \
   --from-literal=serviceAccountApiToken=bdca4123-dbca-4343-bbaa-1313cbad4231

 helm upgrade --install snyk-monitor snyk-charts/snyk-monitor \
   --namespace snyk-monitor \
   --set clusterName="Production cluster"
Once both components are installed in the same cluster, follow the Snyk Integration Docs for Sysdig to initialize the secrets required for the connection, and eventually upgrade your Snyk installation.
Initialize secrets
Here is a sample command:
  kubectl create secret generic snyk-sysdig-secret -n snyk-monitor \
  --from-literal=token=$SYSDIG_RISK_SPOTLIGHT_TOKEN \
  --from-literal=endpoint=$SYSDIG_ENDPOINT_URL \
  --from-literal=cluster=$SYSDIG_AGENT_CLUSTER
Upgrade the Snyk Controller
- Run the following sample command:
helm upgrade --install snyk-monitor snyk-charts/snyk-monitor \
 --namespace snyk-monitor \
 --set clusterName="Production cluster" \
 --set sysdig.enabled=true
Wait about 30 minutes for Snyk to collect all the information from Sysdig.
Log in to Snyk Console and navigate to Integrations > Container Orchestration > Kubernetes.
Re-import all the clusters and namespaces you want to enrich.
Verifying Integration Results in the Snyk UI
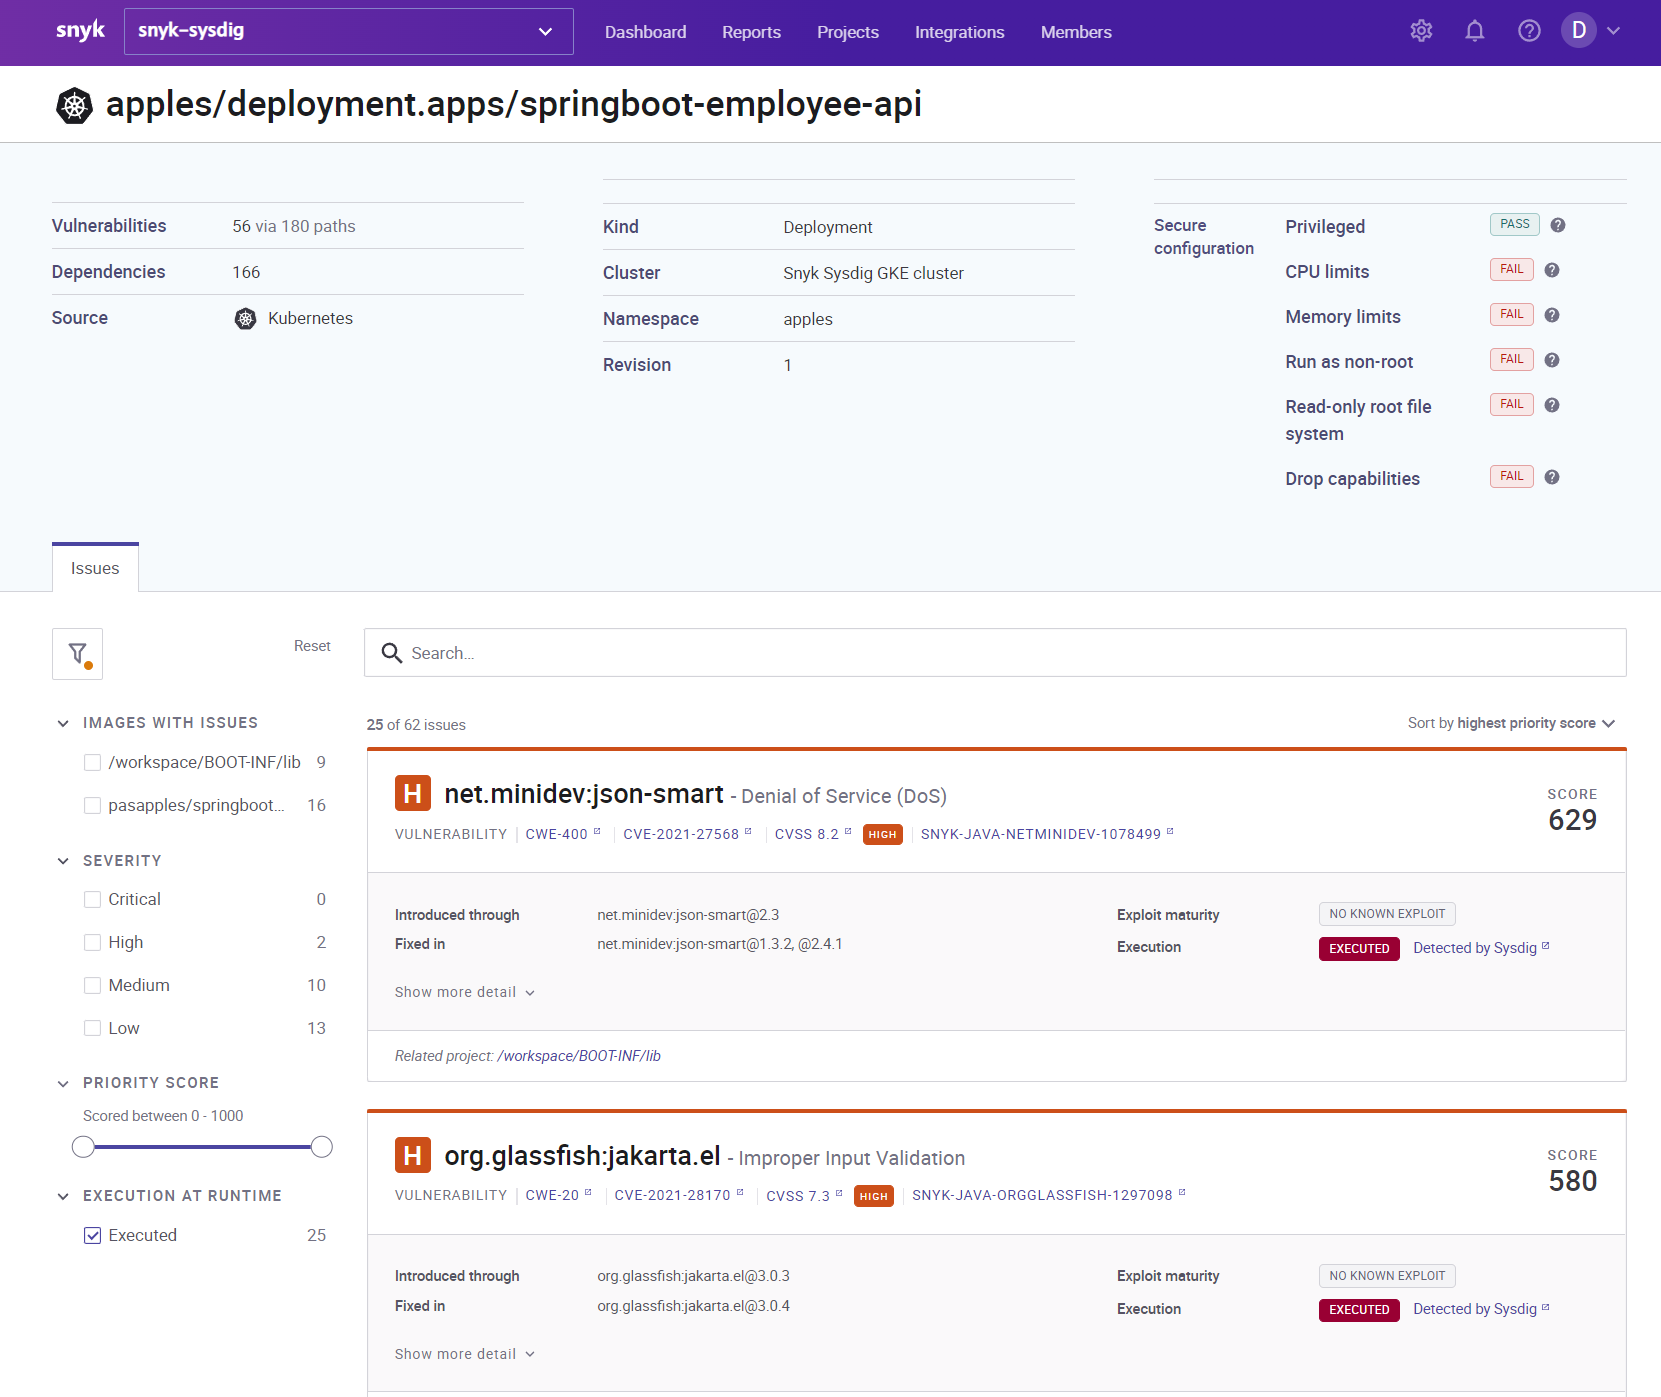
If the setup is successful, you can see that Runtime vulnerabilities are marked with the Executed at Runtime label in the Snyk UI.
Troubleshooting
Check Snyk-Monitor pod logs to see if Sysdig information is being captured successfully.
Integrate Snyk AppRisk Pro
Snyk ingests and correlates data from Sysdig Cloud Inventory to collect information such as internet exposure.
Prerequisites
Ensure you have an active account and valid license for the following:
Install Sysdig Agent
Ensure that the Sysdig Agent is installed in the target clusters.
For the installation instructions, see Sysdig Agent Install Guide or the Cluster Shield Installation Docs.
Configure Snyk
To configure Snyk integration, see Snyk AppRisk Pro Integrations Documentation.
Verifying Integration Results in the Snyk UI
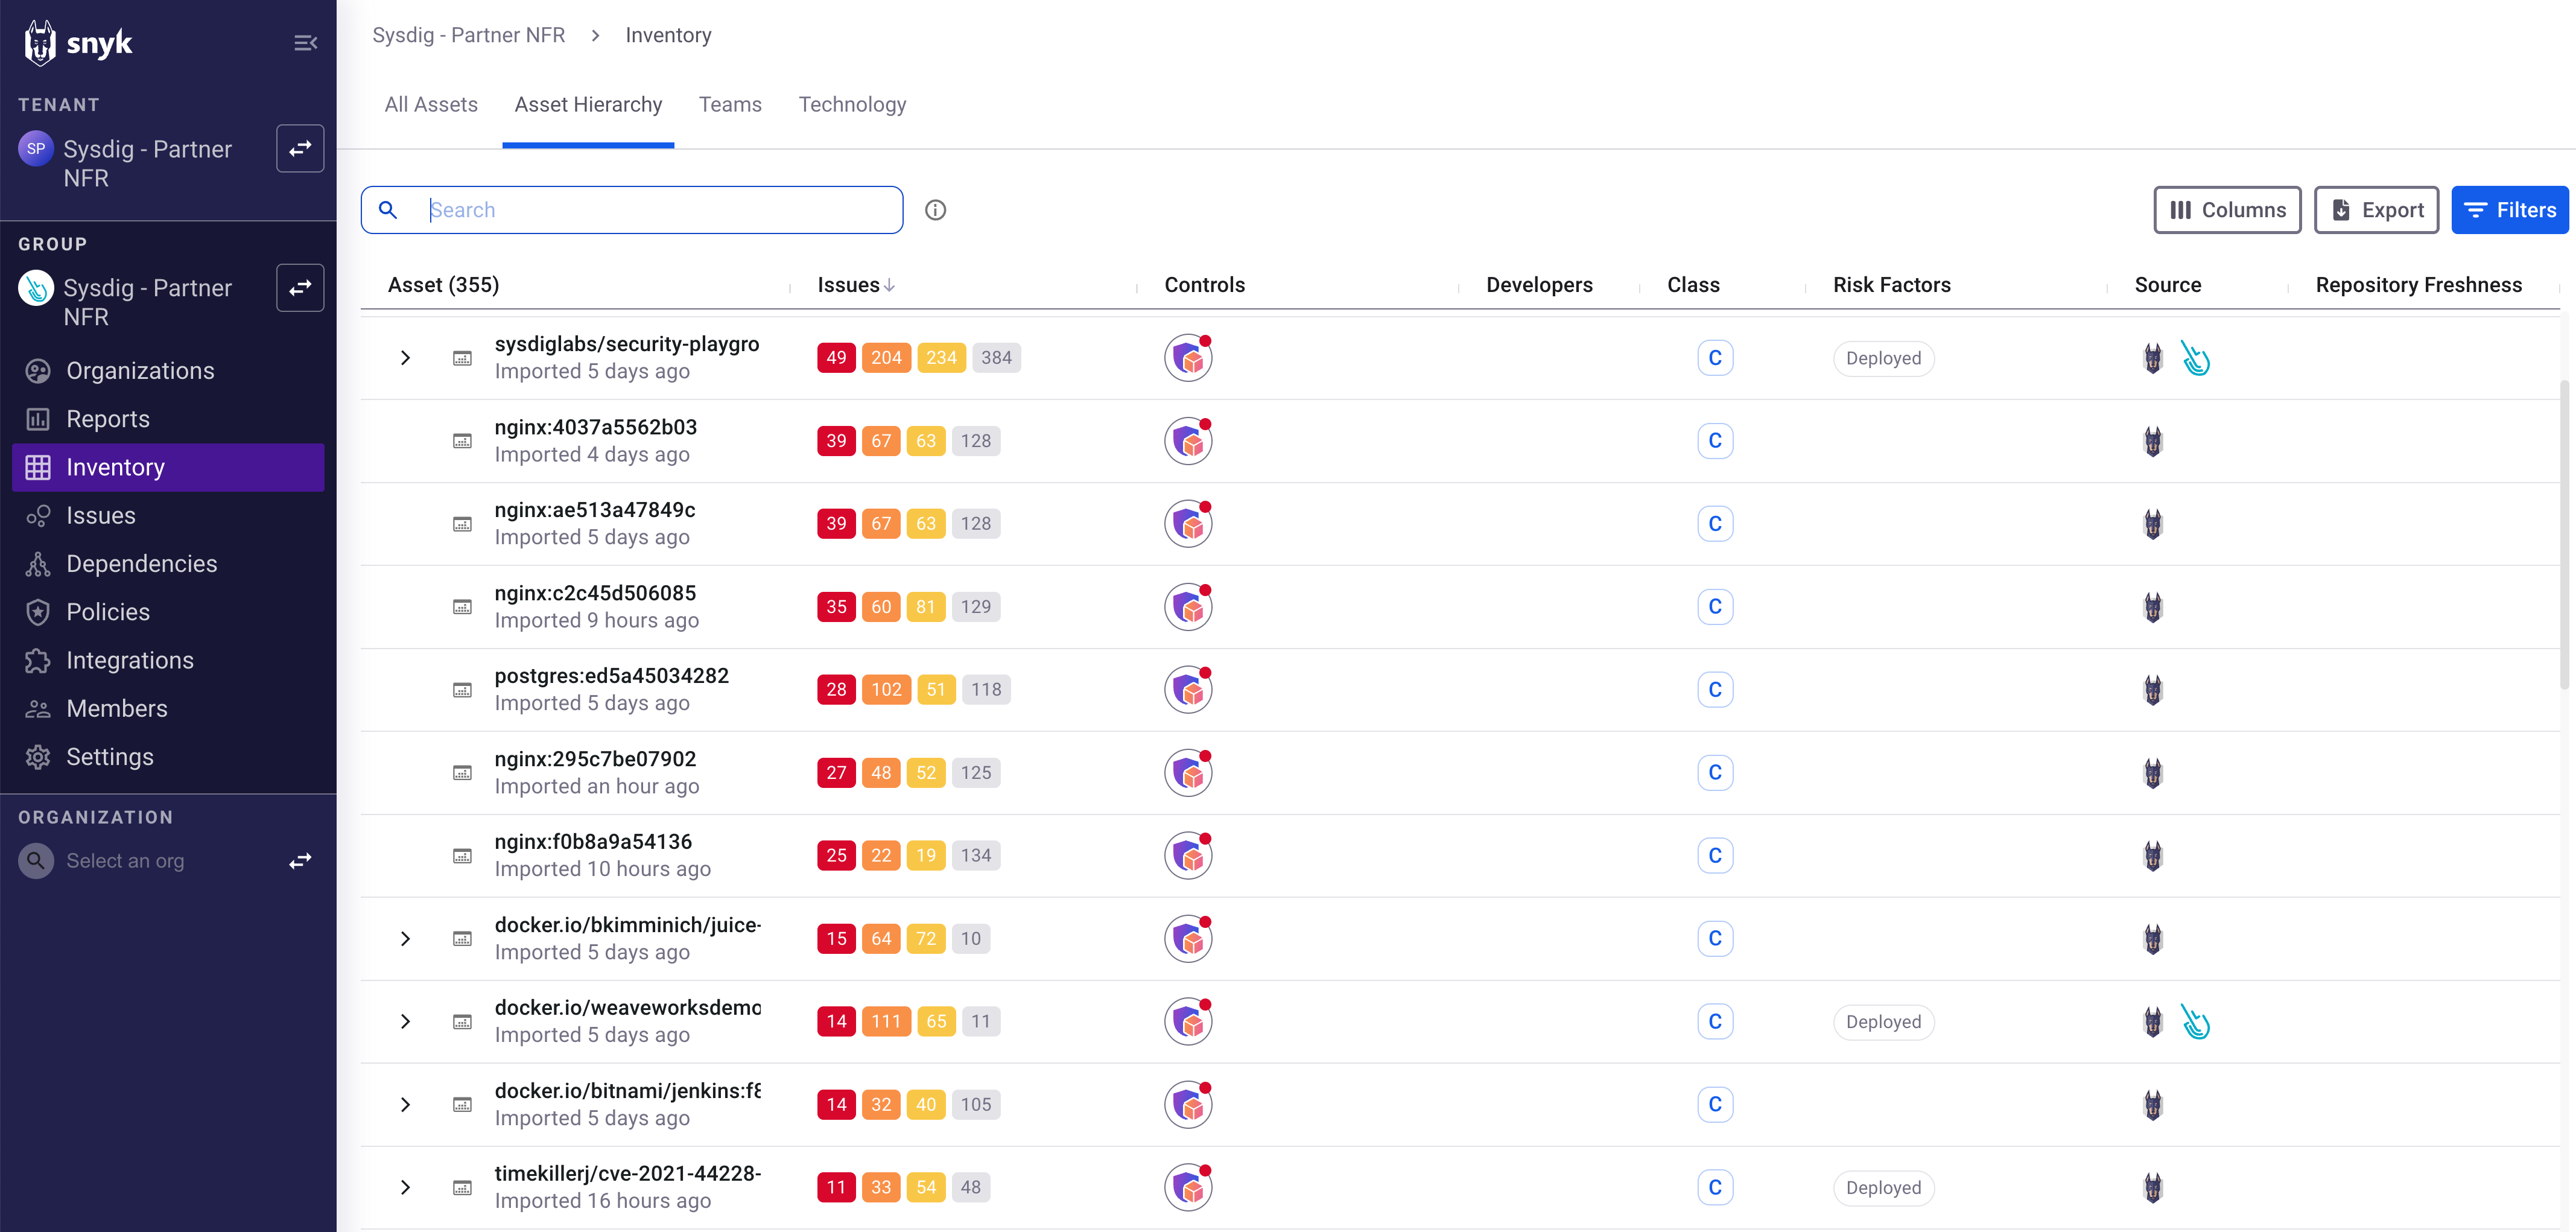
You can view Sysdig listed as the source and new risk factors displayed on the Snyk AppRisk Inventory UI.