Manage Scanning Policies
End of Life Notice: The Sysdig Legacy Scanning Engine will reach its End of Life (EOL) on December 31st, 2024. After this date, it will no longer be supported or maintained. Please upgrade to our New Scanning Engine before December 31st, 2024 to ensure continuous service and support. For assistance, contact our support team or your account representative.
Image scanning policies define several scenarios, such as:
The build process may be stopped.
Administrators may be alerted to potential risks within container images.
Each scanning policy is comprised of rules built of gates and triggers. Sysdig includes default policies that can be used to run scans as soon as registry credentials have been configured.
Users can create additional rules or policies from the available Scanning Policy Gates and Triggers.
Preconfigured Policies
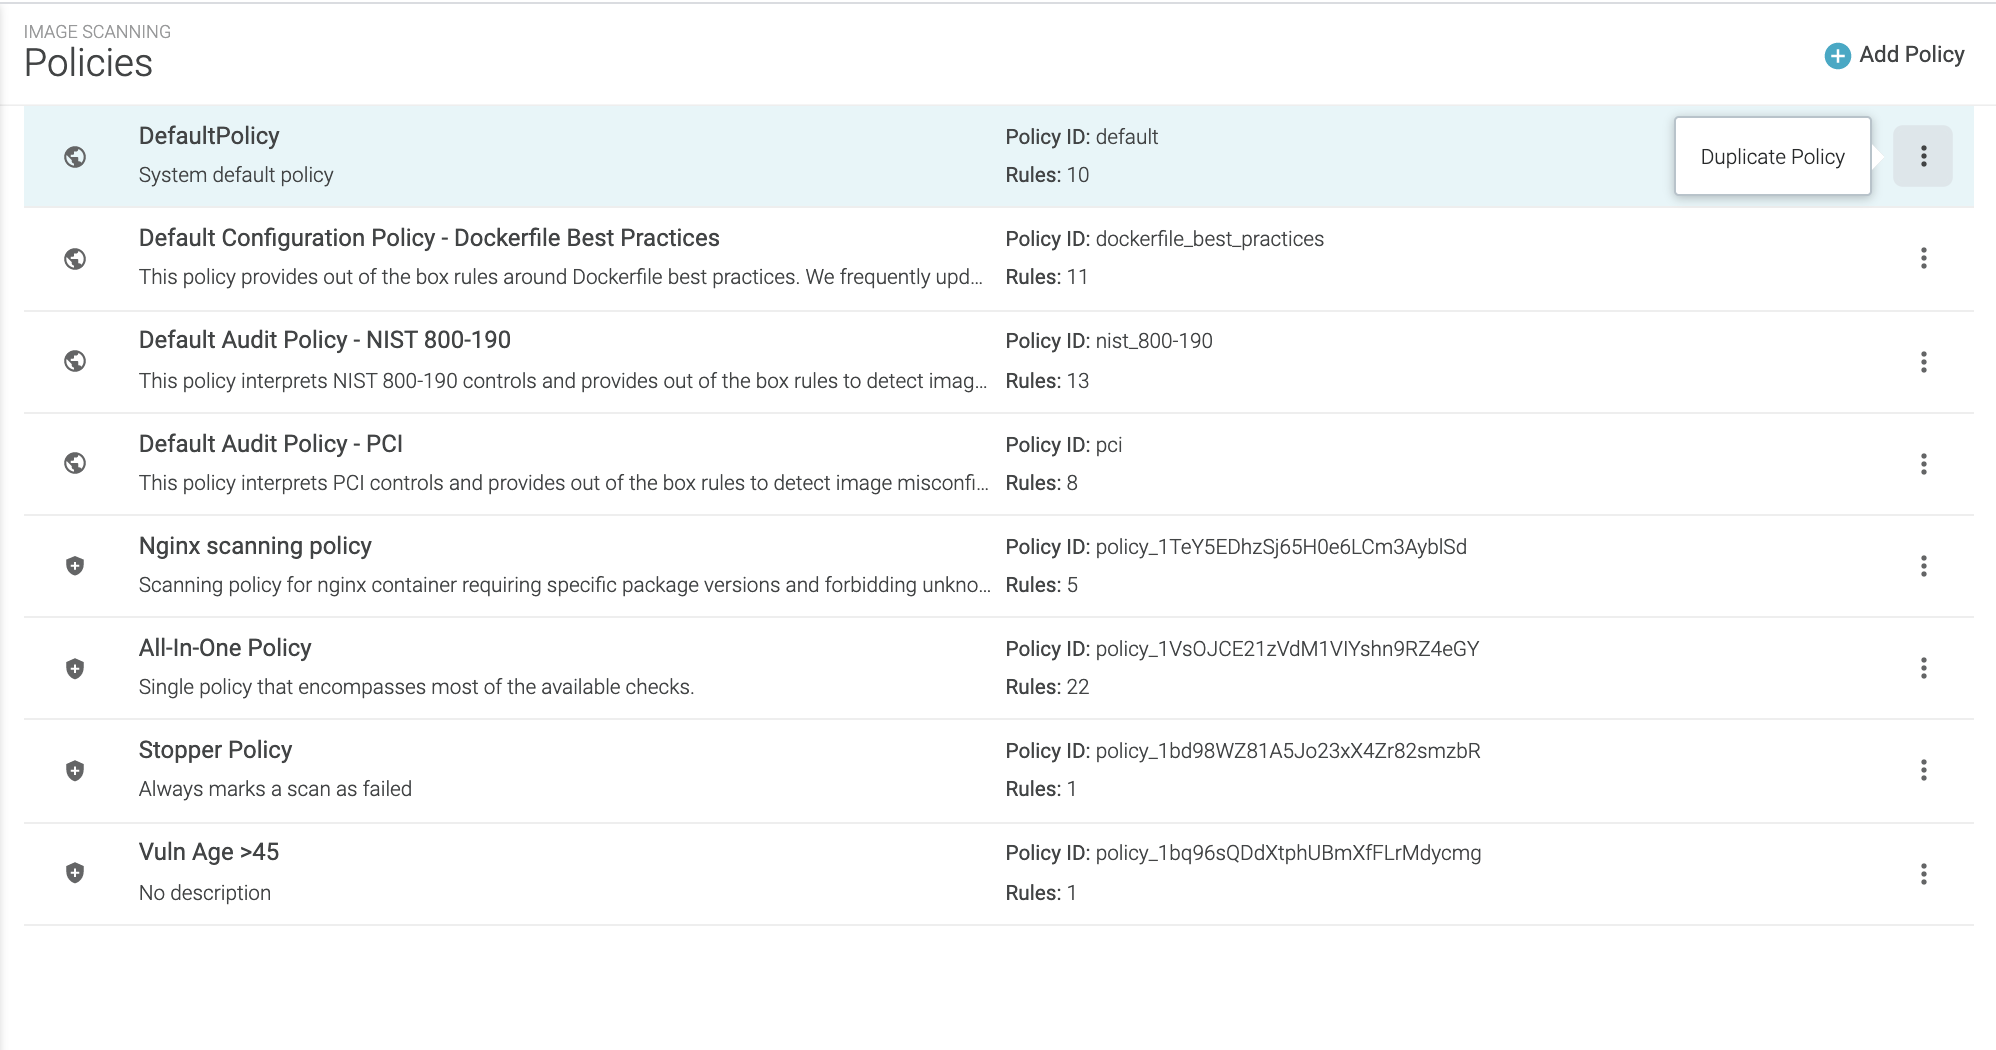
Sysdig provides a number of Default (read-only) baseline policies that can be used as-is or as templates on which to build.
DefaultPolicy
This policy covers the most common image scanning cases, such as:
checking for high vulnerabilities that have a fix available
checking Dockerfile best practices (e.g., ensuring health checks in an image or disallowing exposed ports)
validating that the vulnerability feed data is up-to-date.
This policy is a basic catch-all that cannot be deleted. If no other policy assignments are made, the Default policy is automatically used.
Dockerfile Best Practices
This policy provides out-of-the-box rules around Dockerfile best practices, such as disallowing:
secrets baked in as environment variables
rootuser configurationexposed ports
run instructions that include
yumupgrades.
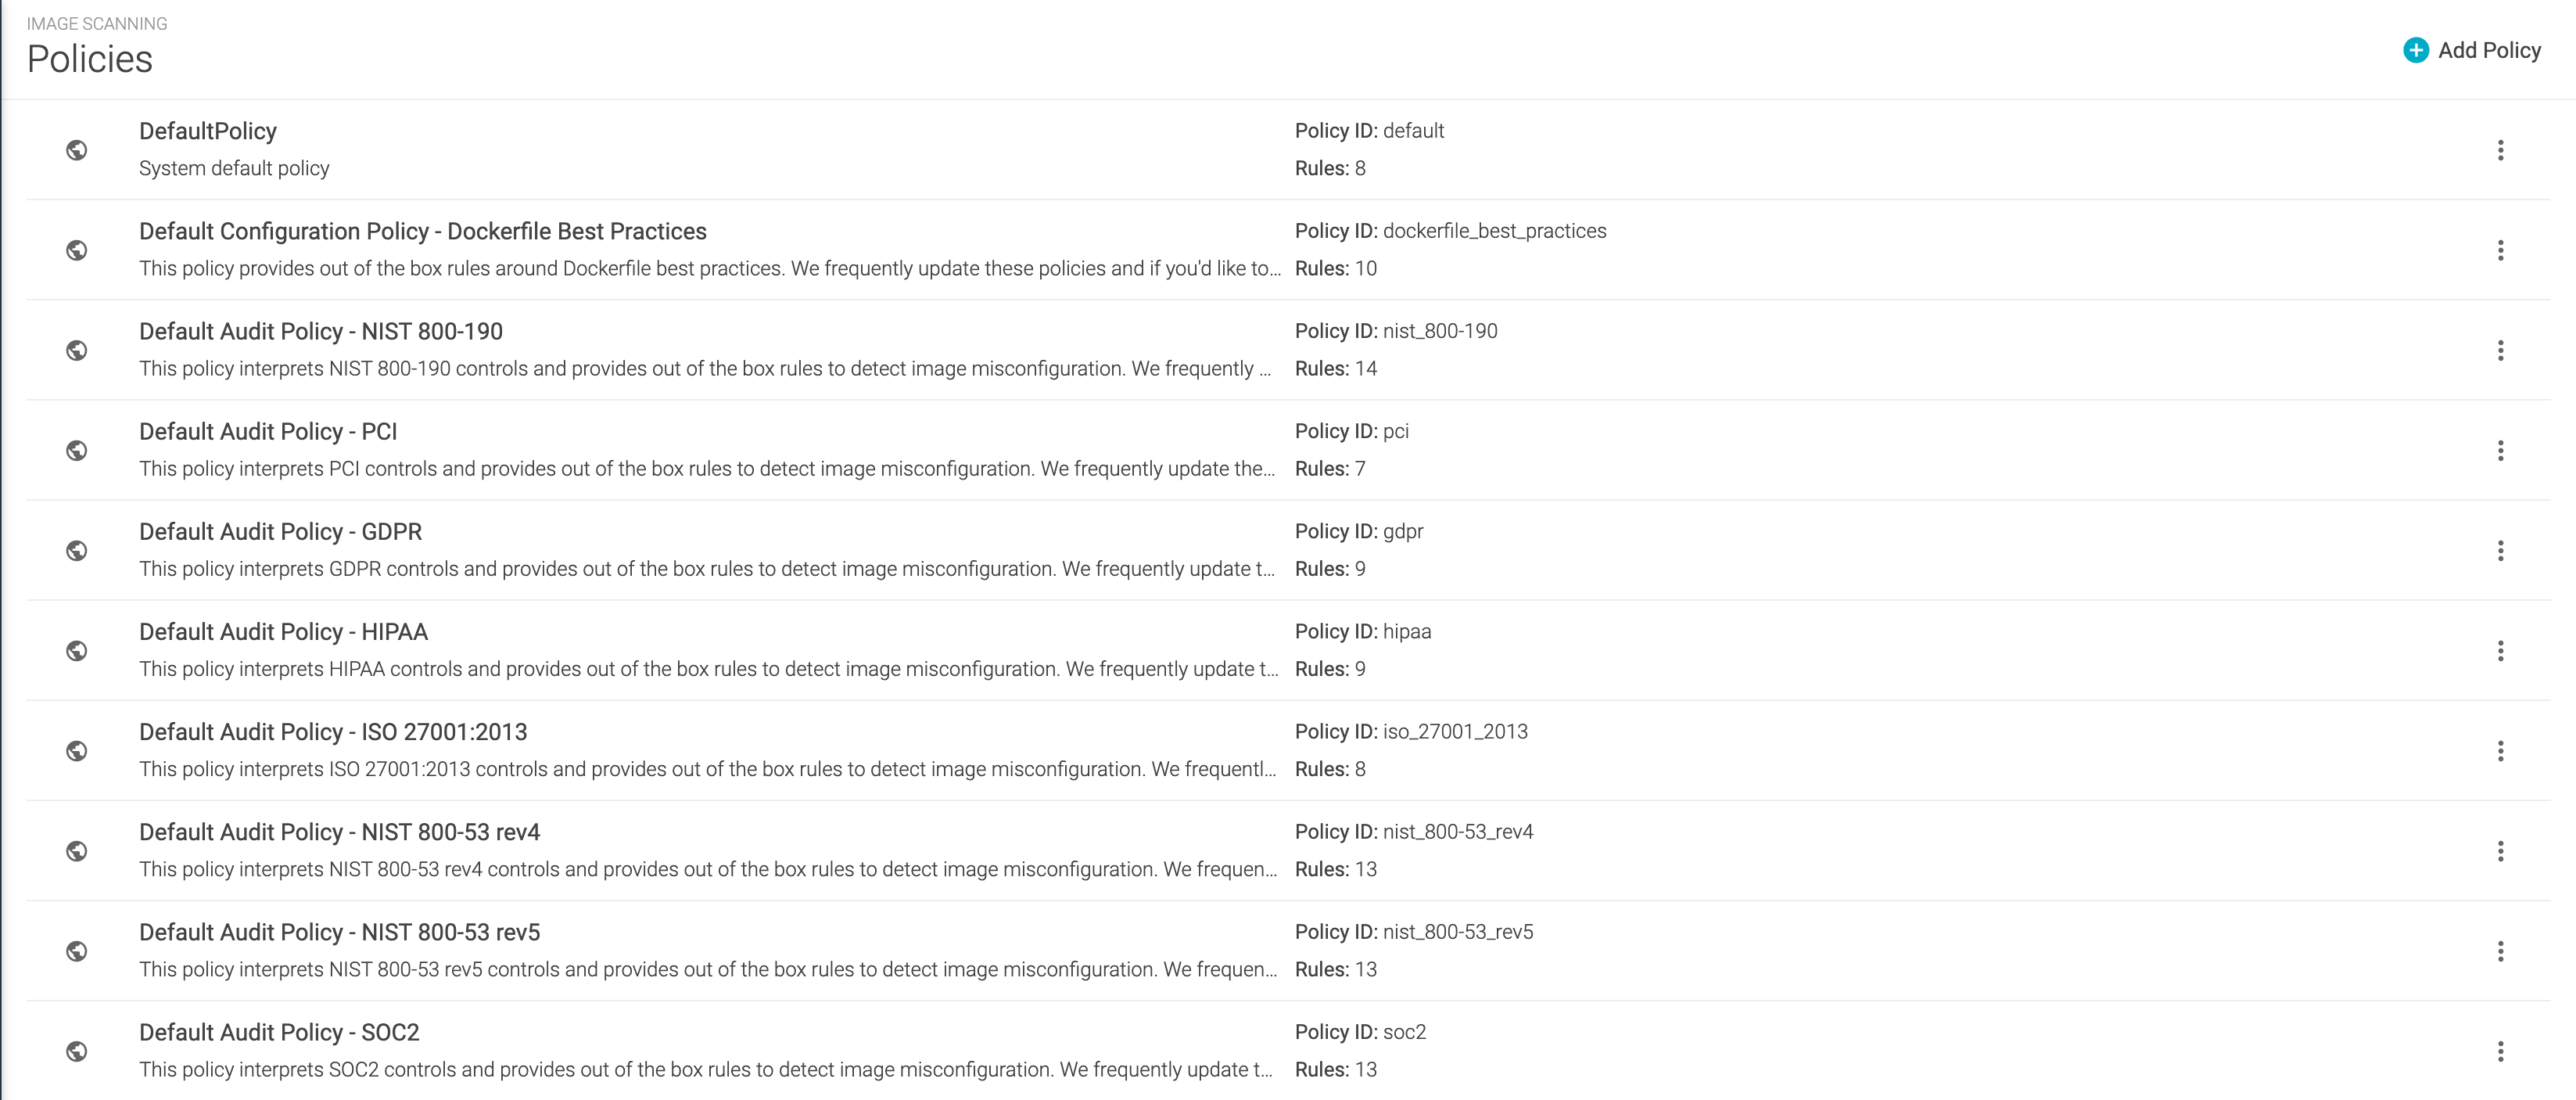
Preconfigured Compliance Policies
The remaining preconfigured default policies deal with compliance rules such as NIST 800, PCI, GDPR, HIPAA, ISO 270001:2013 and SCO2
Audit Policy - NIST 800-190
This policy maps NIST 800-190 controls to a Sysdig Secure scanning policy, such as disallowing:
non-official node or Ruby packages
addinstructions in a Docker filethe use of base distributions outside of expected values.
Audit Policy - PCI
This policy maps PCI (Payment Card Industry) controls to a Sysdig Secure scanning policy, such as disallowing vulnerabilities or credentials to be included in the image.
Customized Policies
You can’t edit a Default Policy - instead use the Duplicate Policy function and then customize it.
Create a Scanning Policy
From the
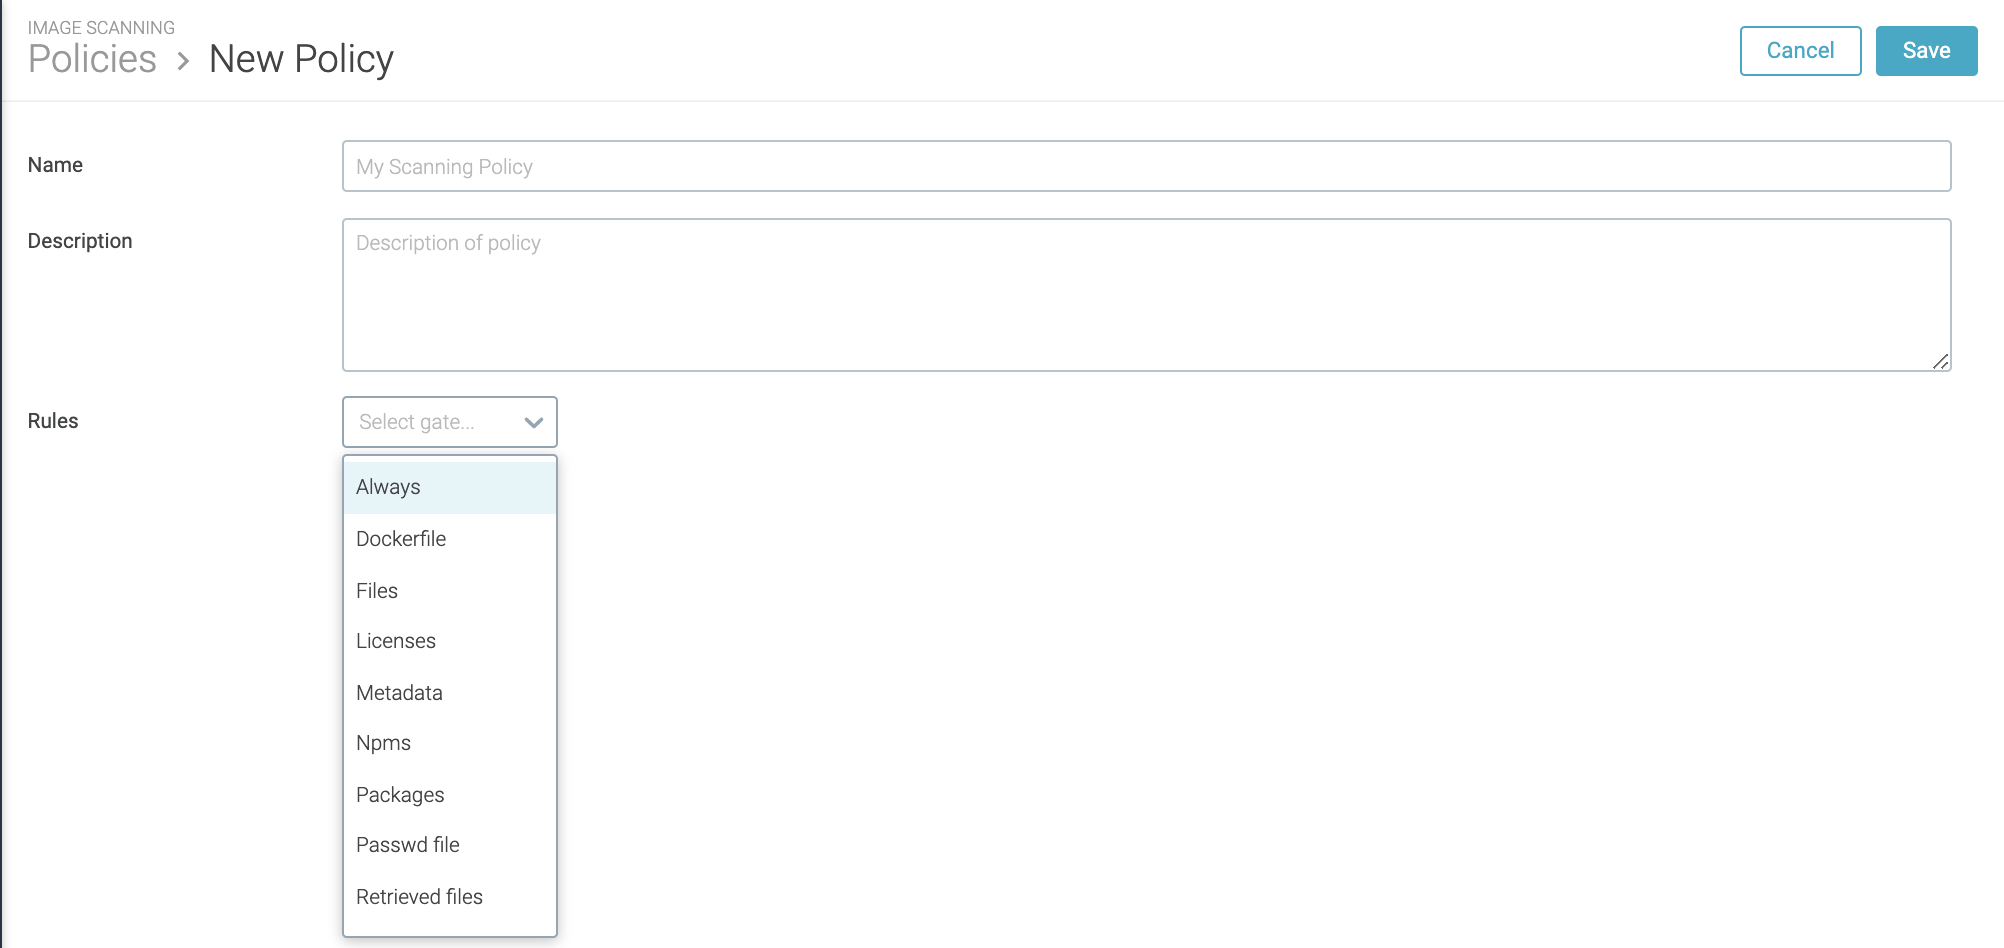
Image Scanningmodule, selectScanning Policiesand clickAdd Policy(+).The New Policy page is displayed.
Define a
Nameand an optionalDescriptionfor the new policy.Add a
Rule:Select the
Gateand then theTriggerfrom the drop-down menus.Configure relevant parameters. (Some triggers do not require parameters to be set.)
The example below uses the
vulnerabilitiesgate with thepackagetrigger.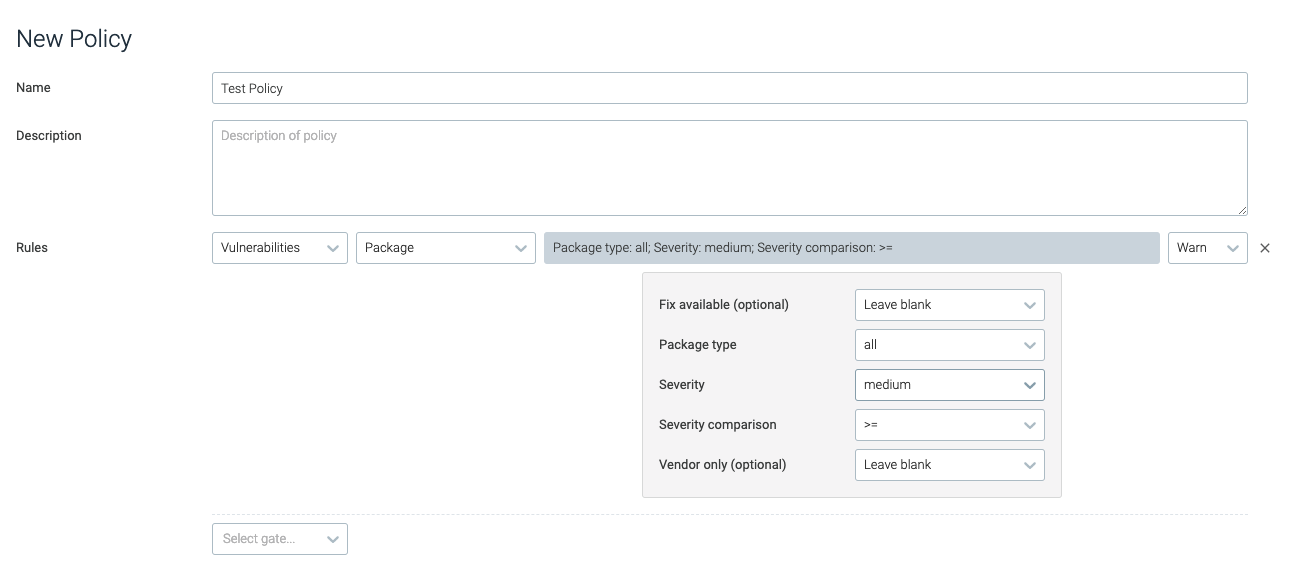
Optional: Repeat step 5 to add rules as necessary.
Click
Save.
Edit a Policy
From the
Image Scanningmodule, selectScanning Policies.Select the desired policy from the list.
Edit the policy rules as required, and click
Save Policy.
Delete a Policy
From the
Image Scanningmodule, selectScanning Policies.Select the desired policy from the list.
Click the
Delete(trash can) icon and chooseYesto confirm the change.
Globally Trust|Untrust
You can add images to a globally trusted or untrusted list, or put CVEs on defined Global Exceptions lists, if desired. This does not affect the policy evaluation order.
Manage Policy Assignments
Unless you use a very simple, single-policy approach to scanning, you will probably assign particular policies to particular registries, repositories, or tags.
Use the Policy Assignments page to do this.
For example:
To evaluate all images with a “Prod” tag with your Example Prod Image Policy, use the assignment (
registry/repo/tag):*/*/ProdTo evaluate all images from gcr.io with an Example Google Policy, use the assignment (
registry/repo/tag):gcr.io/*/*
Assign a Policy
From the
Image Scanningmodule, selectScanning Policiesand choose +Policy Assignments.The previously defined assignments are listed in priority order.
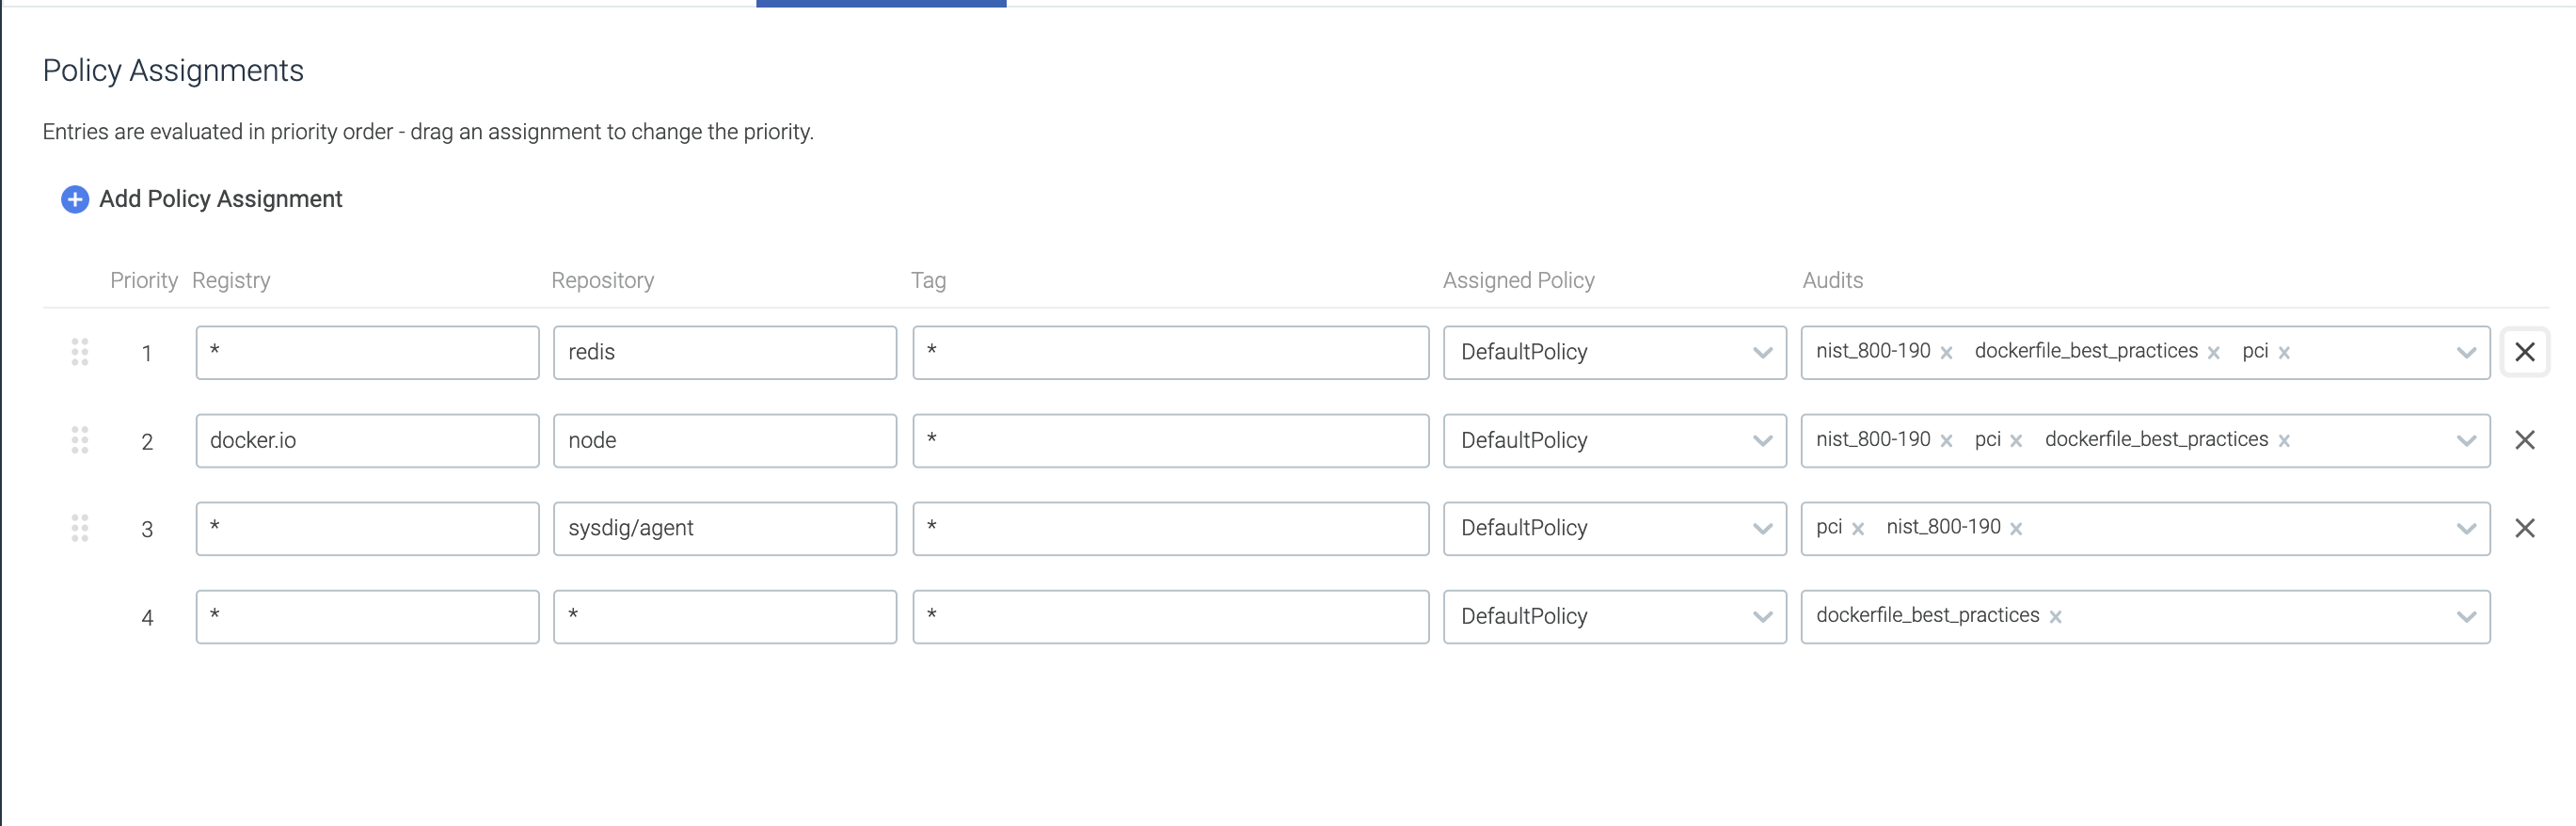
Click
+Add Policy Assignment.A new entry line appears at the top of the Assignment page. Enter the desired assignment details:
Priority: Priority is the order of evaluation against the assigned policy. Each new assignment is auto-placed at Priority 1. Once a policy assignment is created and saved, you can change its priority order by dragging it into a new position on the list.Registry: Any registry domain (e.g.quay.io). Wildcards are supported; an asterisk * specifies any registry.Repository: Any repository (typically = name of the image). Wildcards are supported; an asterisk * specifies any repository.Tag: Any tag. Wildcards are supported; an asterisk * specifies any tag.Assigned Policy: Name of policy to use for evaluation. Select from the drop-down menu.
Click
Save.Optional: Reorganize the Priority order by clicking the drag handle (the four dots to the left of a line) and dragging the assignment to a different spot on the list.
Using Priorities
When you use more than one scanning policy, the Anchore engine evaluates them in top-down order, starting from Priority 1 in the Policy Assignment list. The first policy assignment rule that matches an input image will be evaluated, and all subsequent rules ignored. Therefore, the priority order is important.
For example, imagine a list with two defined policy assignments:
Priority 1 Registry = quay.io Repository = sysdig/*
Priority 2 Registry = quay.io Repository = sysdig/myrepo
Since the first rule uses a wild card, the evaluation applies to all
repos beginning with sysdig/ and will stop before evaluating
sysdig/myrepo.
Reverse the priority order to get the behavior you want.
There is a catch-all entry at the bottom of the Policy Assignment list that cannot be removed. It has the format :
registry = * repository = * tag = * assigned policy = default
(You can change the assigned policy, but other fields cannot be
edited.)
The purpose of this row is to ensure that any registries that do not
fall under another policy evaluation will at least be evaluated against
the system-configured DefaultPolicy.