Group Mappings
You can create a mapping at any time, but it can only be used if a compatible Single Sign On (SSO) authentication is enabled in Sysdig. Group mapping is currently supported when using Security Assertion Markup Language (SAML) 2.0 or OpenID SSO.
Group mapping is beneficial to:
Manage permissions for and access to Sysdig resources from your organization’s IdP itself.
For example, to allow your Analytics team to access a set of Dashboards, you can create a group named Analytics and grant group members access only to the dashboards they need access to.
Update or completely remove user access to Sysdig resources as soon as it’s updated in the IdP.
As an administrator, you can:
- Enter one or more IdP groups and assign a custom role and map teams.
- Map a group to one or more teams or all the teams.
- Select a user role for each group individually.
Group Mapping Behavior
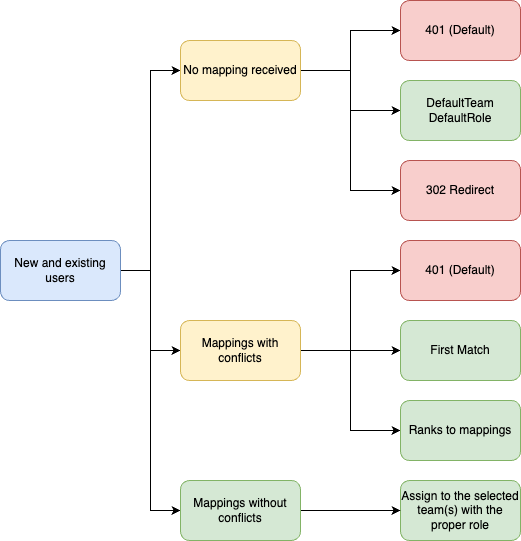
Upon receiving the group information from the IdP, Sysdig will process it and map the user to an appropriate team or role. Following are the main group mapping scenarios:
- No group mapping information received from the IdP (empty groups).
- Group information received, but the user is not a member of any mapped group.
- Conflicting group mapping information received.
- Mapping information received, no conflicts exist.
No Group Mapping Information Received from the IdP
This might be an indication of an issue on the IdP side. Verify the IdP configuration and confirm that the group information is sent as part of the login flow.
Group Information Received, but the User Is Not a Member of Any Mapped Group
This is a valid situation and you can use it to control the access to Sysdig. If this was not intended for controlling access, verify the user group membership on the IdP as well as group mapping within Sysdig.
Conflicting Group Mapping Information Received
If a user is a member of several groups that place the user in the same team with different roles, the system does not know where to place the user.
Mapping Information Received with No Conflicts
This is the expected behavior and in this situation, the user is assigned to teams/roles according to the available group mapping information.
Group Mapping Settings
For certain situations, the system behavior can be configured. These options can be configured only using the Group Mapping Settings API.
In case of No group mapping information received from the IdP or Group information received, but the user is not a member of any mapped group, the behavior can be configured as:
- 401 - Access denied (Default): Users are prevented from accessing the system.
- DefaultTeam/DefaultRole: Place a user in a default team with a default role.
- 302 - Redirect: Users are prevented from accessing the system and are redirected to a URL defined in
noMappingsErrorRedirectURL.
In case of Conflicting group mapping information received, the behavior can be configured as:
- 401 - Access denied (Default): Users are prevented from accessing the system.
- First match: Place the user in the first found group. Group priority is controlled with the group ID. The lower the ID, the higher the priority.
- Weight based: Additional weight field is introduced to help with conflict resolution. This field can only be configured using the API. The lower the weight, the higher the priority.
- Weight by team based: Further enhancement of weight-based conflict resolution. Identifies conflict per team and resolves each conflict individually. This field can only be configured using the API. The lower the weight, the higher the priority.
Enable Group Mapping
You can enable group mapping in Sysdig Secure or Sysdig Monitor when using SAML 2.0 or OpenID.
Add a Mapping
You can map a group to one role and one or more teams.
Make sure to configure at least one Admin group mapping.
- Navigate to Settings > Group Mappings (SSO).
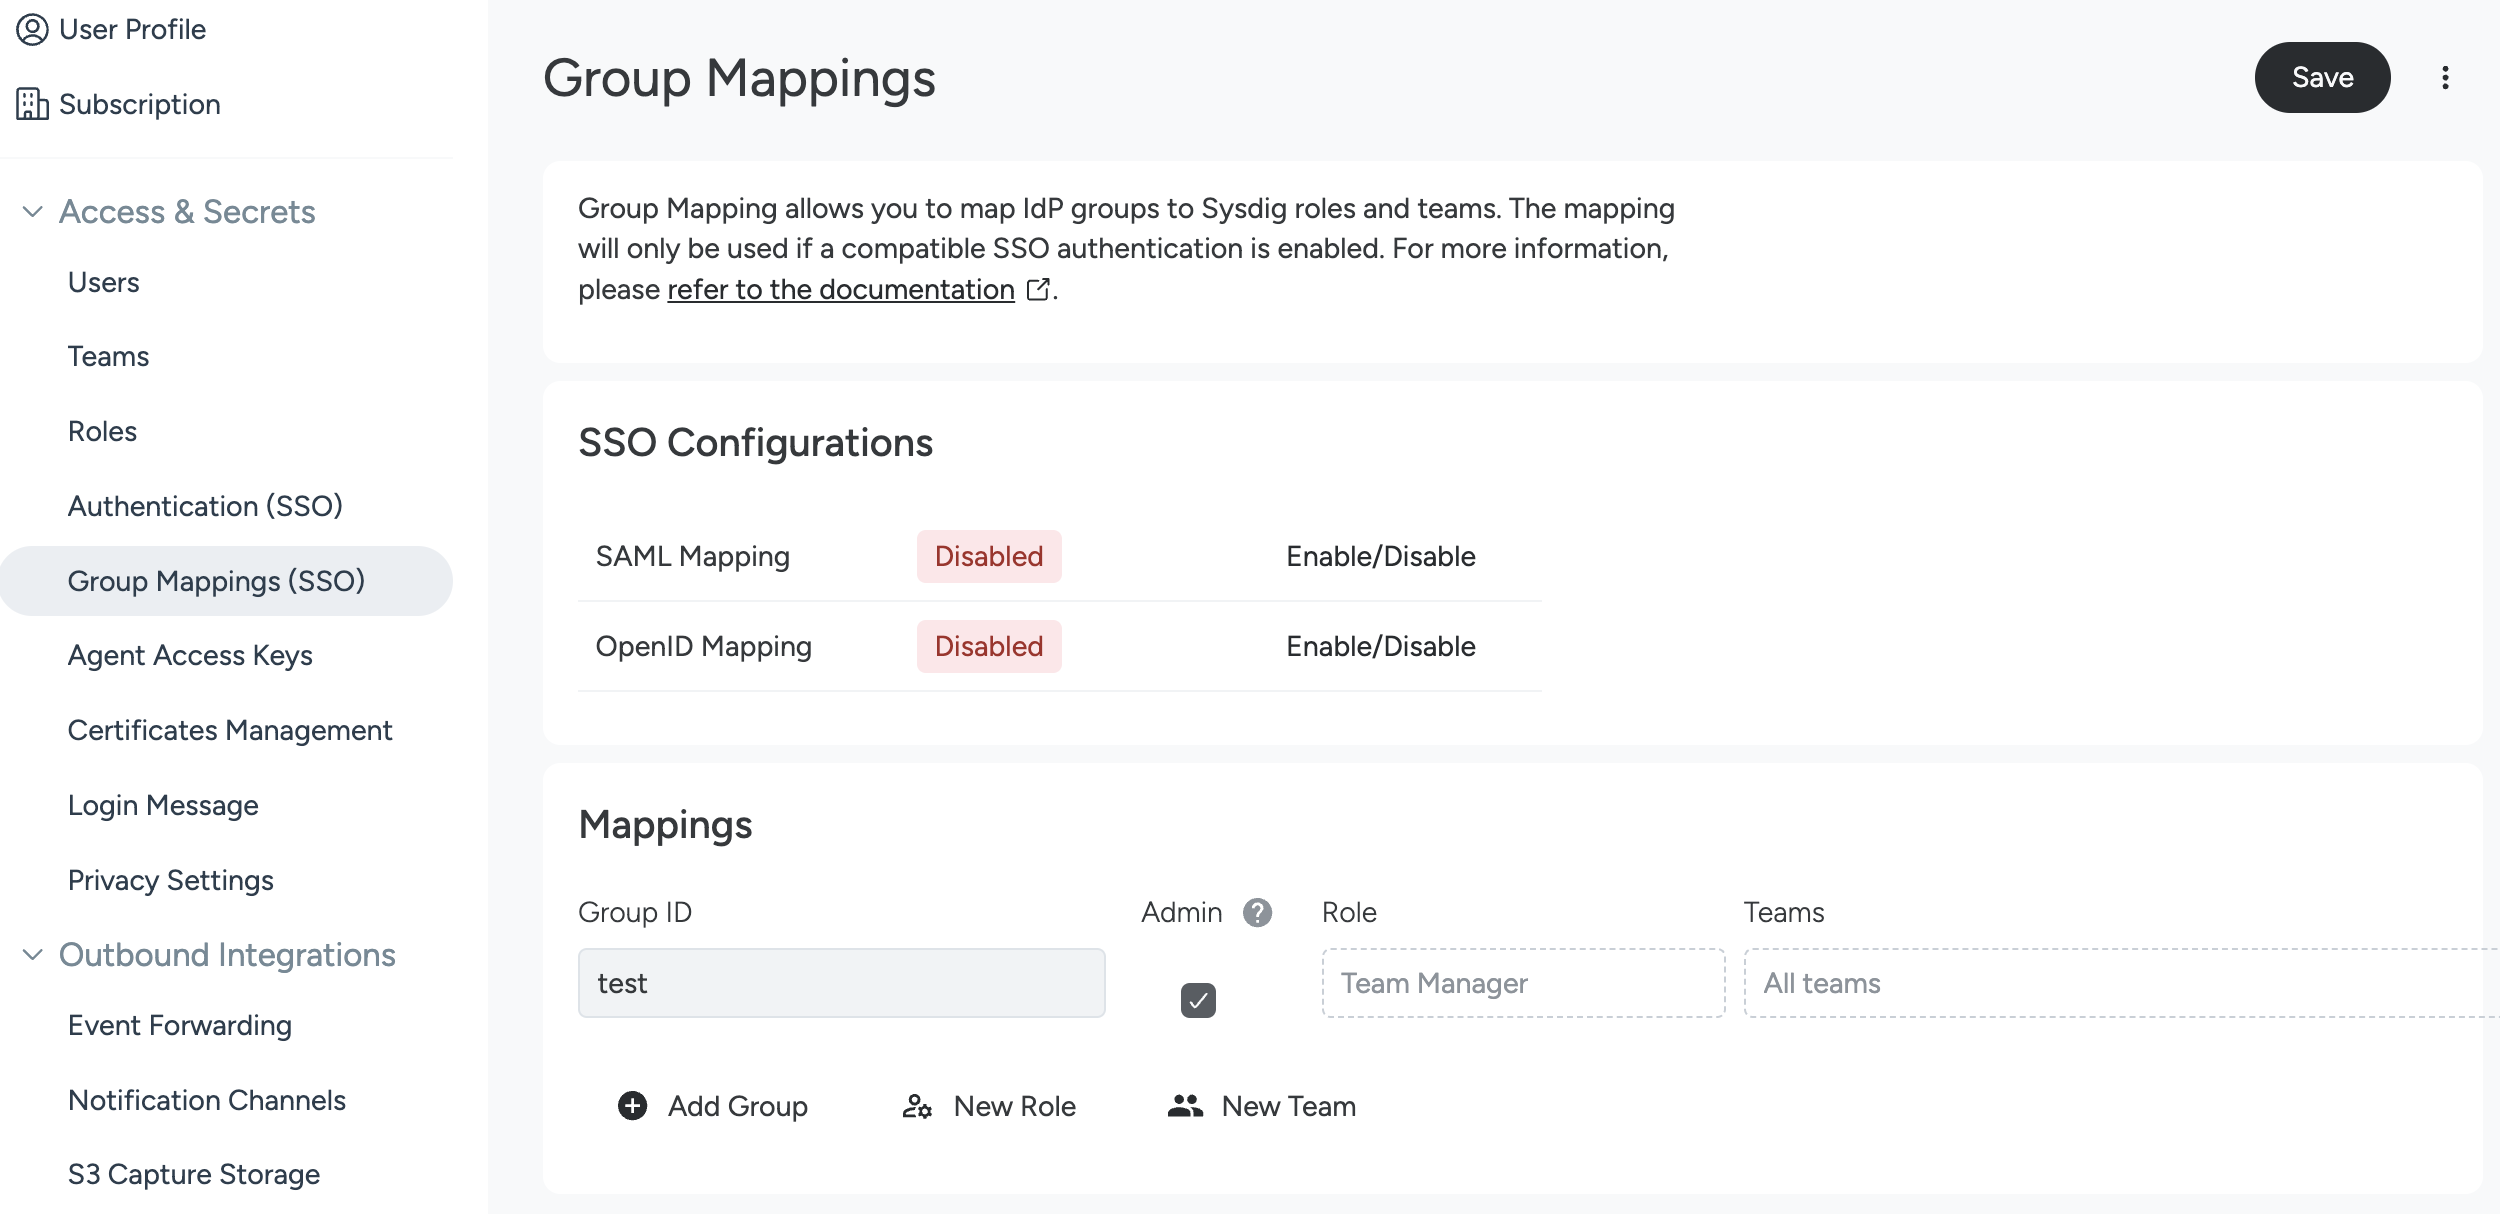
Enter the Group ID.
This is the unique name assigned to the group on the IdP side.
If the group members should assume the Sysdig administrator role, select the checkbox in the Admin column.
Select a role from the Role drop-down.
You can select only one role for a group mapping. Ensure that the roles aren’t conflicting with each other because the mapping will not work if conflicting roles exist for a user.
Select one or more teams from the Teams drop-down.
Optionally, add additional mapping by clicking Add Group and repeating the same steps.
Click Save.
Feedback
Was this page helpful?
Glad to hear it! Please tell us how we can improve.
Sorry to hear that. Please tell us how we can improve.