Captures
Capture File Concepts
Sysdig capture files contain system calls and other OS events that can be analyzed with either the open-source sysdig or csysdig (curses-based) utilities, and are displayed in the Captures module.
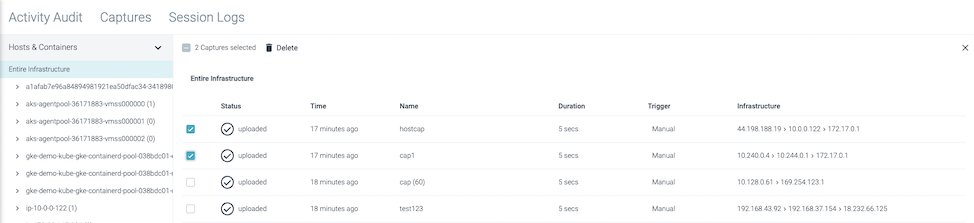
The Captures module contains a table listing:
- the capture file name
- the host it was retrieved from
- the time frame, and
- the size of the capture
When the capture file status is uploaded, the file has been successfully transmitted from the Sysdig agent to the storage bucket, and is available for download and analysis.
Due to the nature and quantity of data collected, the Sysdig Agent is limited to recording one capture at a time (concurrently) per host. If multiple policies, each configured to create a capture, are triggered at the same time on the same host, only the first event will be able to store the captures. Additional attempts to create captures will result in the error Maximum number of outstanding captures (1) reached. This is also true of overlapping captures, often caused by long capture settings.
Configure Capture Files
Store Capture Files
Sysdig capture files are stored in Sysdig’s AWS S3 storage (for SaaS environments), or in the Cassandra DB (for on-premises environments) by default. Both environments have the option to use S3-compatible custom storage, such as Minio or IBM Cloud Object Storage.
For more information, see Storage: Configure Custom S3 Endpoint.
Create a Capture File
Capture files can be created in Sysdig Secure either by configuring them as part of a policy, or by manually creating them from the Captures module.
For more information on creating a capture as part of a policy, see Manage Policies.
To create a capture file manually:
Go to Investigate > Captures and click Take Capture.
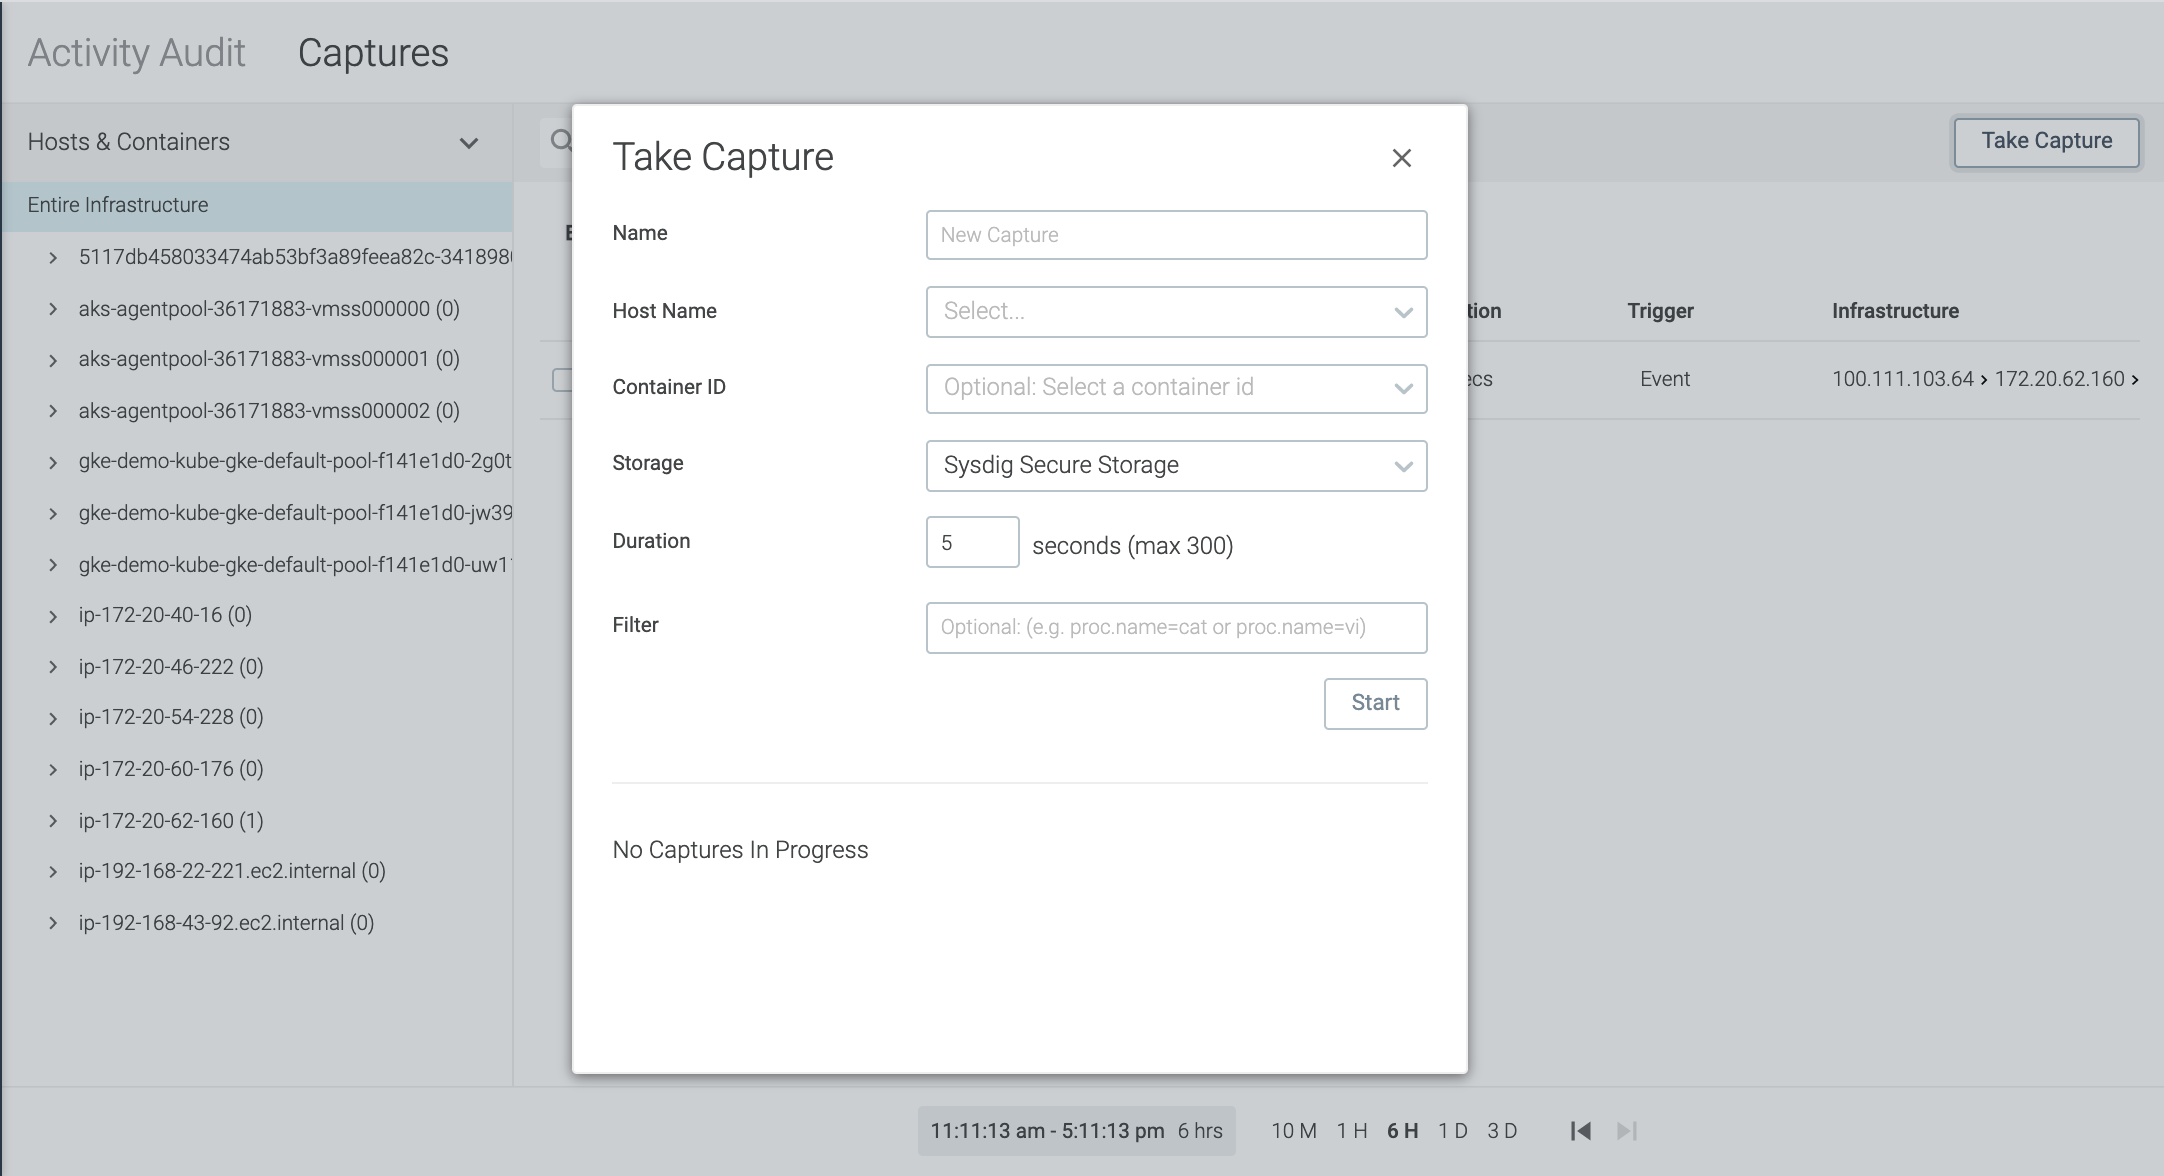
Fill out the following fields:
- Name: Define the Name of the capture.
- Host Name and Container ID: Configure the Host and, optionally, the Container where the capture file should record system calls.
- Storage: Choose your storage options. The default is Sysdig Secure Storage, where captures are stored for 90 days. To configure alternative storage options, see Configure Capture Storage.
- Duration: Define the duration of the capture. The maximum length is 300 seconds (five minutes).
- Filter: Optionally, set a filter for the capture. This restricts the amount of information collected. Applicable filters match the syntax for Falco conditions. See Condition Syntax.
Click Start.
The capture will be taken.
Once the capture is complete, select whether you wish to Keep it or Discard the capture. Capture you keep are displayed in the Captures report page.
Delete a Capture File
From the Captures module, select the capture file(s) to be deleted.
Click the Delete (trash can) icon:
Click Yes to confirm deleting the capture, or the No to cancel.
Review Capture Files
Review a Capture File with Sysdig Inspect
To review the capture file in Sysdig Inspect:
From the Captures module, select the capture file to be reviewed.
Click the Inspect (Sysdig logo) icon on the right side of the capture listing to open Sysdig Inspect in a new browser tab:

From here, you can review the details of the capture file.
See also: Quick Menu to Captures from Runtime Events.
Download a Capture File
To download a capture file:
From the Captures module, select the target capture file.
Click the Download icon to download the capture file.

The capture file will now be downloaded to the local machine.
Disable Capture Functionality
Sometimes, security requirements dictate that capture functionality should not be triggered at all (for example, PCI compliance for payment information).
To disable Captures altogether, edit the agent configuration file as described in Disable Captures.
Feedback
Was this page helpful?
Glad to hear it! Please tell us how we can improve.
Sorry to hear that. Please tell us how we can improve.