Configure Azure Active Directory for OIDC
Enabling Azure OpenID Connect for single sign-on to Sysdig applications include configuration on the Microsoft Azure Active Directory as well as on the Sysdig application.
Prerequisites
Ensure you have administrator privileges on Sysdig and Azure AD.
Configure Sysdig Application in Azure AD
Log in to the Azure AD portal.
Search for Azure Active Directory and do one of the following:
Select your Active Directory service
Create a new one.
Click App registration > New registration.
In the Register an application page, specify the following:
Name: Display name to identify your Sysdig application. For example, ‘Sysdig Secure’.
Supported account types: For Sysdig SaaS, choose Accounts in this organizational directory only (Default Directory only -Single tenant). All user and guest accounts created in your active directory can use Sysdig application and API.
Redirect URI: Authenticated Sysdig users are redirected to this URI.
See SaaS Regions and IP Ranges and identify the correct domain URL associated with your Sysdig application and region. For example, domain URLs of Monitor and Secure for US East are:
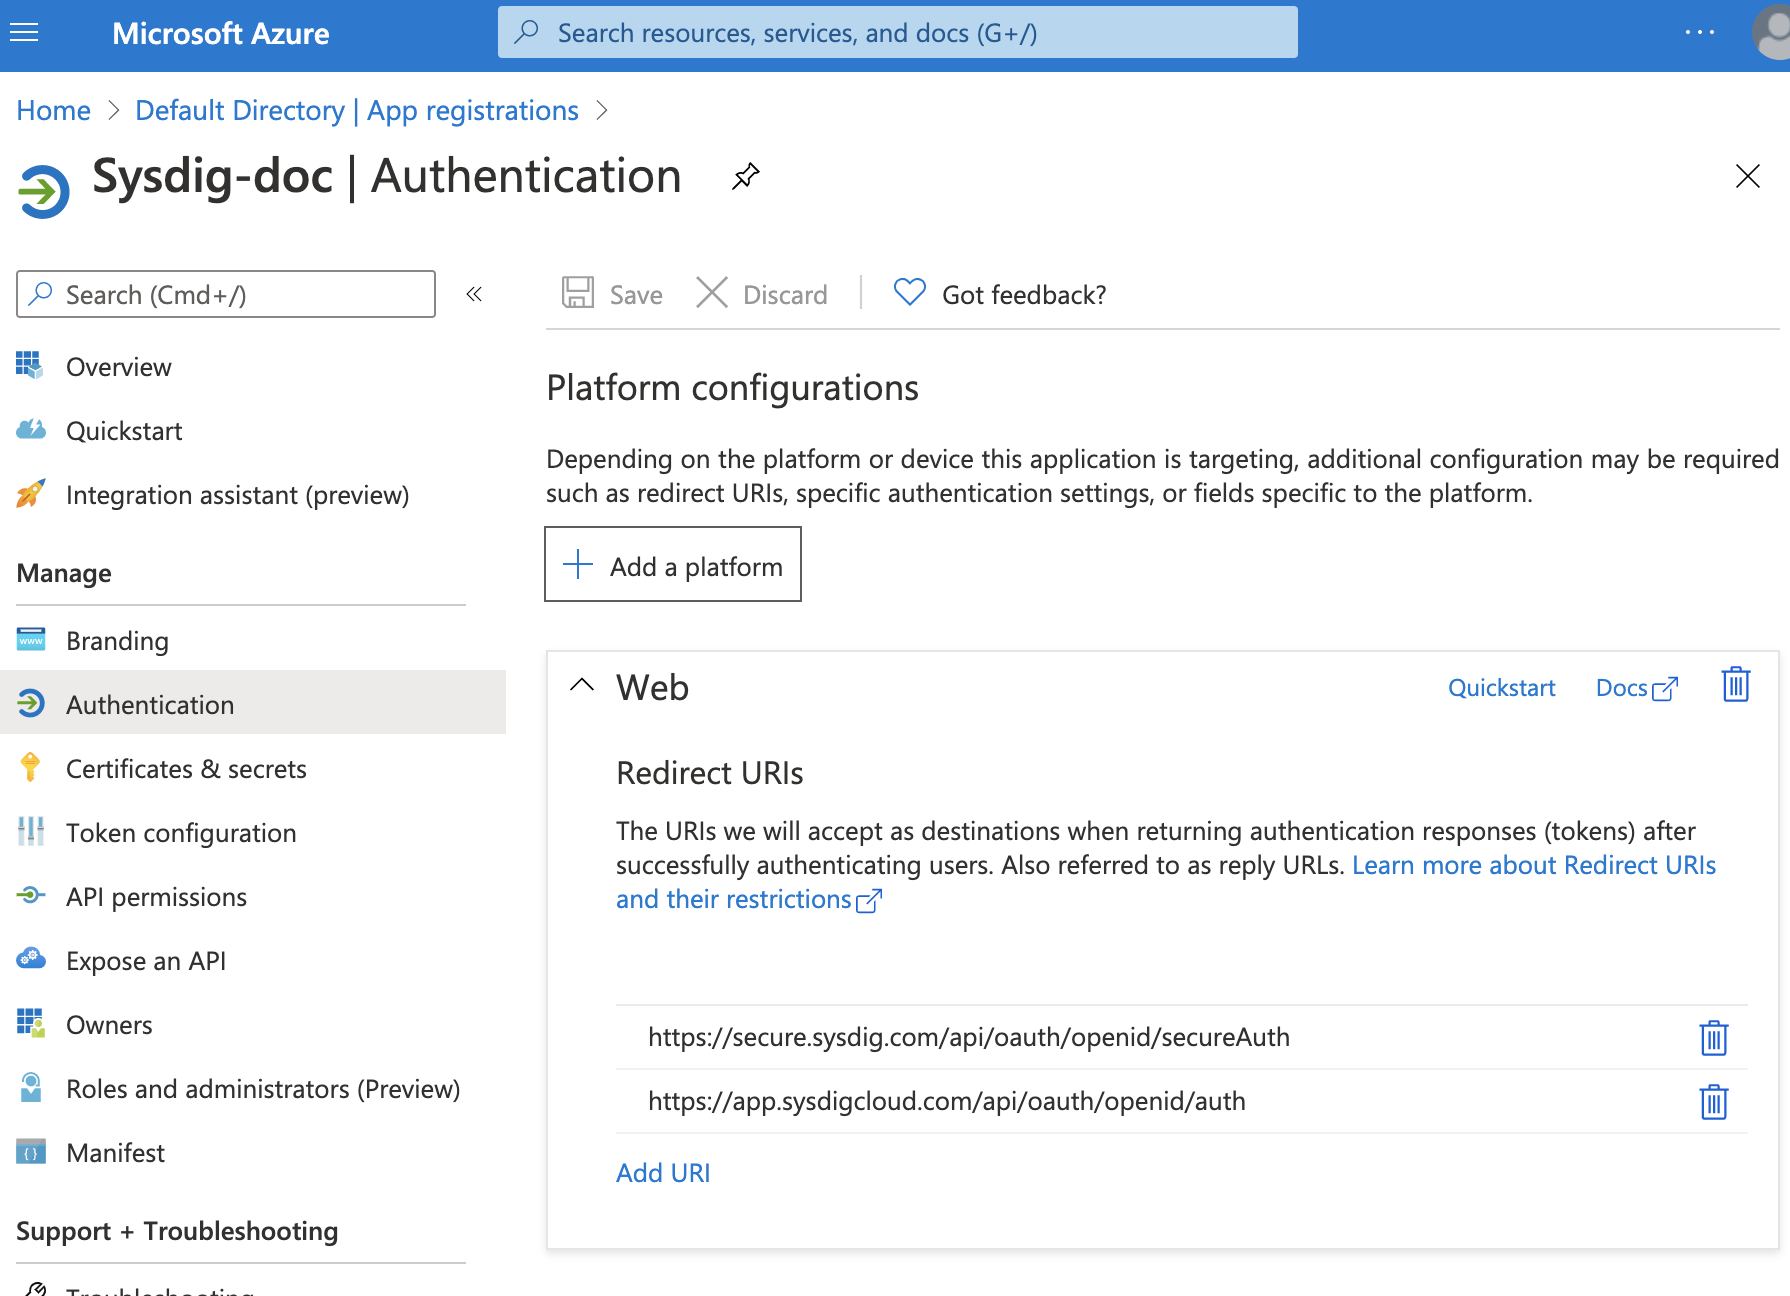
For Sysdig Secure: https://secure.sysdig.com/api/oauth/openid/secureAuth
For Sysdig Monitor: https://app.sysdigcloud.com/api/oauth/openid/auth
For other regions, the format is:
https://<region>.app.sysdig.comReplace
<region>with the region where your Sysidig application is hosted. For example, for Sysdig Monitor you use https://eu1.app.sysdig.com/api/oauth/openid/auth.For on-prem installations, the redirect URI will be deployment-specific.
You can add only a single redirect URI on this page. Use the Authentication page associated with your application to add additional redirect URIs.
Click Register.
Add additional redirect URIs.
Select your application from App registration.
Click Authentication from the left navigation.
Add the redirect URIs corresponding to Monitor and Secure.
Create a Secret for the Sysdig application.
This is a string that the Sysdig application uses to prove its identity when requesting a token.
Click Certificates & secrets.
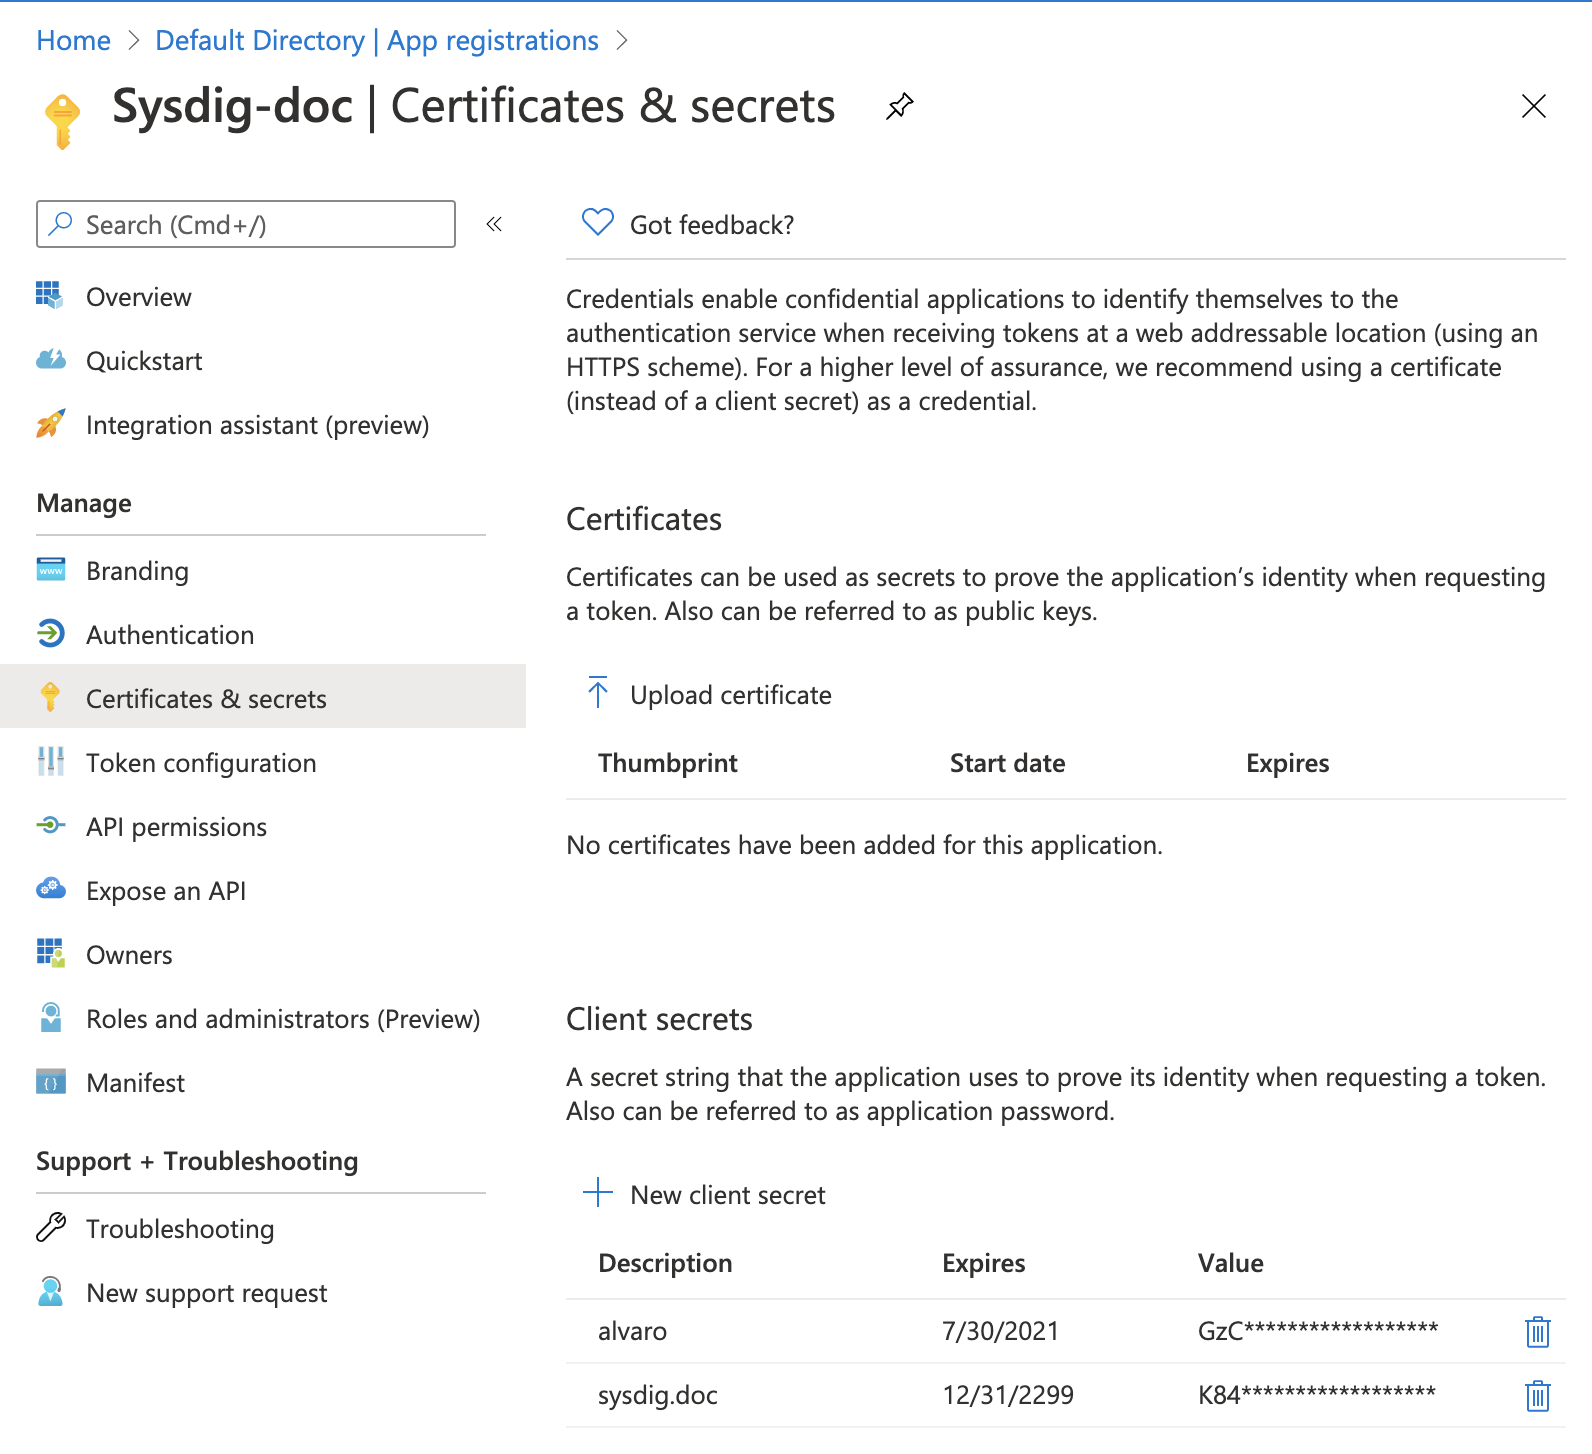
Under Client Secrets, click New client secret.
Enter a description that identifies the secret and choose an expiration period.
Click Add.
Copy the client secret. You will need the client secret when you configure OpenID Connect SSO in the Sysdig Authentication(SSO) settings.
Copy the Client ID and OpenID Connect endpoints corresponding to the application that you have created.
Select your application from App registration.
Copy the Application (client) ID.
You will need the client ID while configuring OpenID Connect SSO on the Sysdig application.
Click Endpoints.
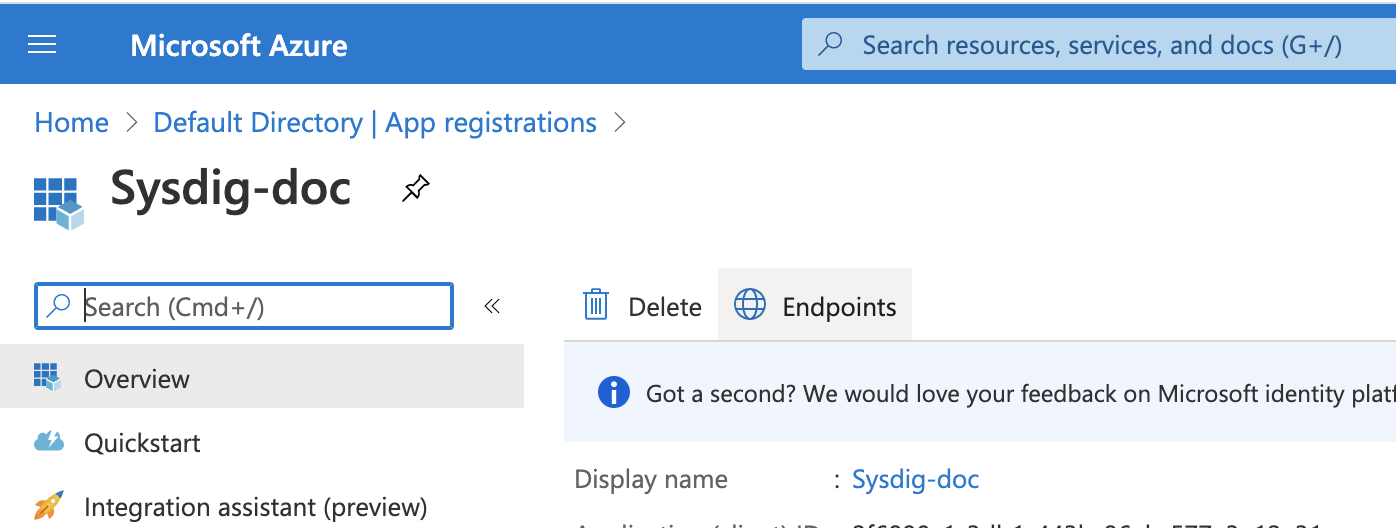
Copy the OpenID Connect metadata document and open it in a browser.
Copy the OpenID Connect URI (Issuer URI).
For example, https://login.microsoftonline.com/5a4b56fc-dceb-4a64-94ff-21e08e5892f5/v2.0
Configure Sysdig Settings
To enable Azure OpenID functionality on the Sysdig application, you need the following:
Client ID
Client Secret
Issuer URL.
See Enable OpenID in Settings to learn how to complete your configuration.
Feedback
Was this page helpful?
Glad to hear it! Please tell us how we can improve.
Sorry to hear that. Please tell us how we can improve.